DIY Halloween Eyeball Wreath
How to Make an Eyeball Wreath
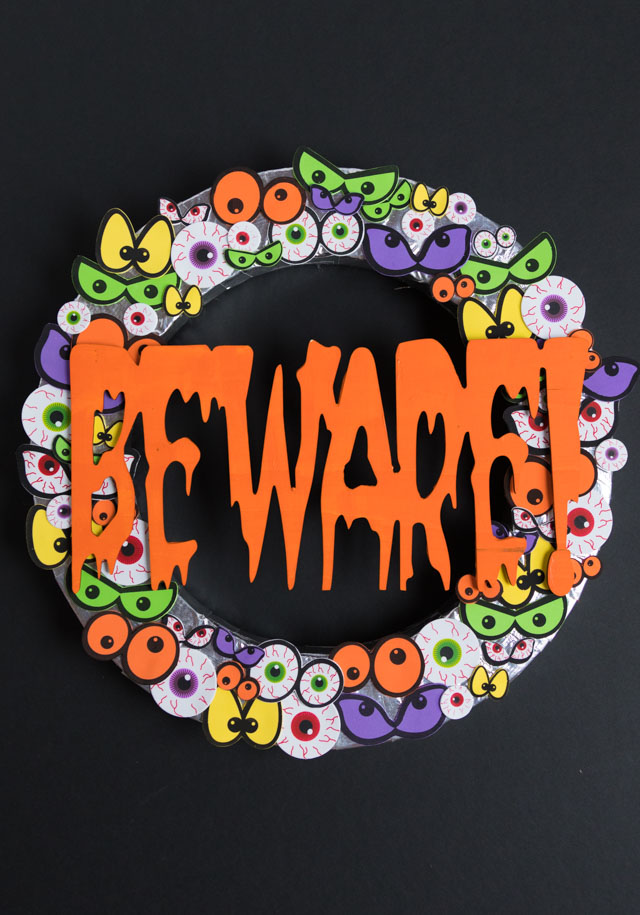
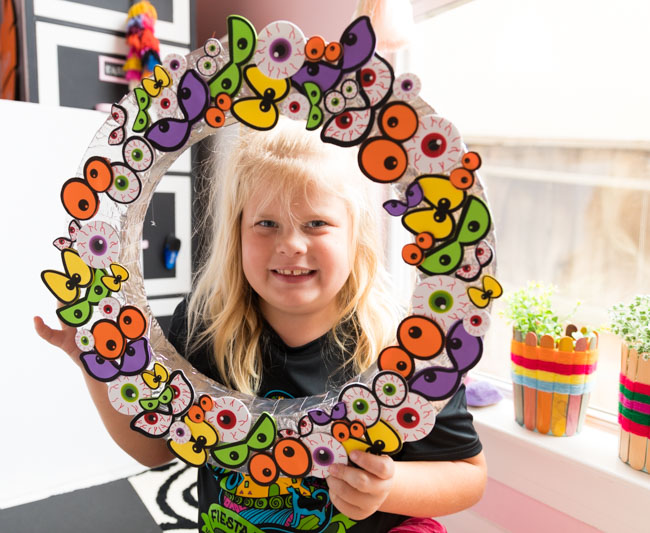
Beware! My DIY Halloween Eyeball Wreath will make you think twice before coming inside! This wreath uses a pack of eyeball stickers that come in a variety of shapes and sizes. Making the wreath is literally as easy as peel and stick! I added a Beware wood sign on top to make it extra spooky. You can make this simple wreath in under an hour. This is a fun one to have the kids help with as well. As you’ll see below, Hazel was my assistant on this one!
The wreath doesn’t look near as scary with a cute face poking through! As is often the case, Hazel came into my craft room while I was crafting and shooting pictures on the floor and asked if she could help. She did an excellent job adding on all of the eyeballs!
This post contains affiliate links. See our full disclosure.
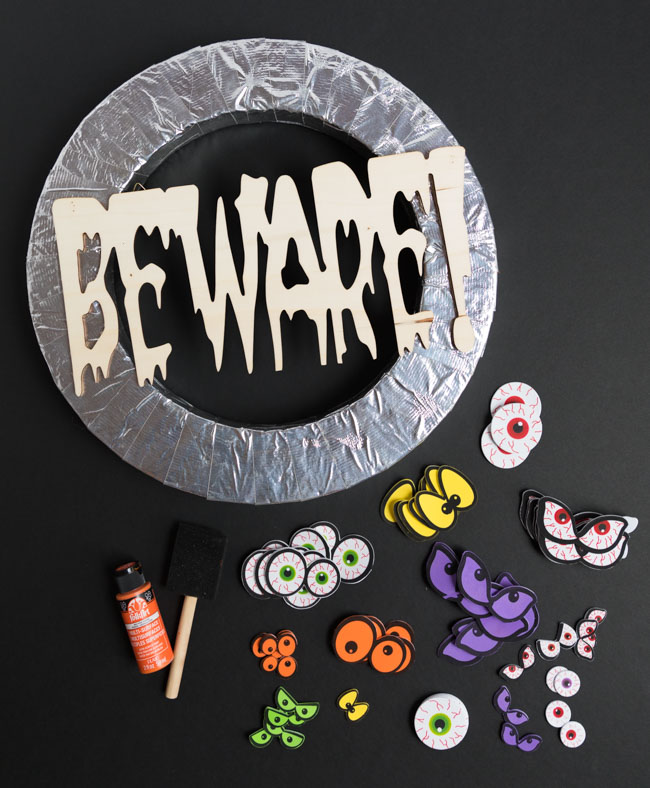
Supplies for DIY Halloween Eyeball Wreath
- Foam wreath form
- Duct tape or ribbon
- Eyeball stickers
- Wood “Beware” sign
- Orange acrylic craft paint
- Foam brush
- Hot glue gun
How to Make Halloween Eyeball Wreath
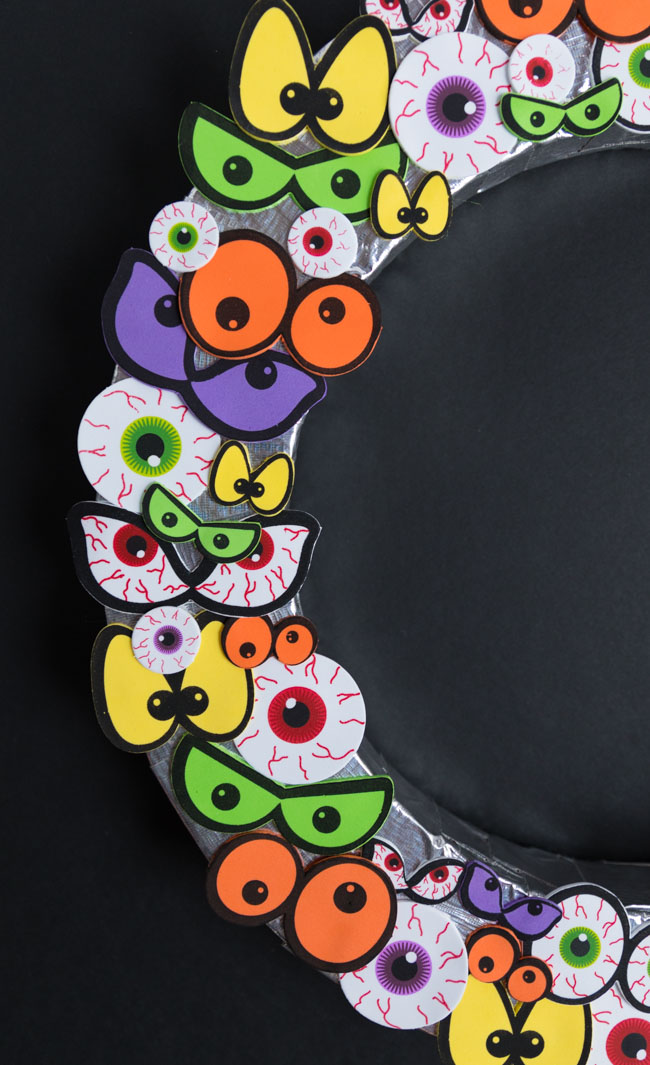
1. Start by wrapping your foam wreath with ribbon or tape to cover it. I typically like to wrap mine with ribbon, but the one I had on hand was already wrapped with silver duct tape, so I went with it! Whatever you use, you just want to cover it with a color that coordinates well with your eyeball stickers. Orange, purple, black or lime green ribbon would look great! Next, start adding the eyeball stickers to the top of the wreath.
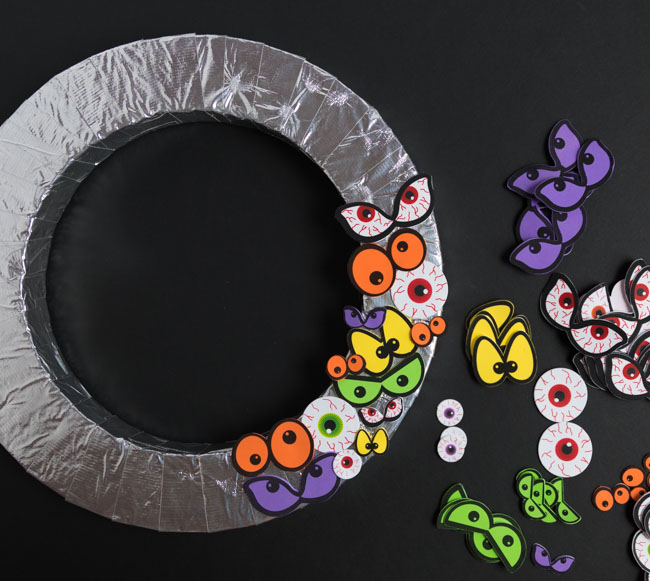
2. Continue adding stickers until you’ve covered the entire top of the wreath. You can overlap some of the eyeballs to give a fuller effect to the wreath.

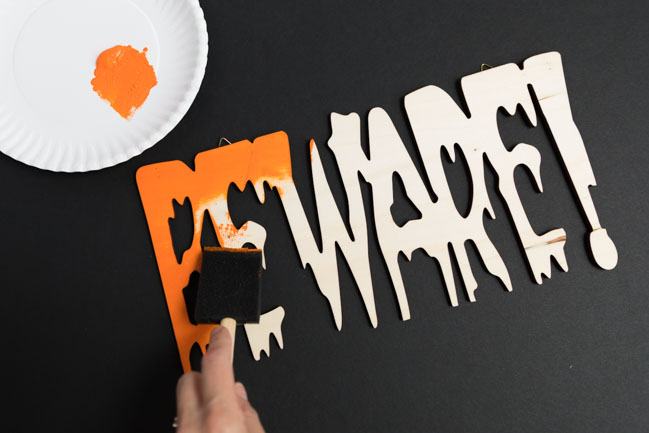
3. Paint the Beware sign with orange craft paint and a foam brush. Let dry.
4. Adhere the wood sign to the top of the wreath with hot glue. Hang your wreath with a ribbon to warn incoming guests! 🙂


Great Job, Hazel.