DIY Pajaki Chandelier
DIY Pajaki Chandelier
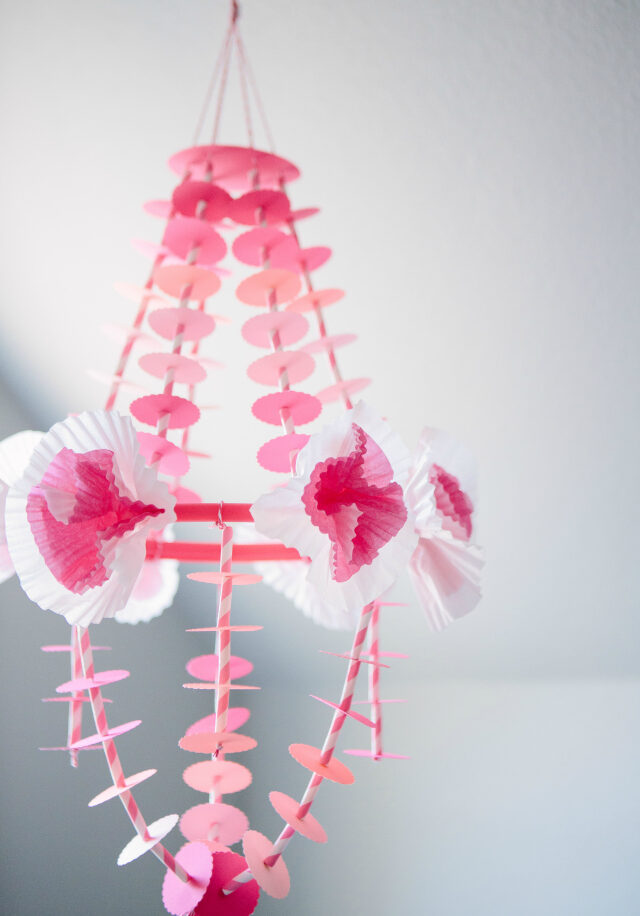
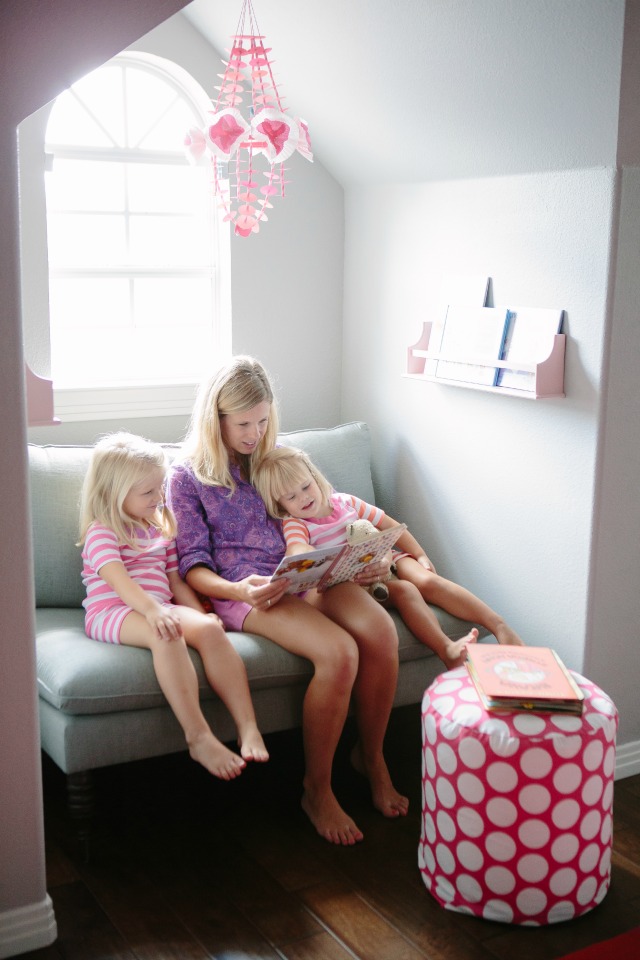
I have one more craft from the girls’ bedroom makeover that I have been excited to share with you! I made this delicate paper DIY pajaki chandelier to hang over the reading nook.
If you follow DIY blogs, you’ve probably seen this style of chandelier before. They are inspired by colorful Polish Pajaki chandeliers – I love their whimsical look and have always wanted to try to make one. I found a helpful tutorial in a book called Paper Made, and with the help of some Martha Stewart craft punches and simple cupcake wrapper flowers I was able to streamline the process significantly without sacrificing the results!
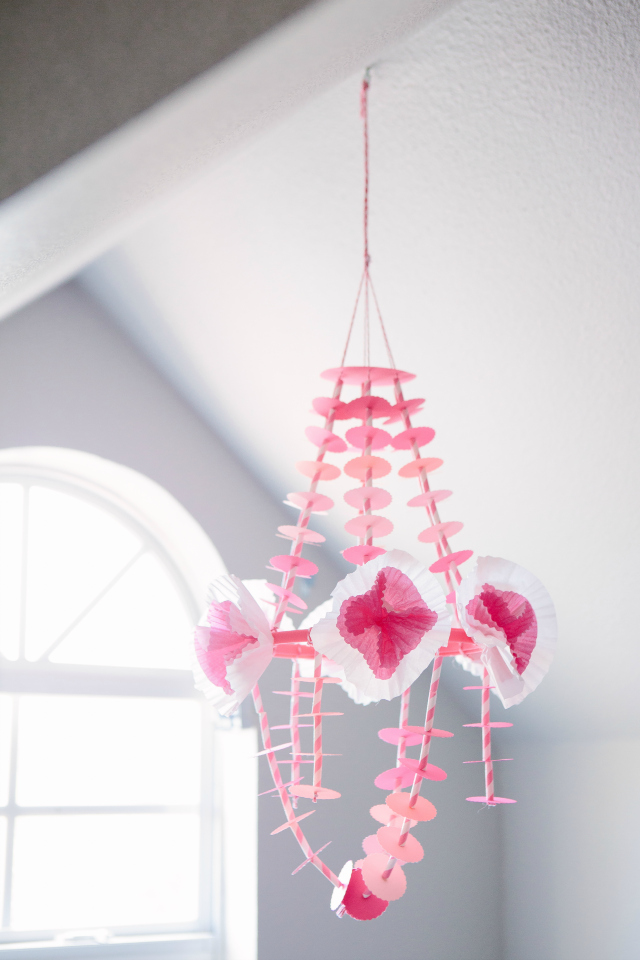
This project has more materials and steps than your typical Design Improvised DIY, but the paper punches make it completely doable in an hour or two. And what you get is pretty amazing – a beautiful chandelier customized to your decor!
Supplies for Paper Pajaki Chandelier
- Embroidery hoop (I found one that was already pink, but you can always paint the basic wood ones)
- Card stock in your choice of colors (I used different shades of pink for an ombre look)
- Martha Stewart scalloped paper punch
- Martha Stewart hole punch
- Striped paper straws
- Baker’s twine
- Darning needle
- Cupcake wrappers in your choice of colors – to make the flowers (I used white large wrappers and pink regular-sized wrappers)
- Hot glue
- Scissors
- (Optional) 2.5 inch paper punch

How to Make a DIY Pajaki Chandelier
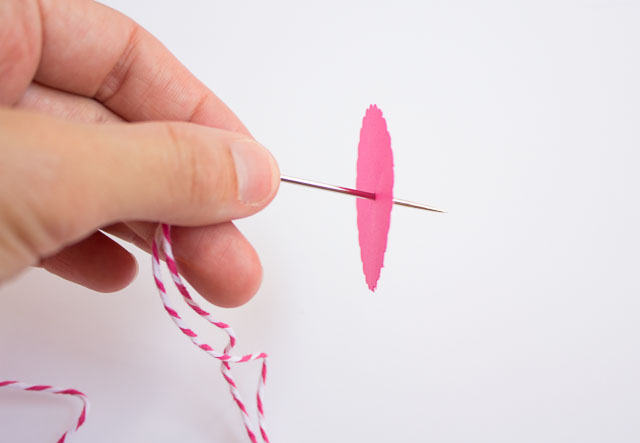
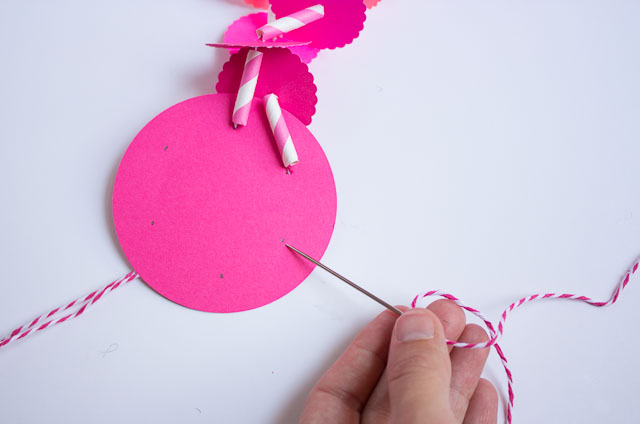
Step 1: Cut paper circles and straws
Use your scalloped paper punch to make 75 circles. I divided them evenly between 5 different shades of pink. Use your scissors to cut the paper straws into 82 pieces, each about 1″ long.
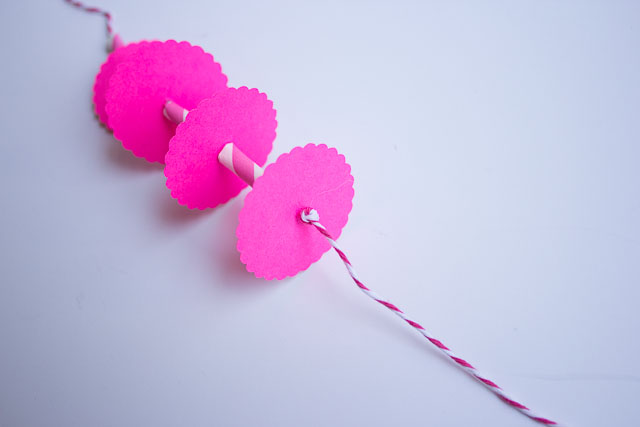
Step 2: String together 7 circles and 8 straws
String Thread the darning needle with the baker’s twine and starting with a paper straw piece, string 7 circles and 8 straws.
Leave several inches of baker’s twine at each end of the strand. Repeat this process to make 6 strands like this:
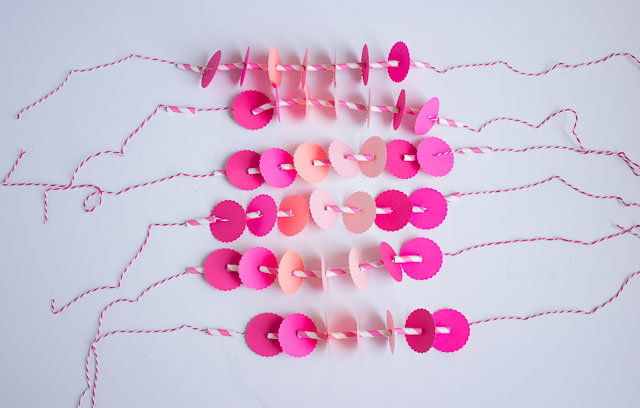
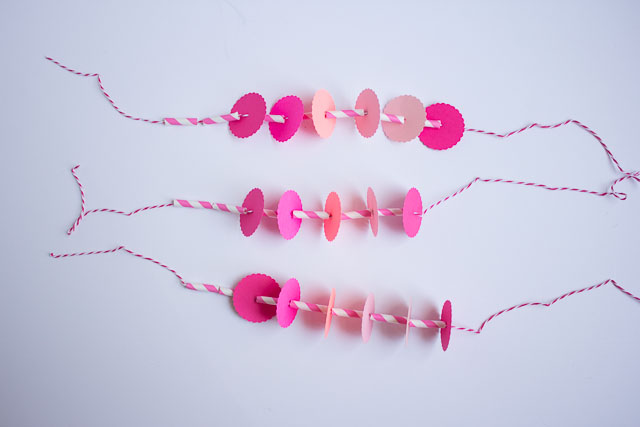
Step 3. String together 4 straws and 4 circles
Starting with a straw, string 4 straws and 4 circles. Repeat this process to make 3 strands like this:
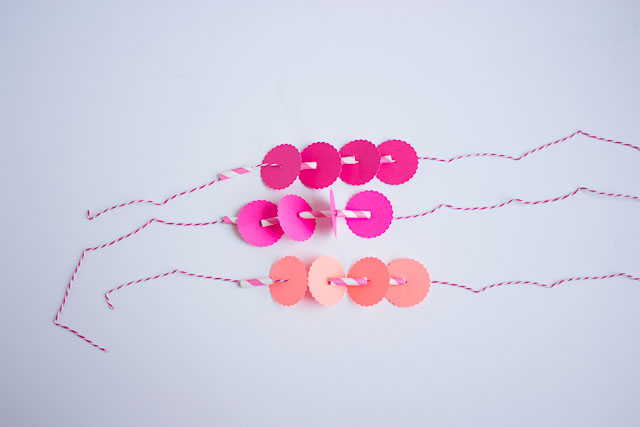
Step 4: String together 6 circles and 7 straws
Starting with 2 straws, string 6 circles and 7 straws. Repeat the process to create a total of 3 strands:
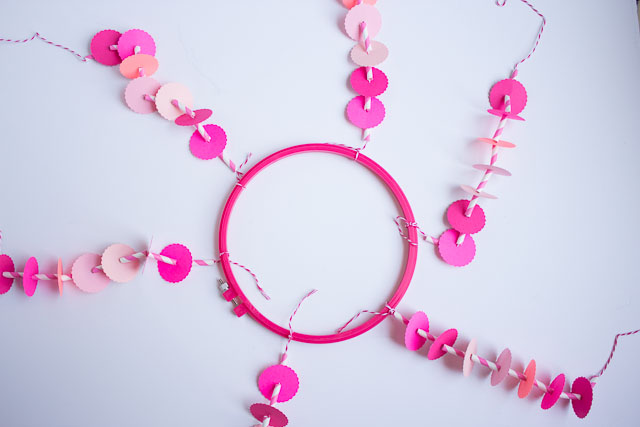
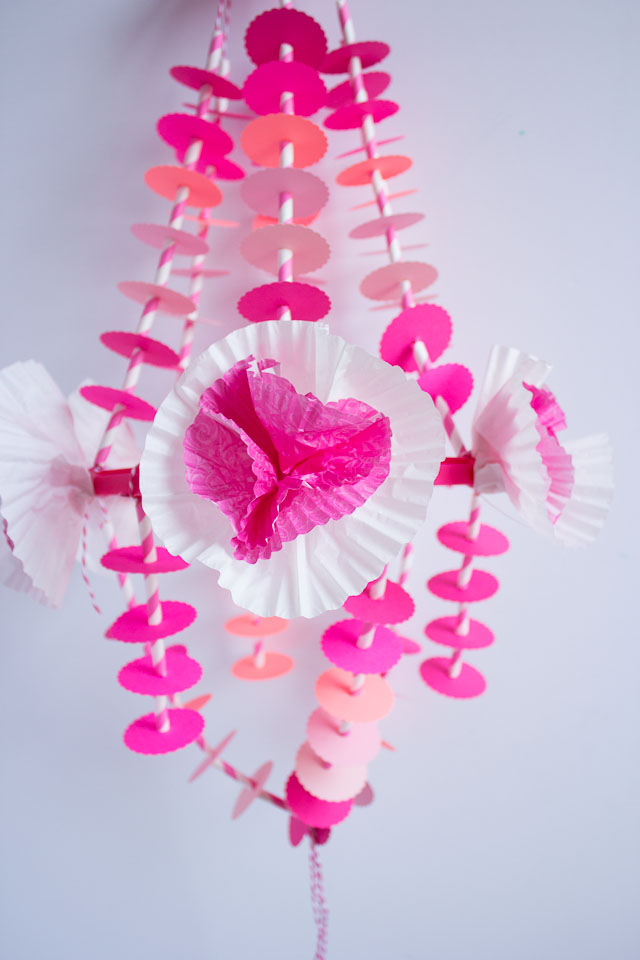
Step 5: Assemble the chandelier
Now for the assembly! Take the initial 6 strands and tie them around the embroidery hoop, spacing them evenly apart.
Step 6. Create the top hanger for the pajaki chandelier
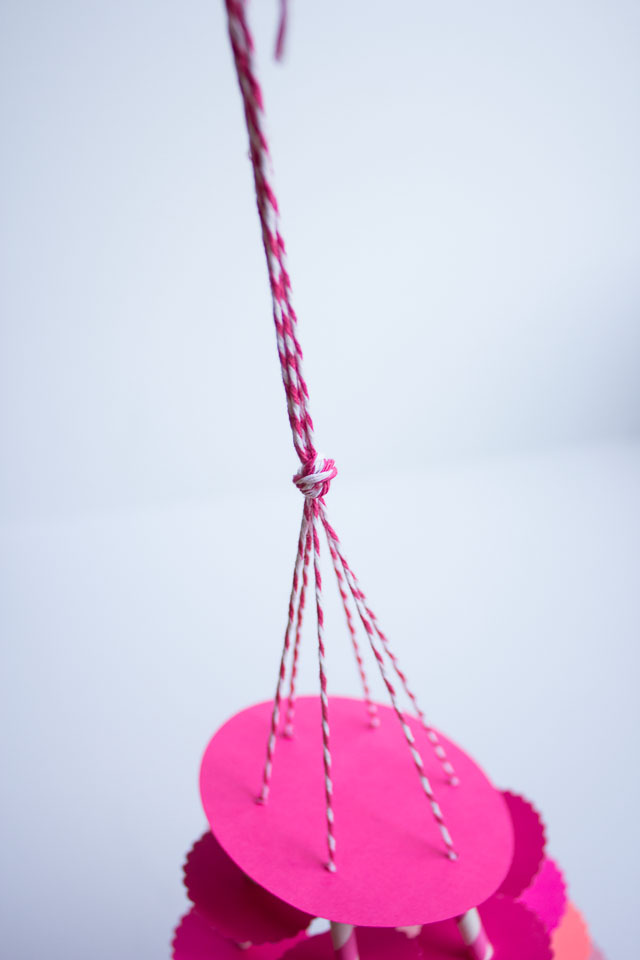
Use a 2.5 inch paper punch or cut out a circle of card stock and mark 6 dots evenly spaced around the circle as shown below. Thread the other end of the six strands attached to the hoop through the dots on this circle.
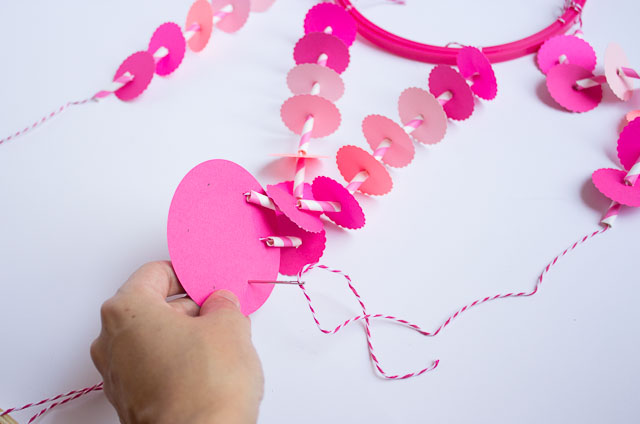
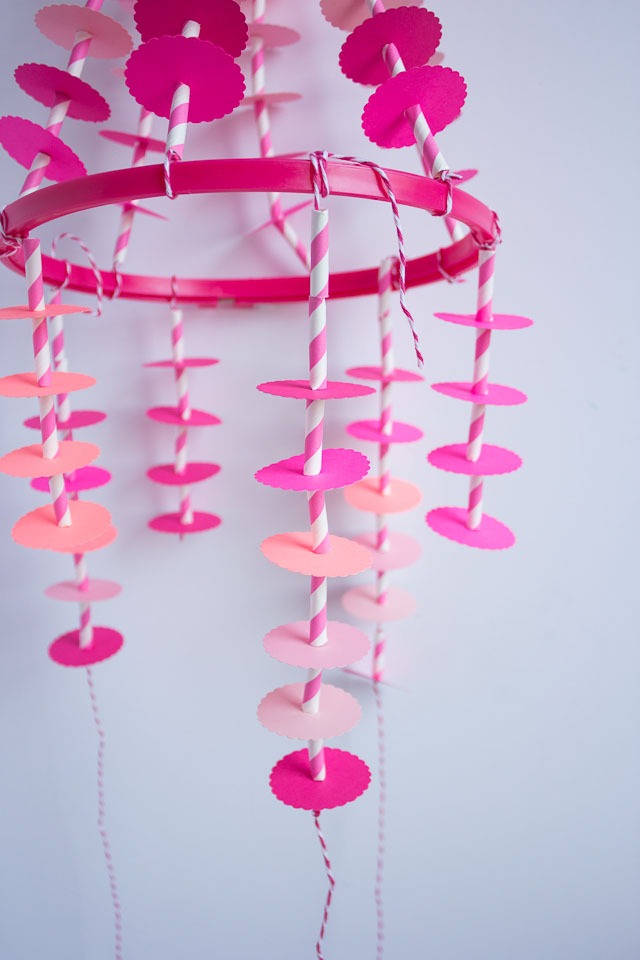
The chandelier should now look like this:
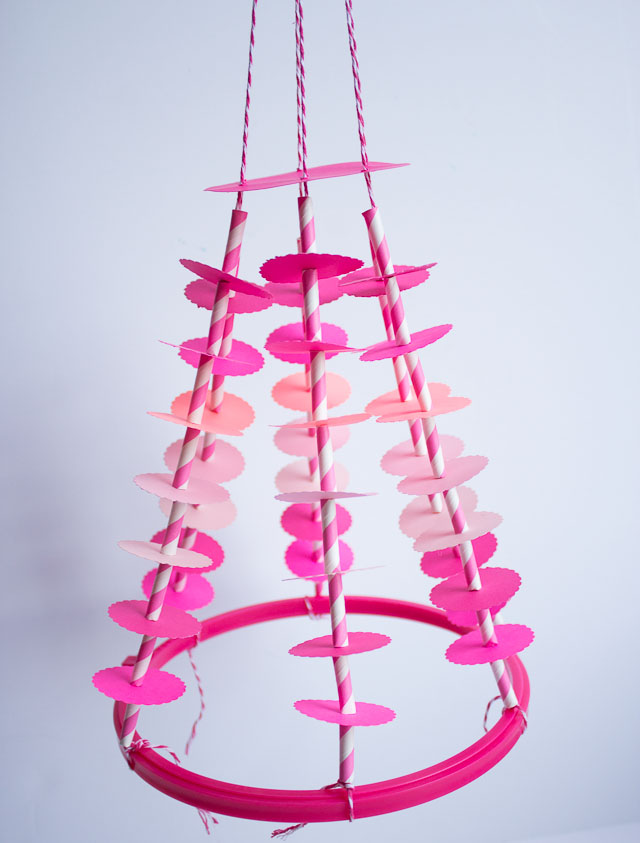
Step 7. Tie the strands into a knot
Take the six strands at the top of the chandelier and tie a knot like this:
Step 8: Knot the bottom of the strands
Take your 3 strands of 4 circles, and tie a knot at the bottom of each of them to hold the circles in place:
Step 9: Tie to embroidery hoop
Then tie the 3 strands to the embroidery hoop, spacing them out evenly (between every other one of the top strands):
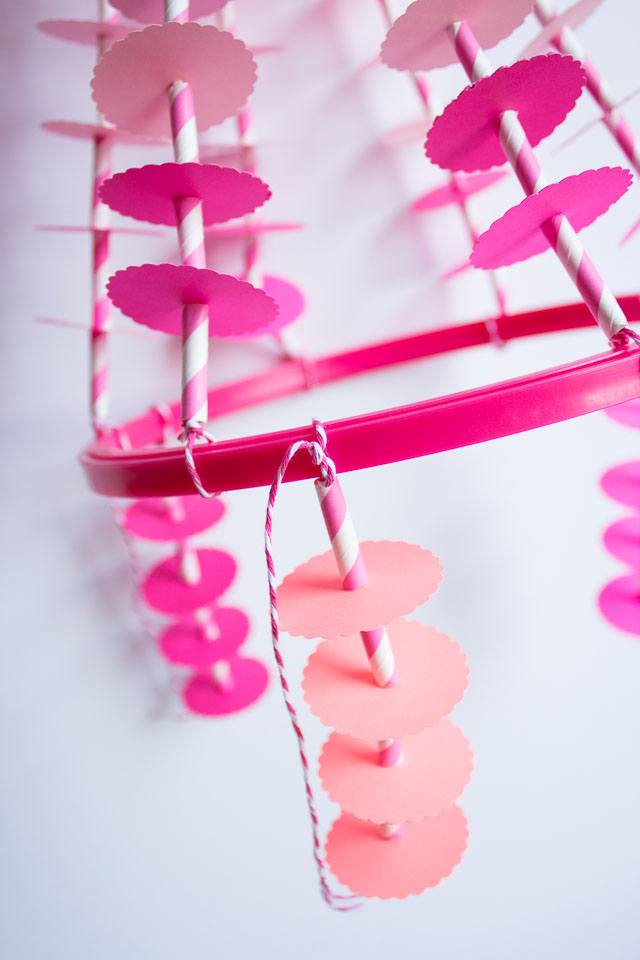
10. Repeat with remaining strands
Tie the remaining 3 strands of 6 circles to the embroidery hoop in a similar fashion, so that they are alternating with the shorter strands:
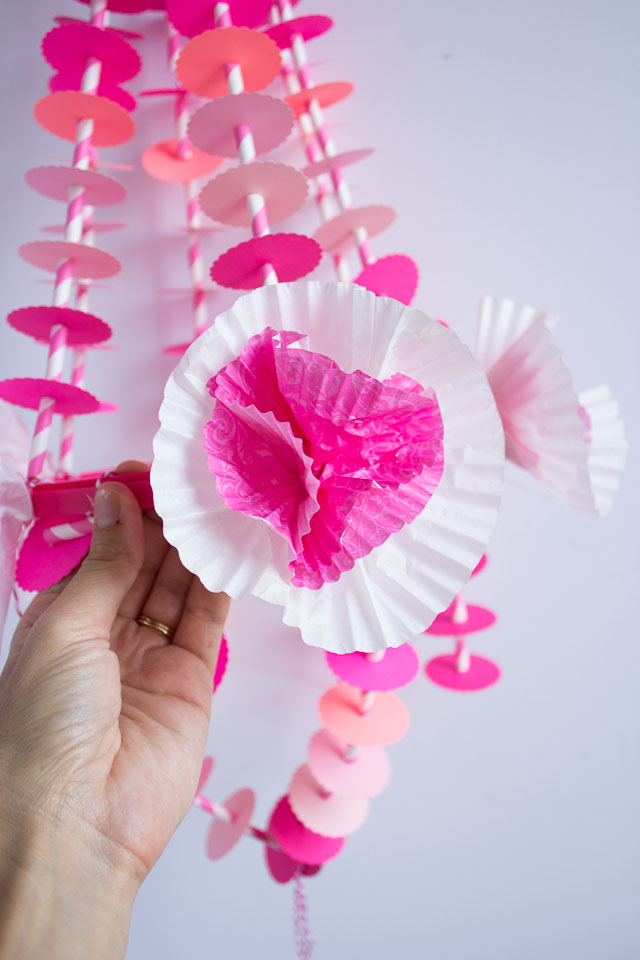
11. Make cupcake wrapper flowers
To finish off the chandelier, I glued six flowers made from cupcake wrappers around the embroidery hoop. To make the cupcake wrapper flowers, I flattened out one large white wrapper and two standard sized pink wrappers, layered them on top of each other and added a dab of hot glue between each layer to hold them together. Then I crinkled them up into a flower shape. It sounds more complicated than it is – it takes less time to make one than reading this! If you’re a visual learner, here’s a step-by-step photo tutorial.
Step 12: Hang your pajaki chandelier
Trim any excess baker’s twine and hang!
Photos of finished chandelier by Candice Stringham.