DIY Burlap Wreaths: The Ultimate Guide!
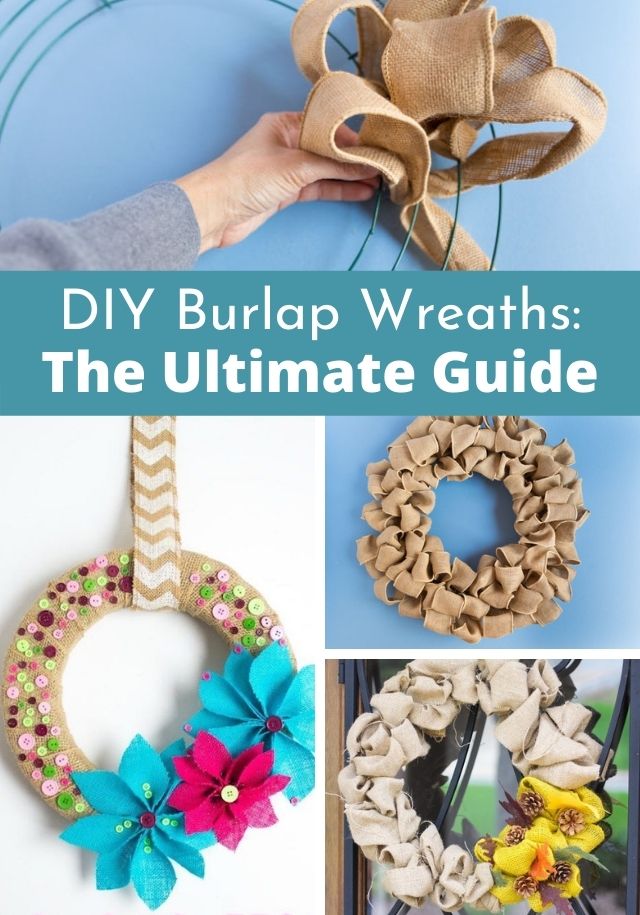
The Ultimate Guide to Making DIY Burlap Wreaths
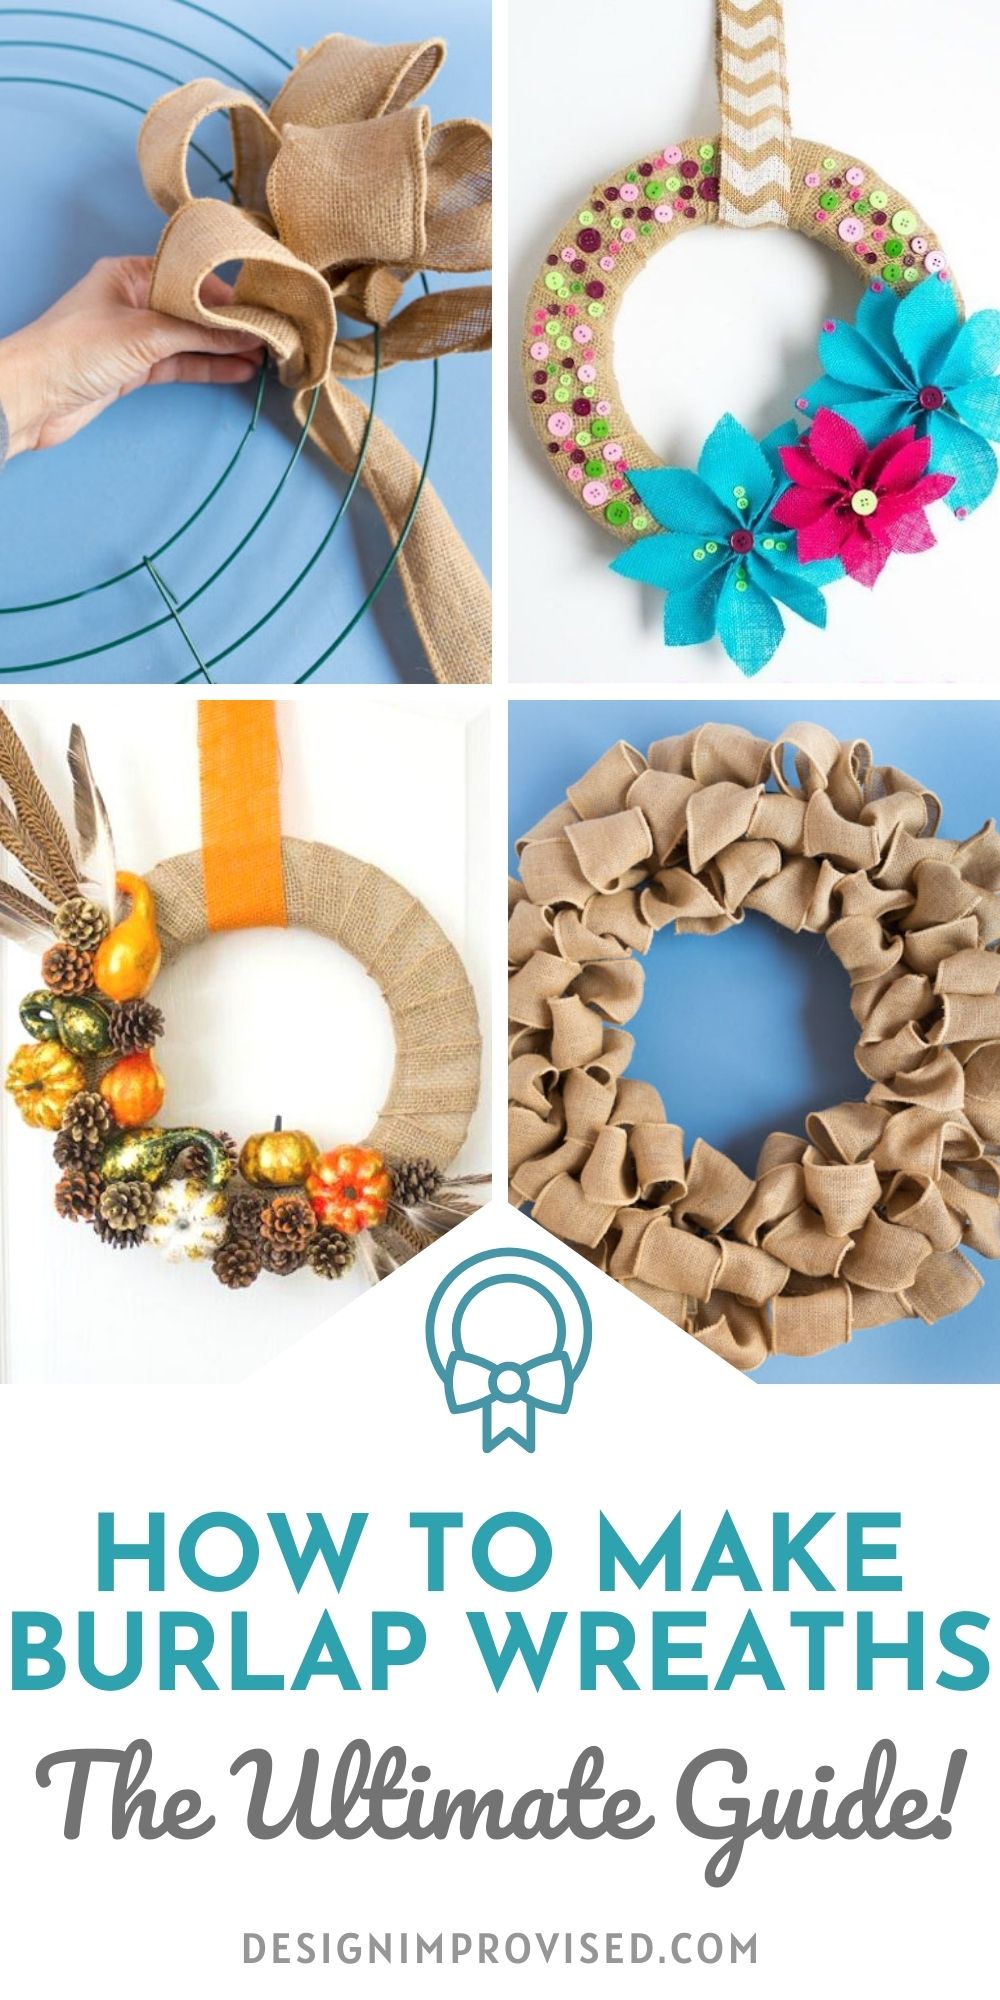
If you love to make wreaths, then DIY burlap wreaths are a must for you to try! They are easy to make and so versatile. Burlap works as a great neutral base for a variety of different wreath embellishments.
There is no one way to make a burlap wreath, so I’ve created the ultimate guide for you. It is full of burlap wreath crafting techniques and ideas. I’m also including my favorite burlap wreath supplies and examples of wreaths you can make for each season of the year! Let’s start with how to make a basic burlap wreath.
This post contains affiliate links. See our full disclosure.
How to Make a Basic Burlap Wreath
This type of looped burlap wreath can also be referred to as a bubble wreath or a twisted burlap wreath. It is one of the easiest wreaths to make and it looks so nice even without additional decoration! As an added bonus, it requires very few supplies. All you need is burlap ribbon and a wire wreath form. You can make it for under $10 in supplies!
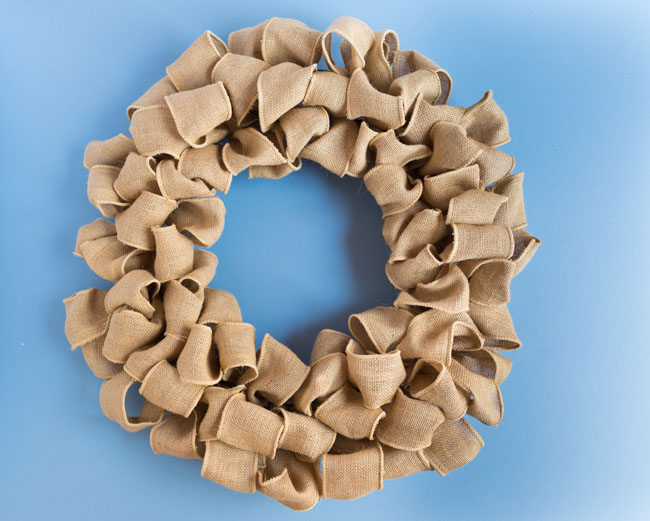
Step 1: Tie burlap to frame
Pull the burlap ribbon through the wire wreath frame and tie the burlap in a knot on the back of the frame. You can use either wire burlap ribbon or a more rougher edge burlap shown here. I like to use between a 3″ to 6″ wide ribbon for this technique. There is a lot of flexibility in the type of burlap ribbon you choose. You could even cut burlap fabric into long strips!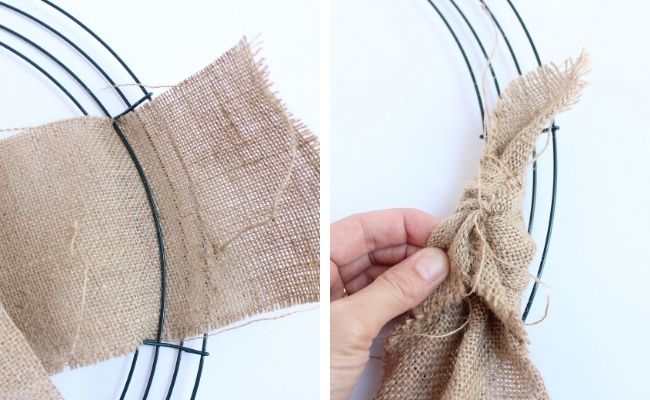
Step 2: Pull burlap up to create a loop
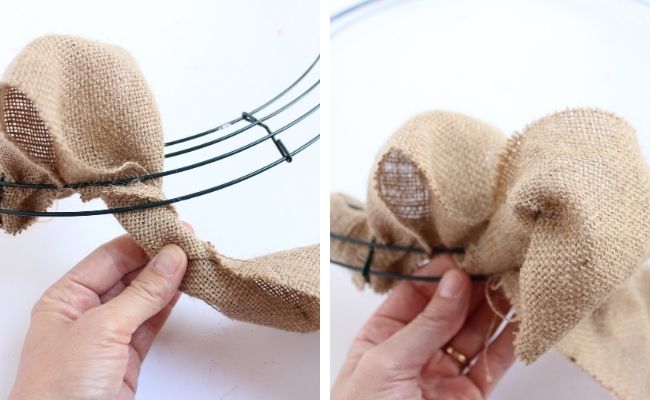
Flip the wreath frame over to the front and pull the burlap ribbon up between two of the wires on the frame to create a loop that is a few inches long.
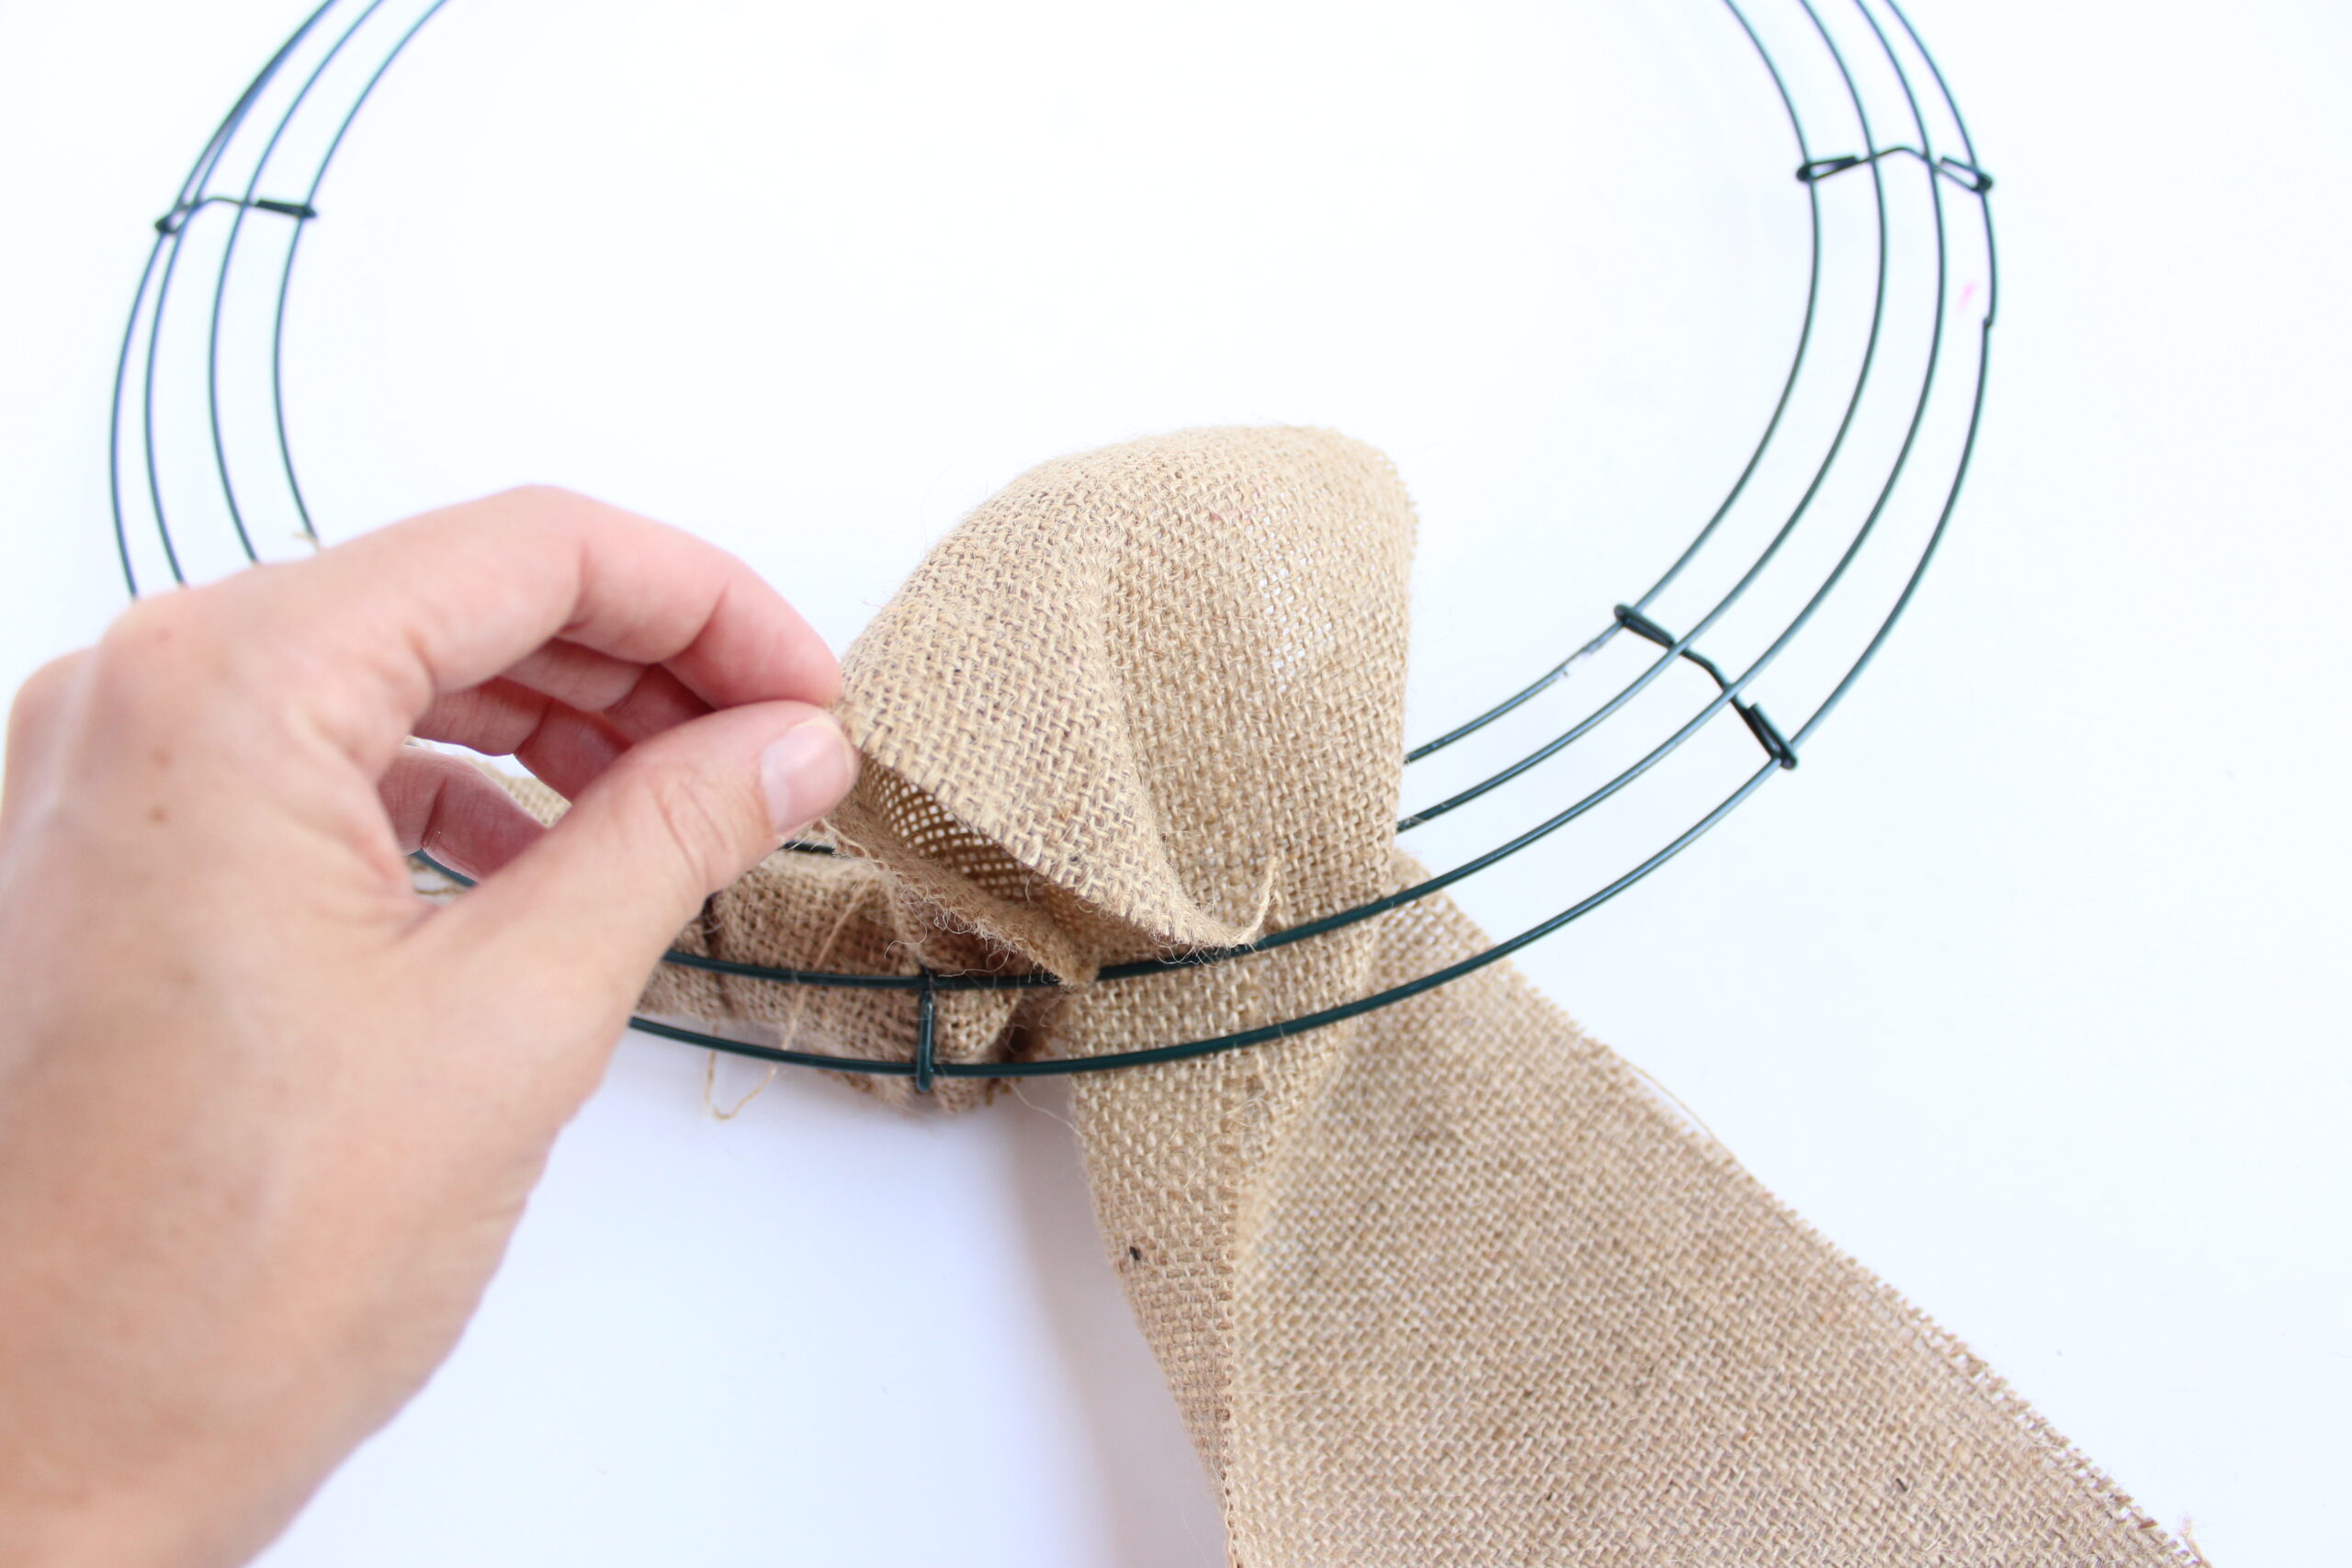
Step 3: Twist the ribbon and repeat
Twist the burlap ribbon at the base of the loop and then pull it up between another row of the wire wreath form to create a new loop. Keep repeating the process of twisting the burlap and pulling it through another set of wires.
Step 4: Push together the loops as you go
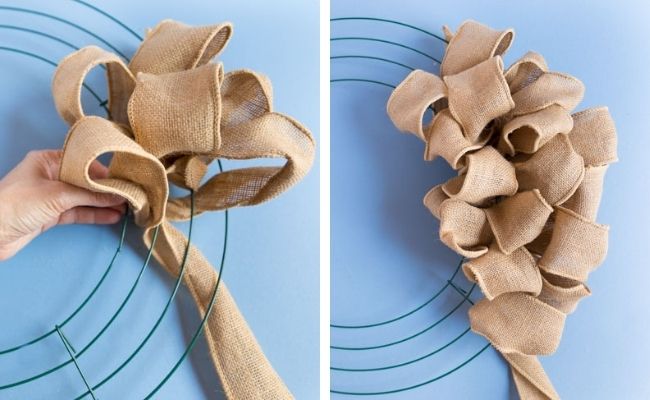
You’ll see the wreath start to form as use push the loops together as you go. Keep continuing the process of pulling up a loop of ribbon through the frame and then twisting at the bottom. If you run out of ribbon, just knot the end to a new roll and keep going.
Step 5: Tie burlap to frame
To end your wreath, this the end of the burlap ribbon to the back of a frame in a knot.
4 Different Ways to Make DIY Burlap Wreaths
The looped wreath shown above is just one way to make a burlap wreath. That is why burlap is so fun to work with. Here are four other ways to use burlap fabric or ribbon to make a wreath. Which is your favorite?
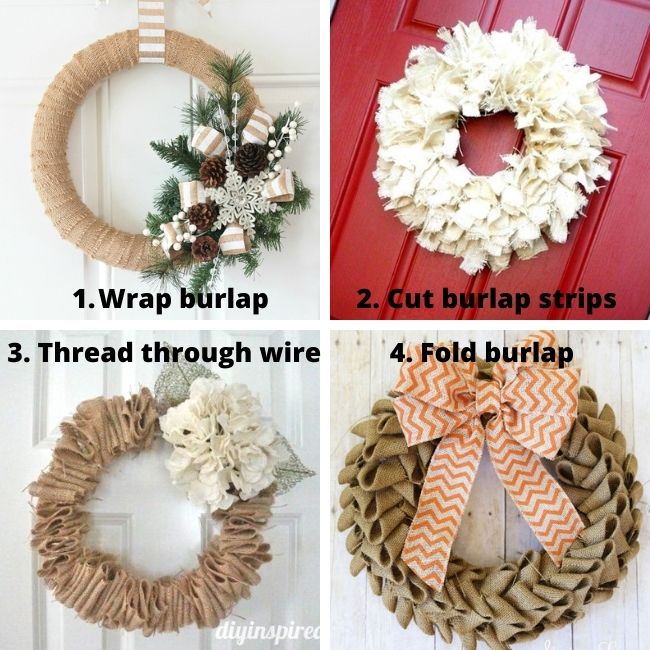
1. Wrap a styrofoam wreath
The easiest way to use burlap on a wreath is to wrap it around a styrofoam wreath base such as this Burlap Button Wreath that I made. I also used colored burlap to make simple flowers.
2. Make a rag wreath with burlap strips
You can also cut short strips of burlap for a wreath. This technique creates a homespun looking rag wreath.
- This Burlap Rag Wreath Tutorial via Ginger Snap Crafts uses two yards of burlap fabric cut into 1″ by 12″ strips. They are tied around a wire wreath form.
3. Poke burlap through a wire hanger
Rather than use a store bought wire wreath form, you can also bend a wire hanger into a variety of shapes including a circle or a heart. Sturdy floral wire is another alternative. For this technique you actually poke the wire through the middle of a burlap strip. You then accordion fold the burlap, poking the wire through each fold.
- This Wire Hanger Burlap Wreath Tutorial via DIY Inspired shows how to use a coat hanger to make a wreath:
4. Fold burlap into triangles and add to wreath
To create a sophisticated and cleaner look for your wreath, you can try folding the burlap. This Folded Burlap Wreath Tutorial from Skip to My Lou uses burlap squares folded into triangles and then pinched together.
Burlap Wreath Supplies You’ll Need
If you like making wreaths, it is helpful to have the basic supplies on hand so you are ready to craft when the mood strikes! The nice thing about burlap wreaths is that you can customize them in so many ways. Here are my favorite supplies for making burlap wreaths:
1. Burlap ribbon
- 3″ wide burlap ribbon
- Wire burlap ribbon
- Colored burlap ribbon
- Decorative burlap ribbon such as lace or plaid
2. Burlap fabric
3. Wire frame
How Much Burlap Do You Need for a Wreath?
To make a looped bubble style burlap wreath you’ll need at least 10 yards for a 12″ wire wreath and 20 yards for an 18″ wire wreath.
How Do You Make Burlap Flowers?
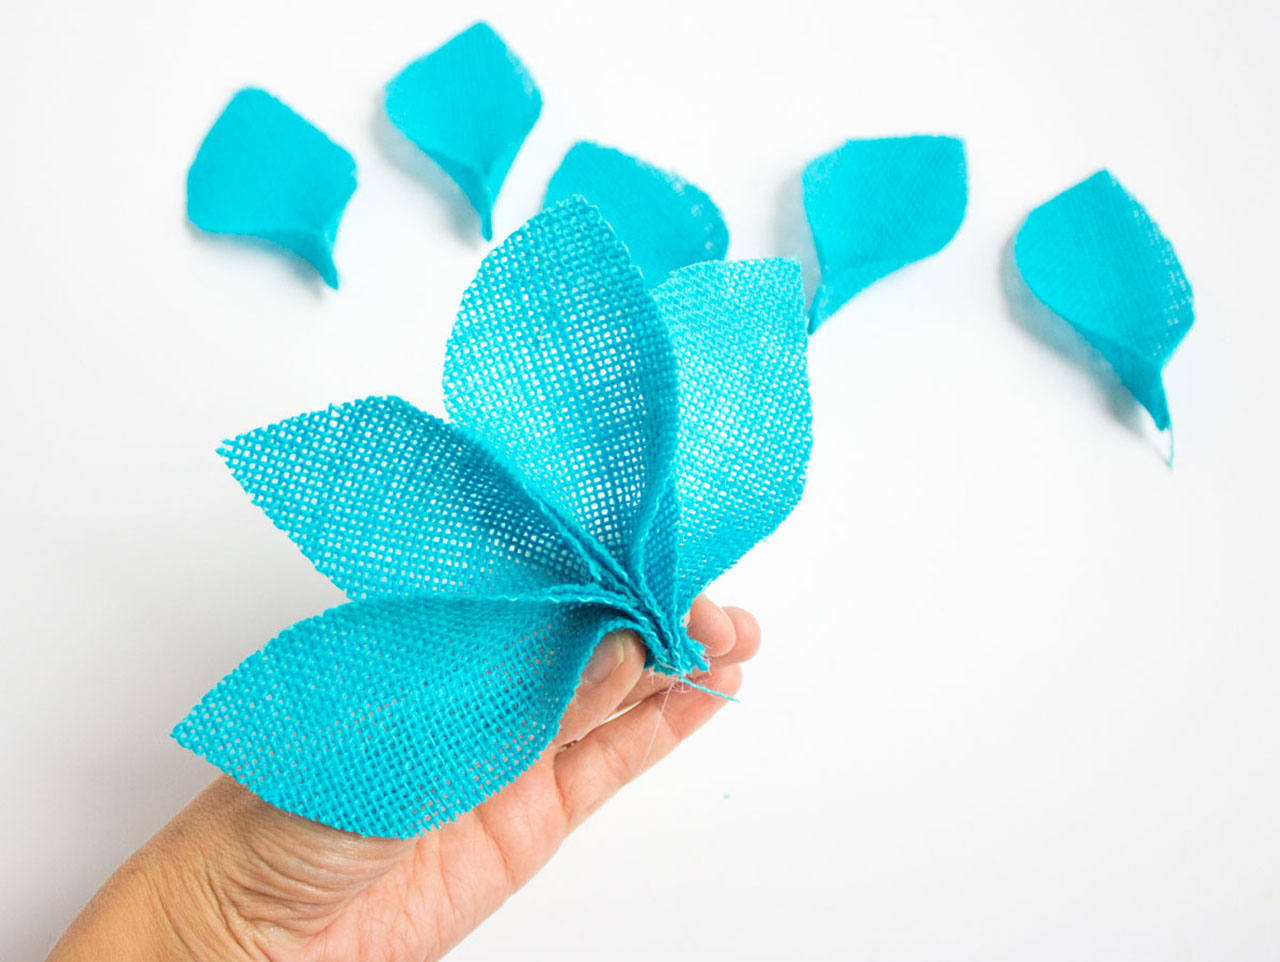
You can use burlap to make a variety of different flowers, such as this simple flower I made below by cutting out petals and gluing them together. Get the step-by-step tutorial here.
Here are several other versions of DIY burlap flowers including burlap roses and rustic burlap rosettes:
- No-Sew Flower Tutorial via Fun 365
- Burlap Roses Tutorial via The Mama’s Girls
- No-sew Burlap Flower Tutorial via The Frugal Homemaker
- How To Make Burlap Flowers Wreaths for Every Season via Online Fabric Store
DIY Burlap Wreaths by Season
There are burlap wreaths out there for every holiday and every season. I’ve rounded up some of my favorites from Design Improvised and other makers. They use a variety of different types of techniques!
Spring Burlap Wreaths
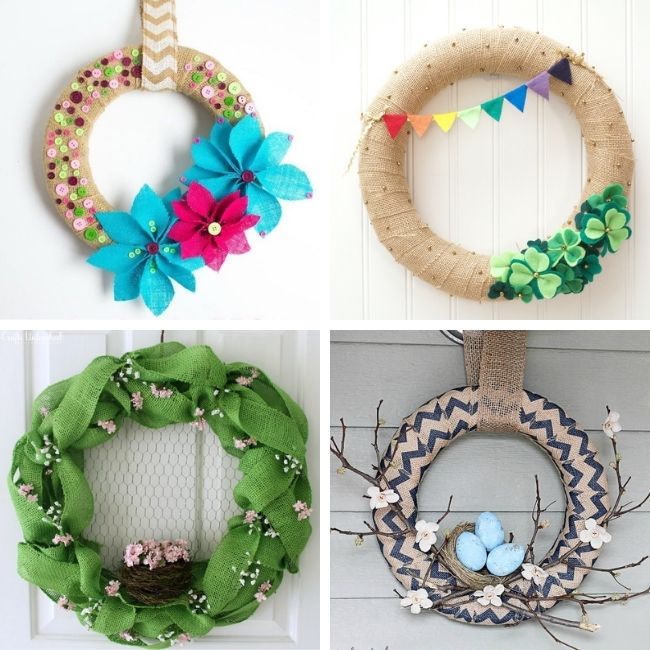
For a spring burlap wreath you can added colorful flowers like the ones I made for my wreath below. Or you can top a basic wrapped burlap wreath with a mini rainbow banner and felt shamrocks for St. Patrick’s Day! Also try experimenting with different colors of burlap or printed burlap:
- Burlap Flower Wreath Via Design Improvised
- St. Patrick’s Day Wreath via Flamingo Toes
- DIY Burlap Wreath with Flowers via Crafts Unleashed
- Natural Spring Burlap Wreath via Crafts Unleashed
Summer Burlap Wreaths
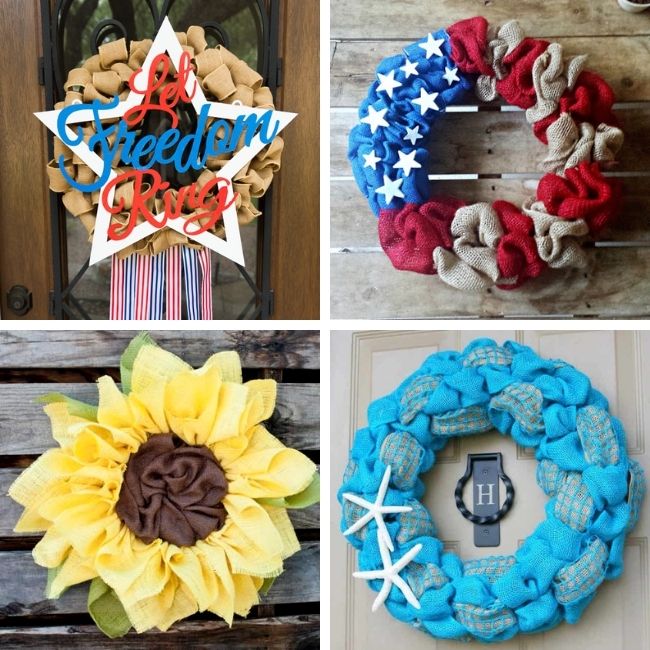
For summer, think patriotic red white and blue. Or make a sunflower burlap wreath with yellow and brown burlap. I also found a fun ocean inspired wreath that uses blue and webbed burlap ribbon:
- DIY Let Freedom Ring Wreath via Design Improvised
- DIY: Patriotic Wreath via Inspirations by D
- Sunflower Burlap Wreath via Clumsy Crafter
- Summer Burlap and Starfish Wreath via Happy Go Lucky Blog
Fall Burlap Wreaths
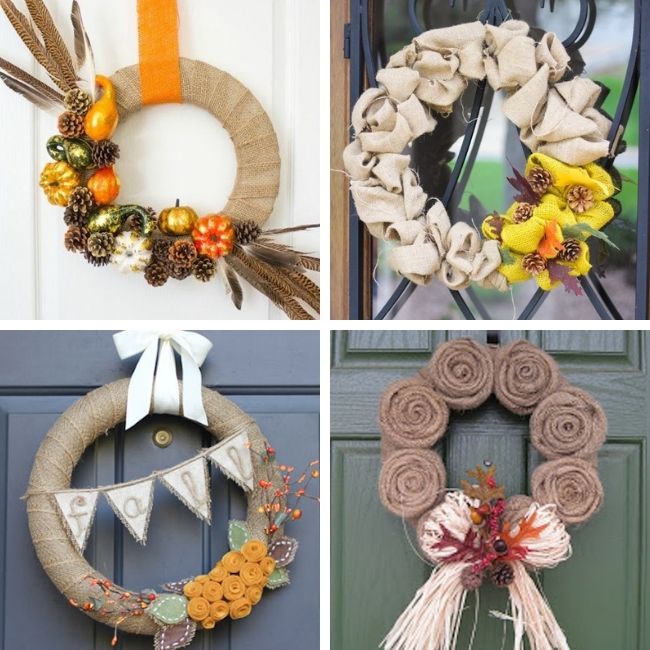
Burlap is the perfect rustic touch for a fall wreath. Add faux gourds, feathers, pine cones, or faux berries as embellishment. You can even roll burlap into a rustic fall rosette.
- Rustic Fall Wreath via Design Improvised
- DIY Fall Burlap Wreath via Fun 365
- DIY Crow Wreath For Halloween via Crafts Unleashed
- Fall Burlap Roses Wreath via La Force Be With You
Winter Burlap Wreaths
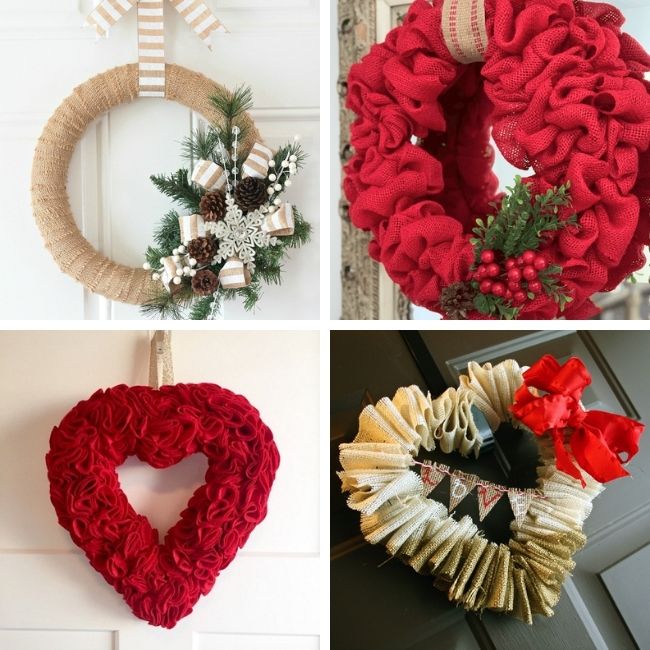
I found a couple beautiful wreaths for both Christmas and Valentine’sd Day. Think red burlap and heart shaped wreath forms:
- Christmas Burlap Wreath via Love of Family and Home
- DIY: Red Burlap Christmas Wreath via A Well Purposed Woman
- How To Make a Valentine’s Hearths Wreath via How to Make Burlap Wreaths
- Gold Dipped Burlap Valentines Wreath With Mini Bunting via Curly Crafty Mom
I hope you found this ultimate guide to making burlap wreaths helpful. Leave a comment below if there are any other questions you have about wreath making. Happy Crafting!


I love your handy dandy table of contents in this post. What a great wreath making resource! Thank you.
Thanks so much! It was actually my first time using a Table of Contents in a post, so I’m so glad you found it helpful. 🙂