DIY Floral Painted Wood Circle Wreath
Make a Floral Painted Wood Circle Wreath
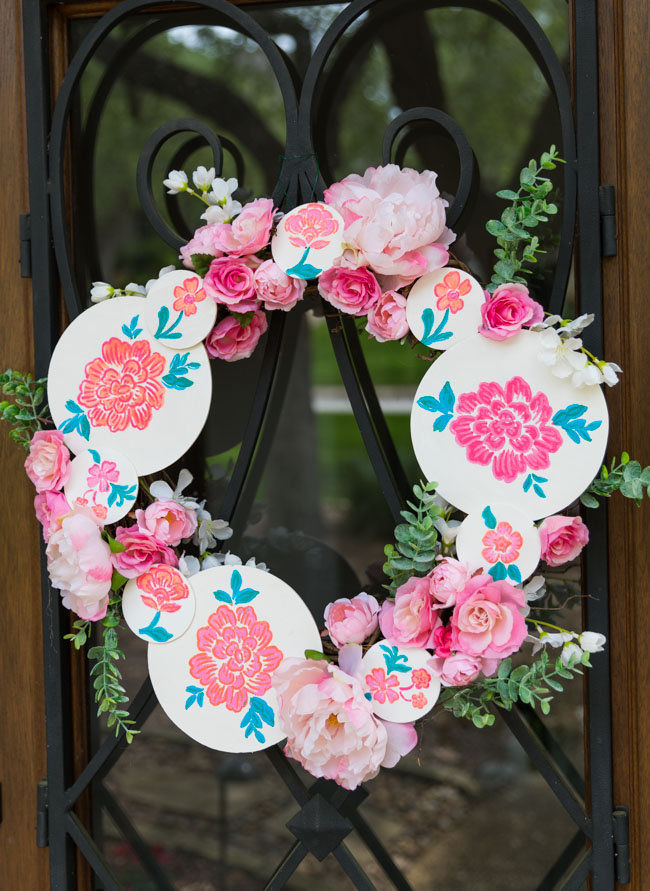
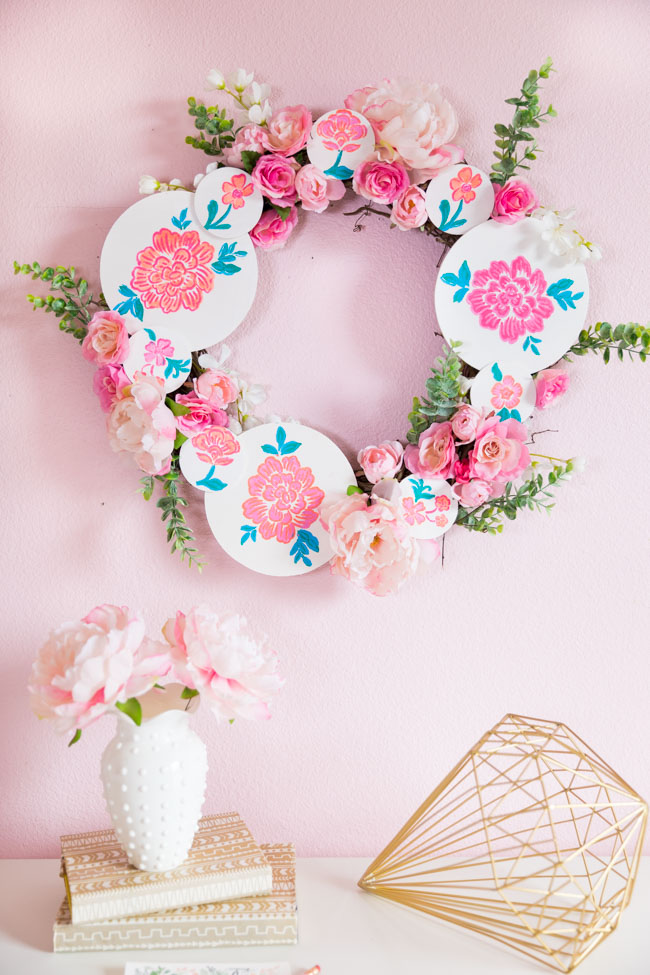
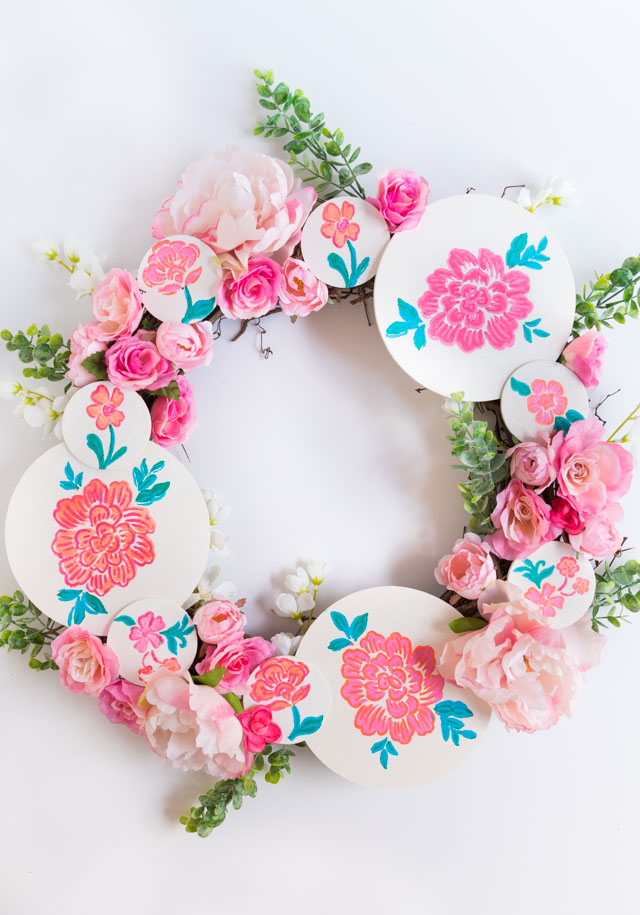
Looking to try out a new craft while you’re at home? This DIY painted wood circle wreath is a fun opportunity to get out your craft paints and do some stenciling while creating a gorgeous spring wreath. It would also make a beautiful Mother’s Day wreath to give to mom! I’m partnering with Martha Stewart Crafts® to show how their floral stencils and craft paints create amazing results for even the beginning crafter. I had fun dreaming up this wreath because I’ve never seen anything quite like it! It incorporates flowers painted on wood circles along with faux flowers and greenery for a lush, almost vintage looking wreath. I hope you like it as much as I do and want to give it a try!
This post contains affiliate links. See our full disclosure.
To create the wreath, I experimented with these floral Martha Stewart Crafts® Layering Stencils for the first time. By combining two overlapping layers to the stencil image, it creates an almost hand-painted look to the flowers, with no painting experience required! All the Martha Stewart products featured in this post are available at Michaels.

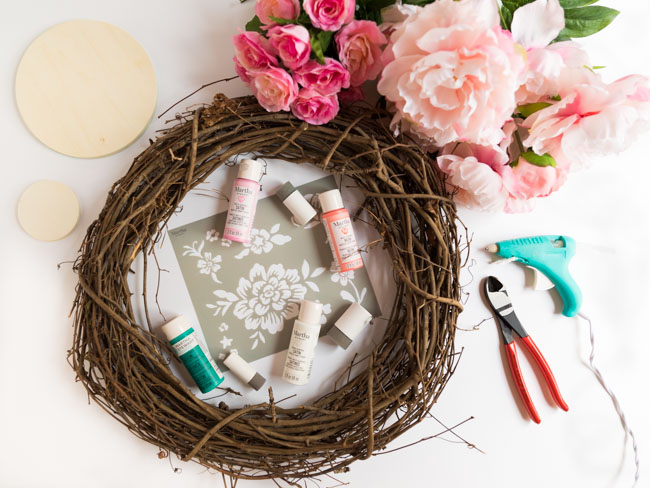
Supplies for Floral Painted Wood Circle Wreath
- Martha Stewart Crafts® Adhesive Laser-Cut Layering Stencils
- Martha Stewart Family Friendly Multi-Surface Satin Acrylic Craft Paint
- Foam pouncers
- 18″ grapevine wreath
- 3″ wood circles
- 6″ wood circles
- Artificial peonies
- Pink artificial roses
- Faux eucalyptus greenery
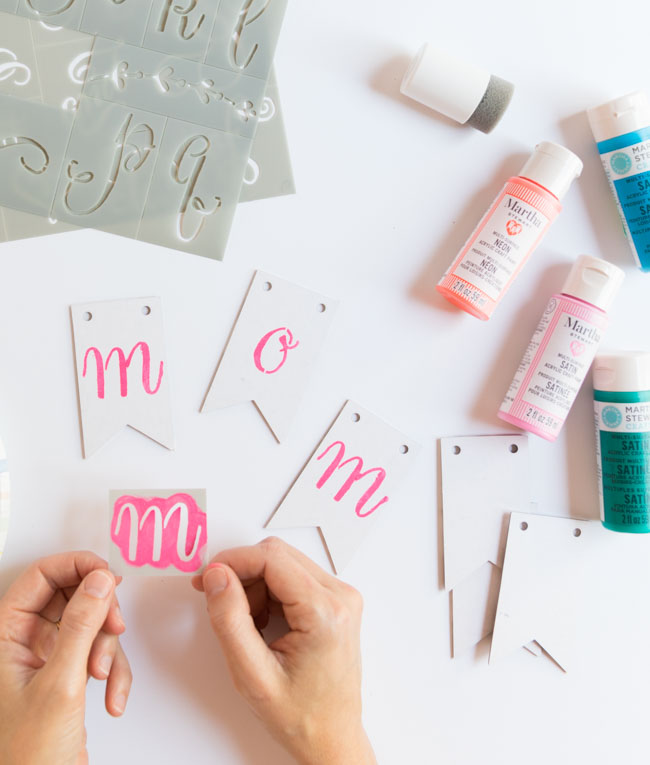
- Mini paper banners
- Martha Stewart Adhesive Laser-Cut Stencils, Elegant Script
How to Make a Painted Wood Slice Wreath
Step 1: Paint the wood discs white
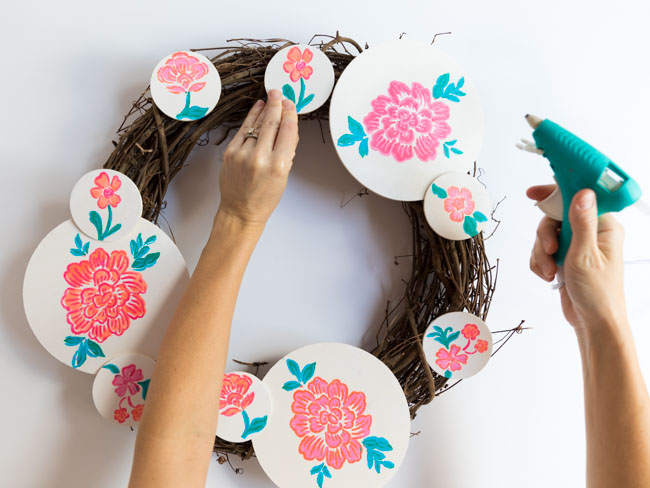
To make the wreath I used a mix of 6″ wood circles and 3″ wood circles. I started by painting each of the wood circles with a coat of white acrylic craft paint.

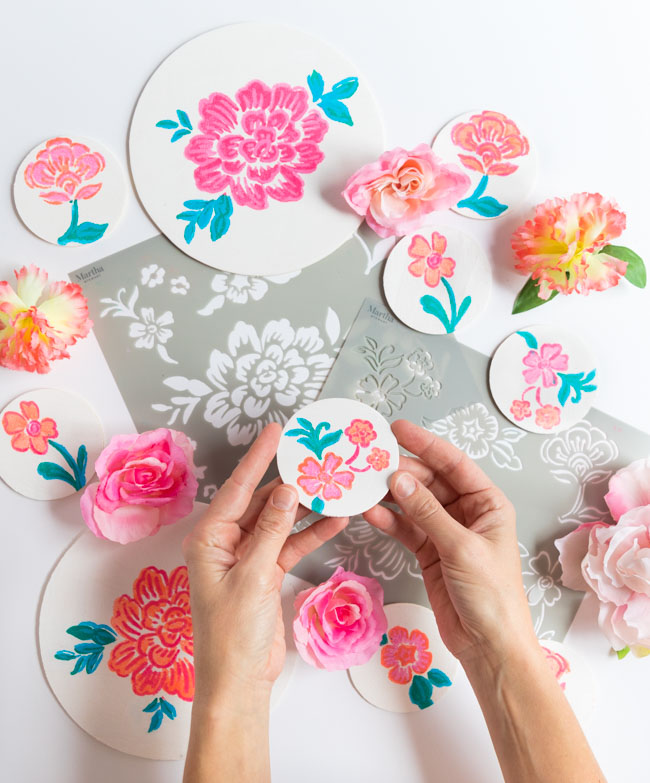
Step 2: Stencil a floral design onto the wood discs
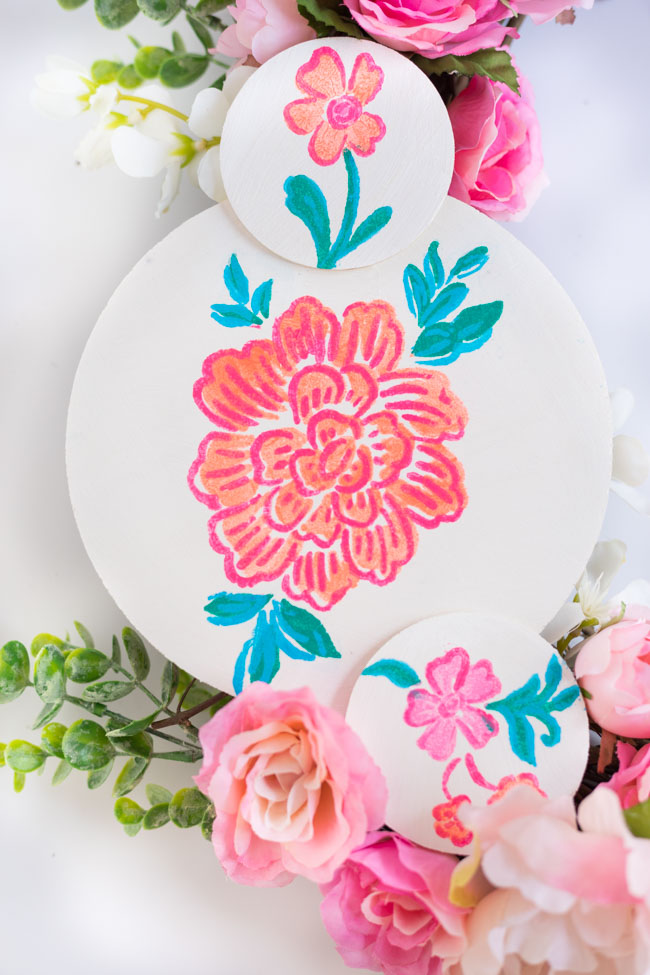
To create the floral designs, I used these Martha Stewart Crafts® Adhesive Laser-Cut Layering Stencils and a foam pouncer. You can use a piece of tape to secure the stencil in place and prevent it from moving around.
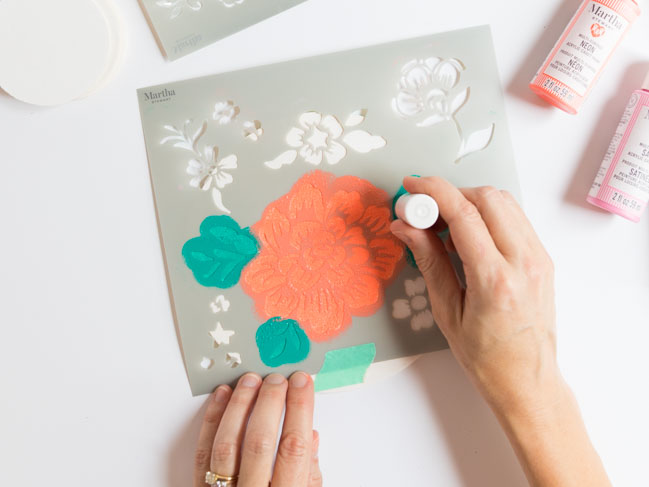
The layering stencils require two steps. First you stencil on the base color and let it dry. Wash off you stencil immediately after use to keep it working great.
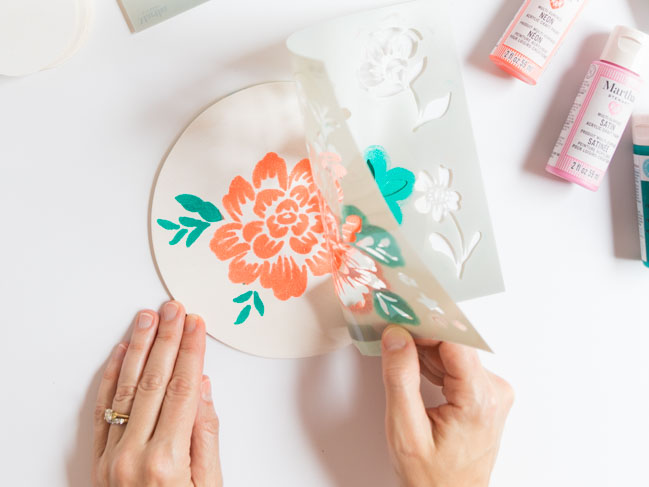
Step 3: Add the second layering stencil to the design
This is where the magic happens. When you overlay the second stencil and add a new set of colors on top of the existing design, it creates a beautiful flower that almost looks hand painted.
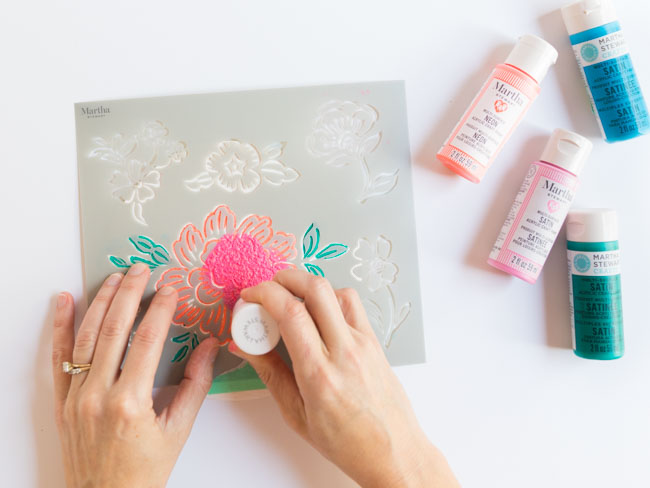
I love the added dimension that the layering creates!
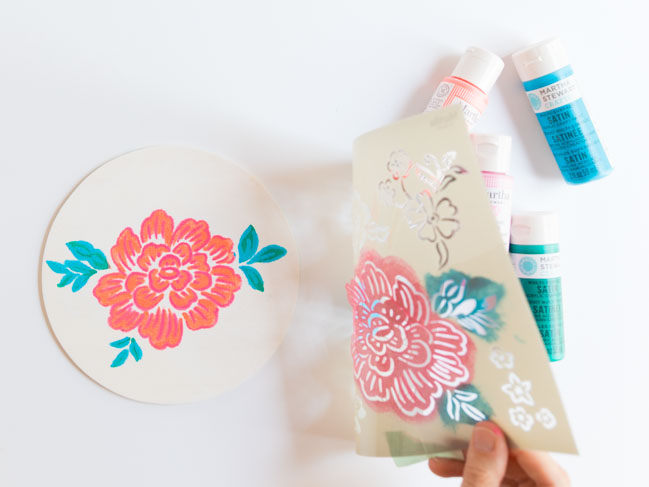
Continue stenciling a variety of floral designs on the two sizes of wood circles. I used three large 6″ wood circles and seven small 3″ circles for my wreath.
Step 4: Glue wood slices to a grapevine wreath
Position the wood circles around an 18″ grapevine wreath. Once you have the look you want, glue them in place with an ample amount of hot glue on the back.
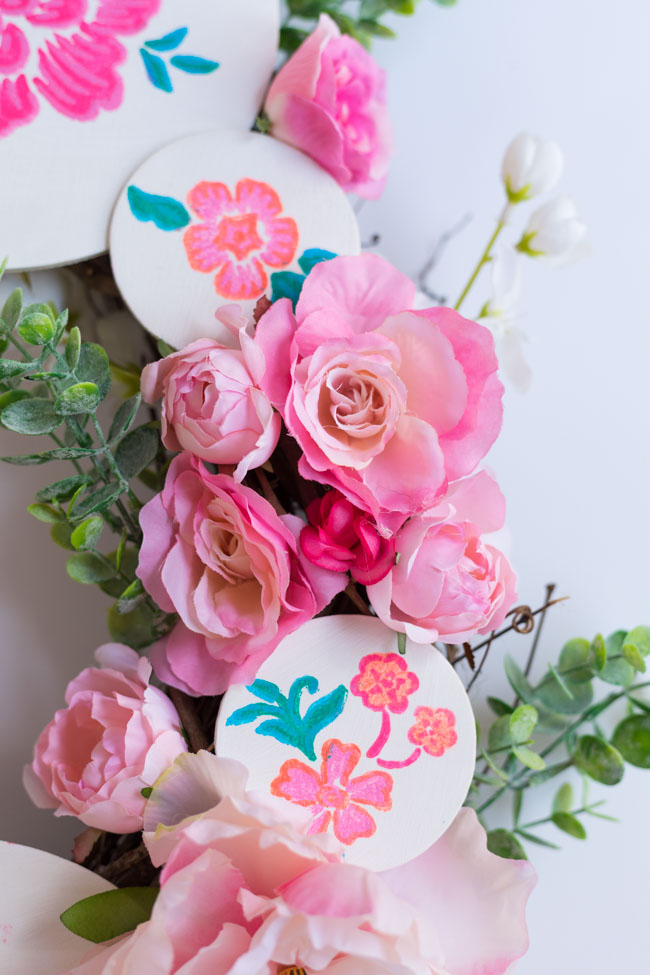
Step 5: Fill in gaps with artificial flowers
I used a variety of artificial pink flowers to fill in the gaps between the wood slices. To make a lush wreath, I incorporated a mix of artificial peonies, pink roses and some faux eucalyptus greenery.
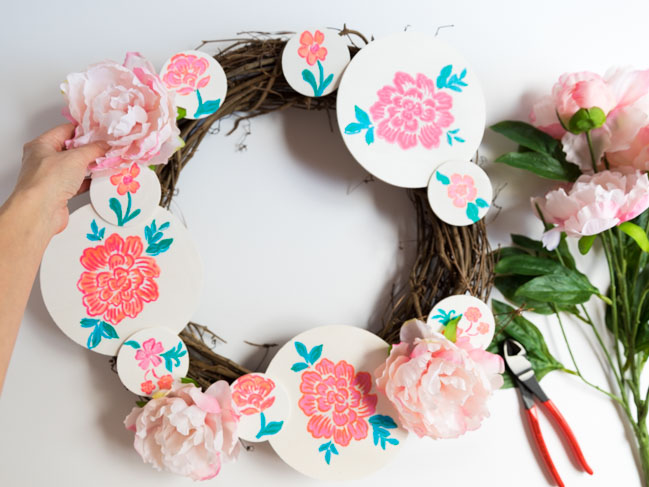
Use a pair of wire cutters to cut the flowers from their stems, leaving about an inch of the stem intact to press into the wreath. Secure in place with a dab of hot glue at the base of the flower.
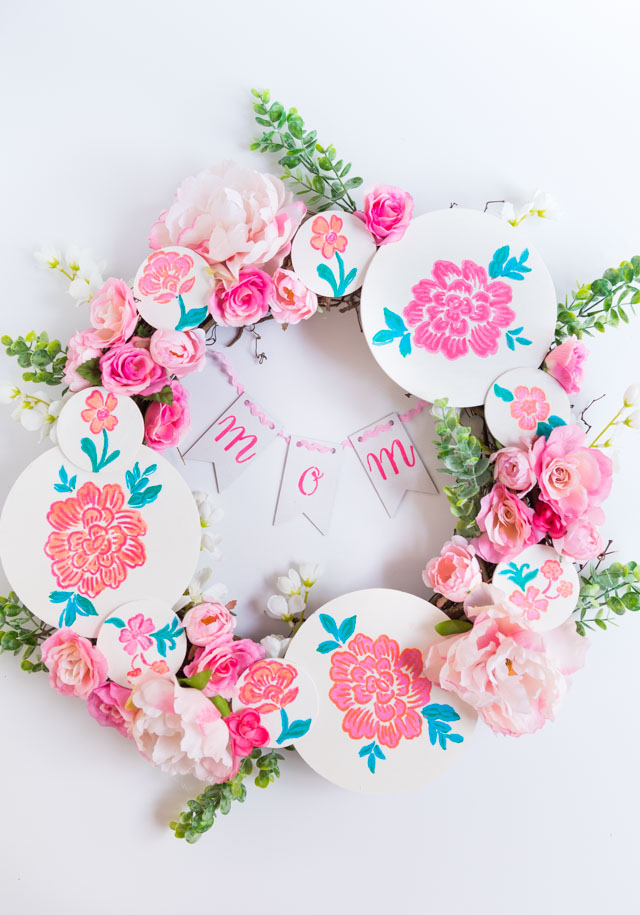
Make it a Mother’s Day Wreath!
Add a Mother’s Day banner
To make your wreath a special Mother’s Day gift, you can add a mini banner to the wreath. Cut banners out of sturdy white cardstock and stencil “mom” onto them with these Martha Stewart letter stencils. String the banner together with a thin ribbon and attach it to the back of the wreath with hot glue.
What mom wouldn’t be thrilled to get this wreath for her front door?
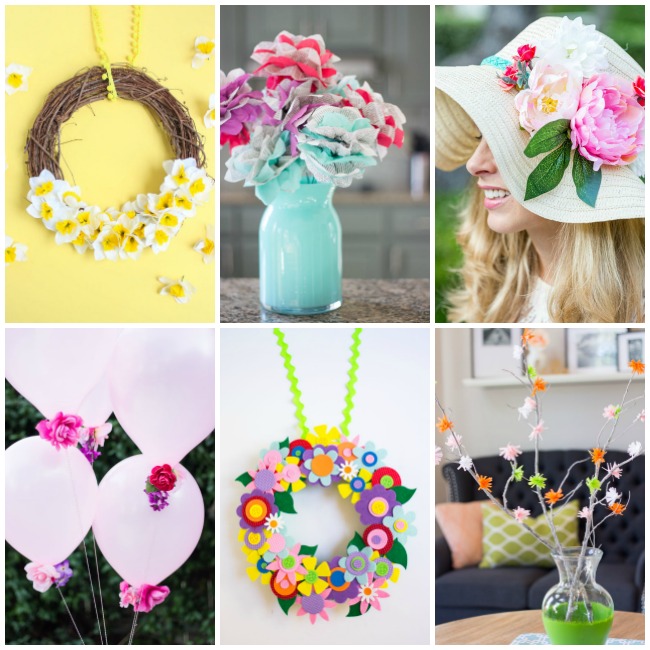
Like this floral wreath for Mother’s Day? Then don’t miss my other flower craft ideas!
This post is sponsored by Martha Stewart Crafts®. All expressed opinions and experiences are my own.


This is such a gorgeous wreath! I love the colors you used on the wood circles. And the flowers add such a pretty touch!
Thanks so much Michelle!
This is such a pretty wreath! I love how you incorporated the floral stencils in with the artificial flowers! So creative!
Thanks Alison! It was the first time I’ve ever added a painted element to one of my wreaths. I’m digging it!
Love this so much! Just ordered the stencils that I’m going to use for another project! Thanks for the inspiration!
karianne
Awesome! I can’t wait to see what you do with the stencils. The layering effect they produce is so cool!
This is beautiful! I love making wreaths and this is a perfect wreath for this season! Pinned!
Thank you so much! It was the first time I’ve ever incorporated painting into a wreath project and I love how it turned out!
Such a sweet Mother’s Day gift idea!
Thanks Shaunda!