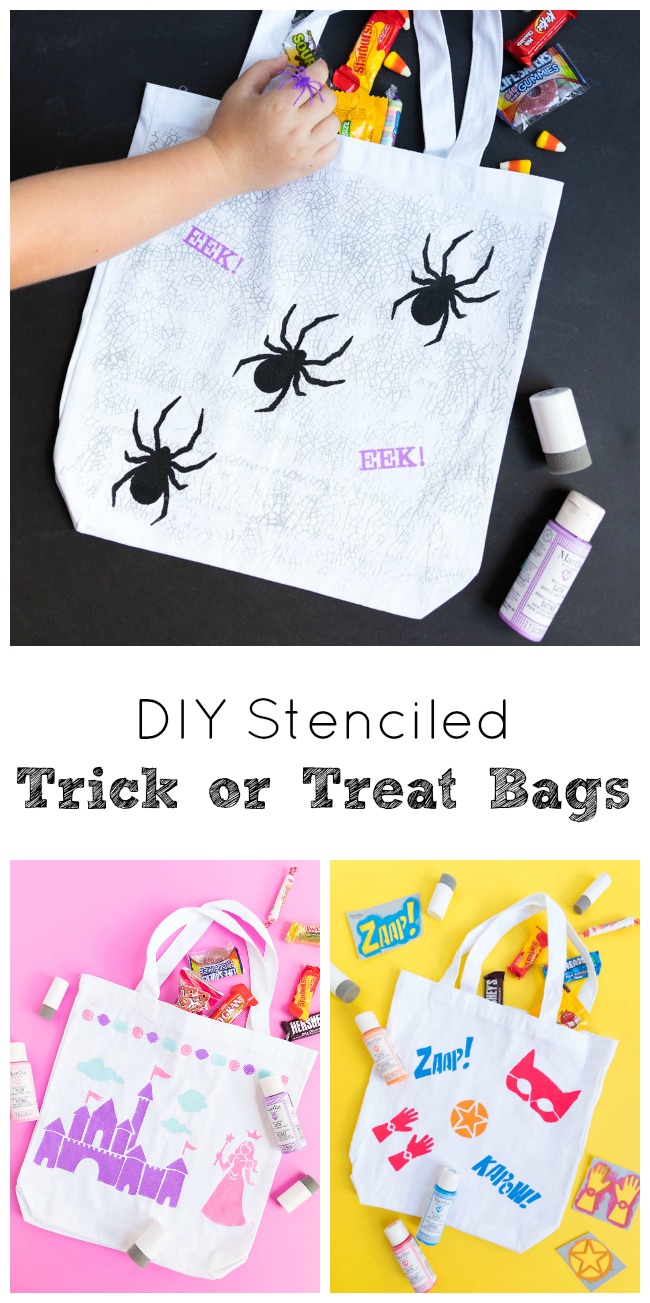
DIY Stenciled Trick or Treat Bags
DIY Stenciled Halloween Trick or Treat Bags
How cute are these DIY stenciled trick or treat bags? With all the excitement around picking a Halloween costume, the trick or treat bag can be an afterthought, but it doesn’t have to be! These bags are fun to make and are a lot more memorable than the traditional plastic pumpkin. I’m partnering with Martha Stewart Crafts® to show how you can decorate a plain white tote bag with Martha Stewart stencils to create just the right bag for your trick-or-treater. Or better yet, let your kids make their own bags!
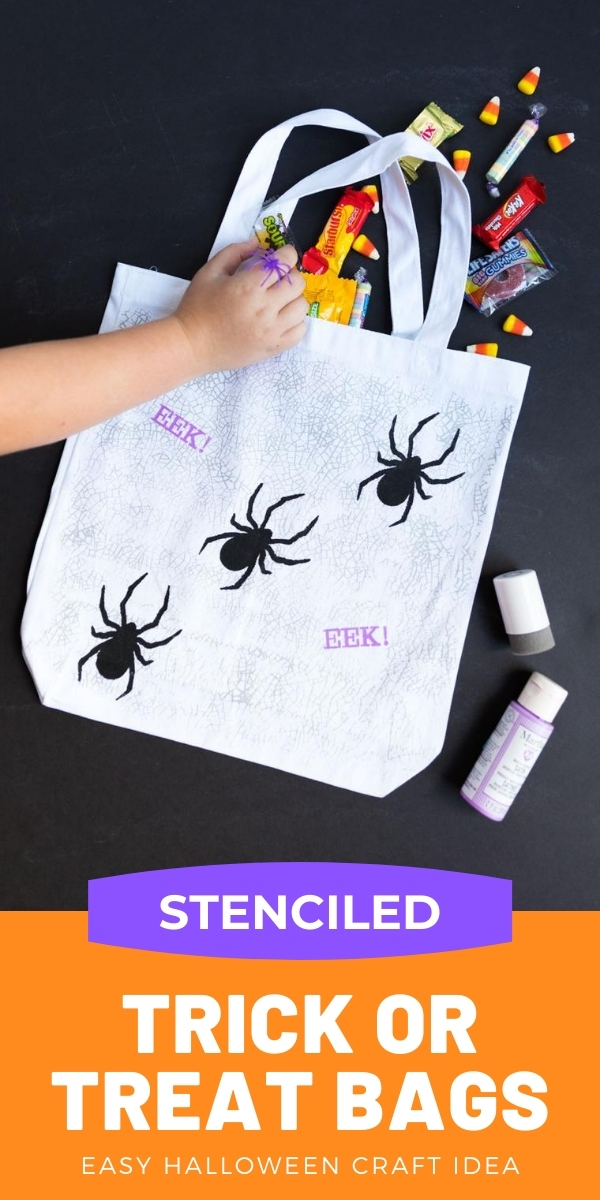
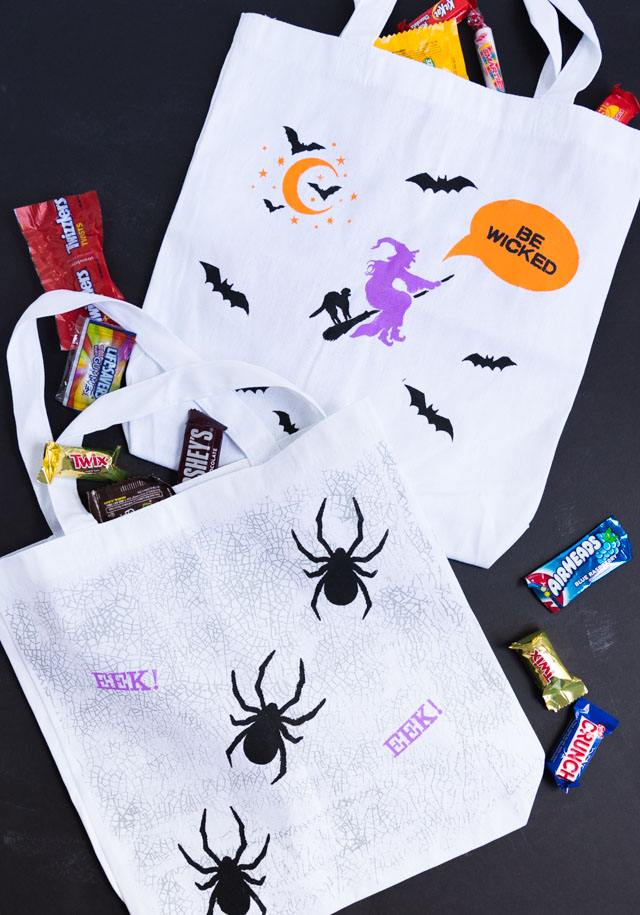
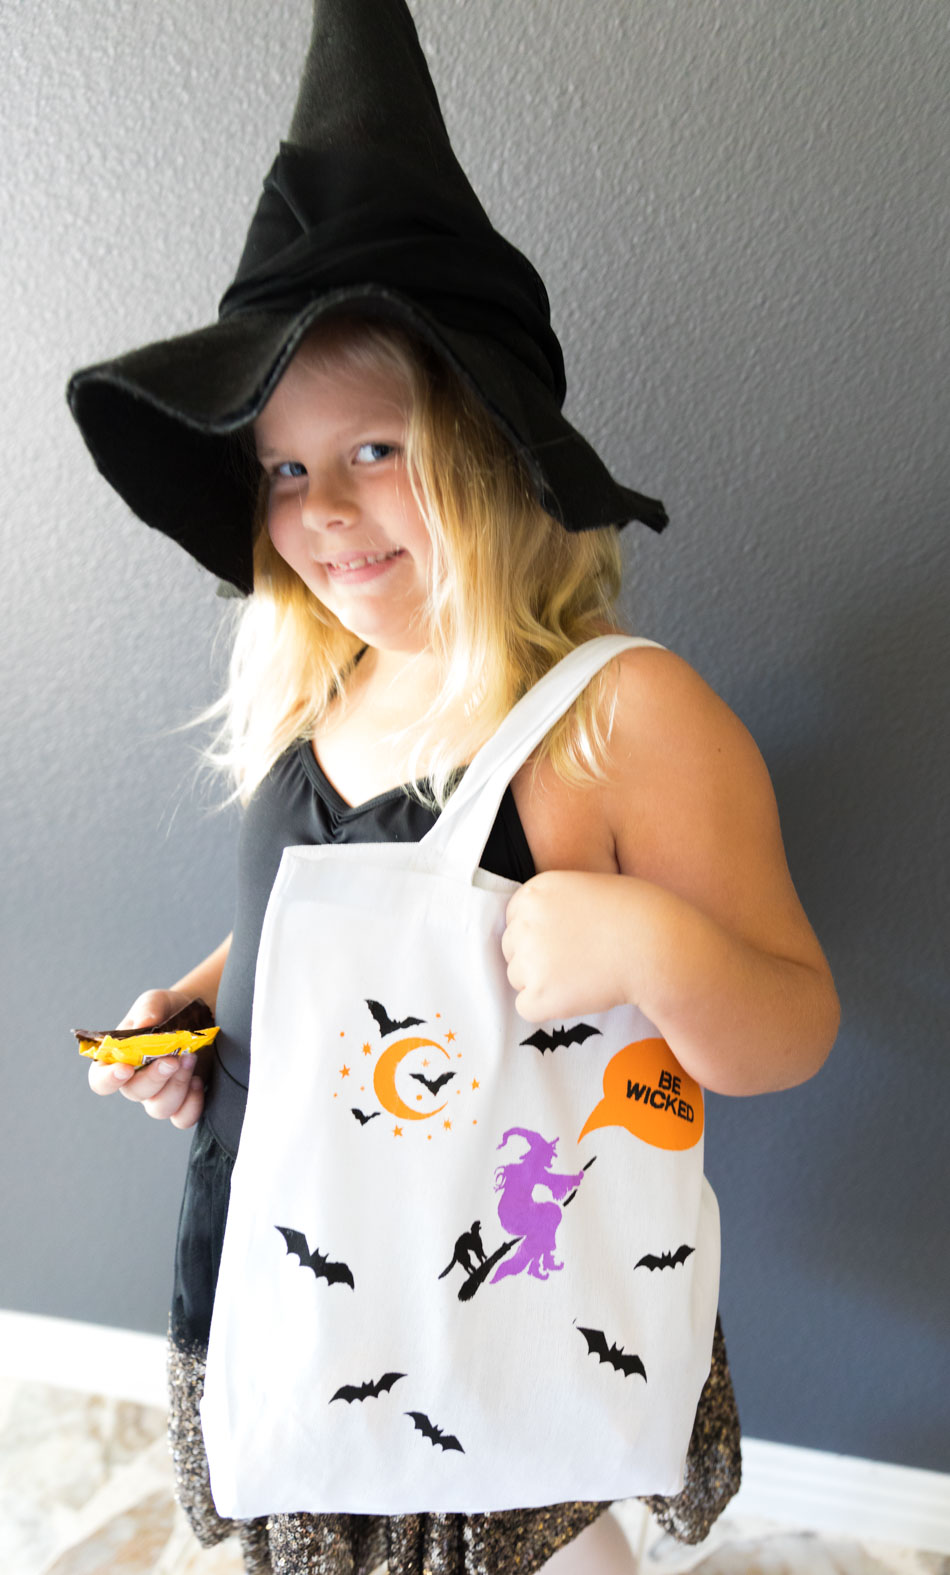
These Martha Stewart Halloween stencils were perfect for creating this witch trick-or-treat bag. I used the same pack to create the spider version above, which also uses a Martha Stewart Crackle Silkscreen for the background.
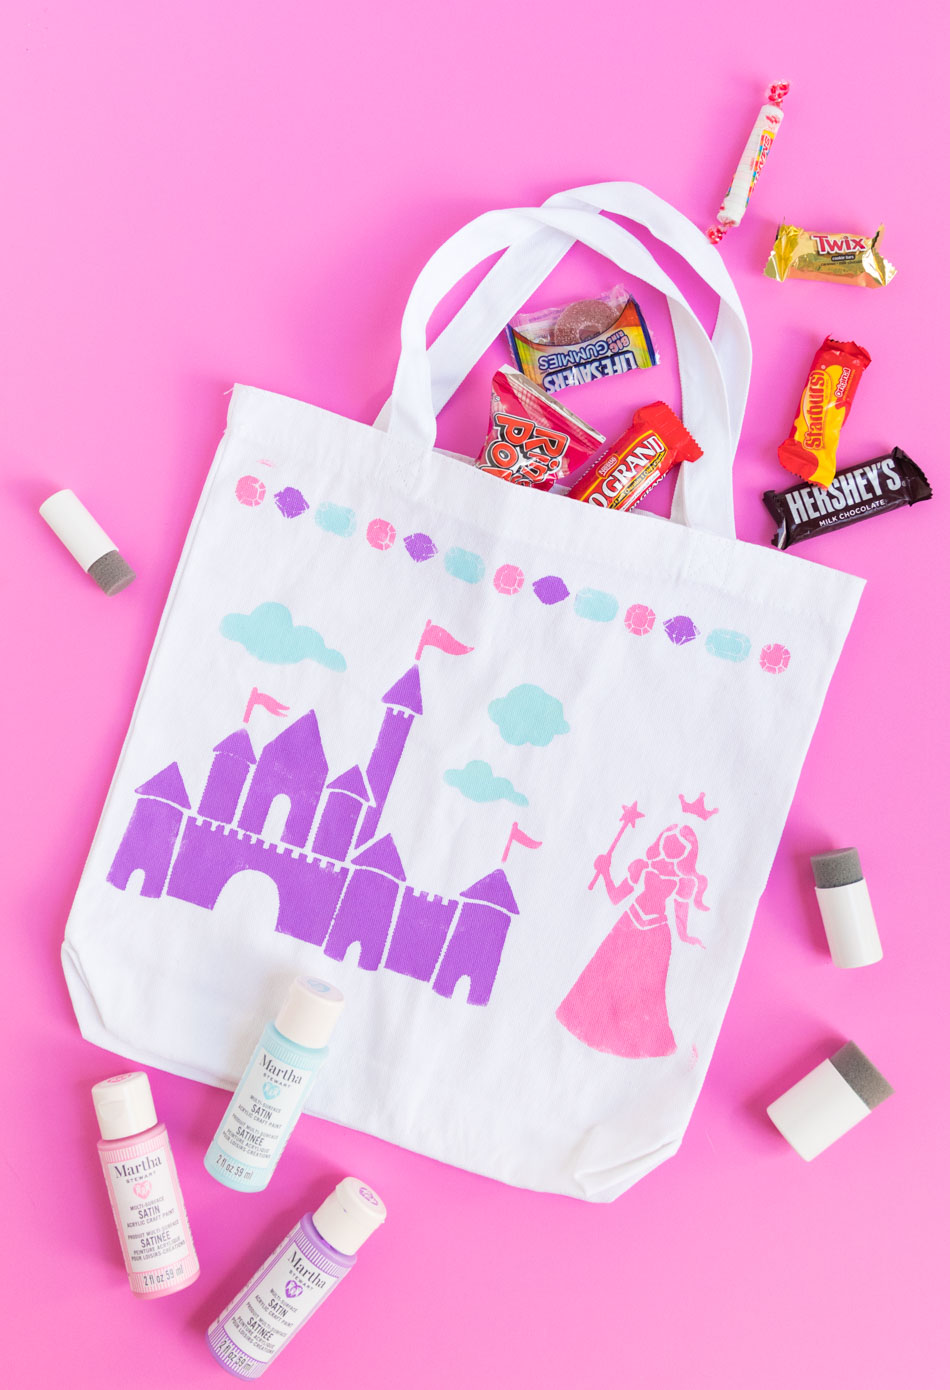
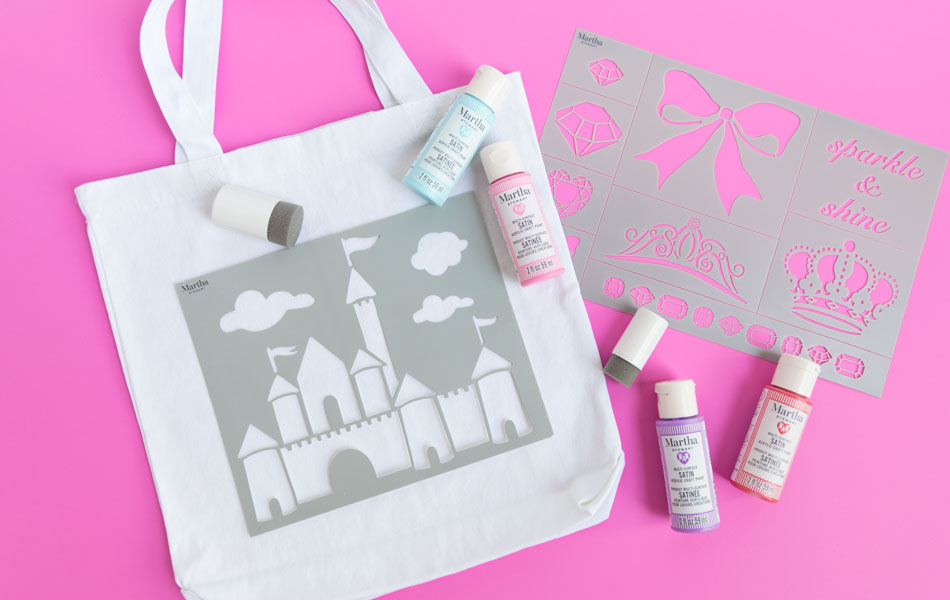
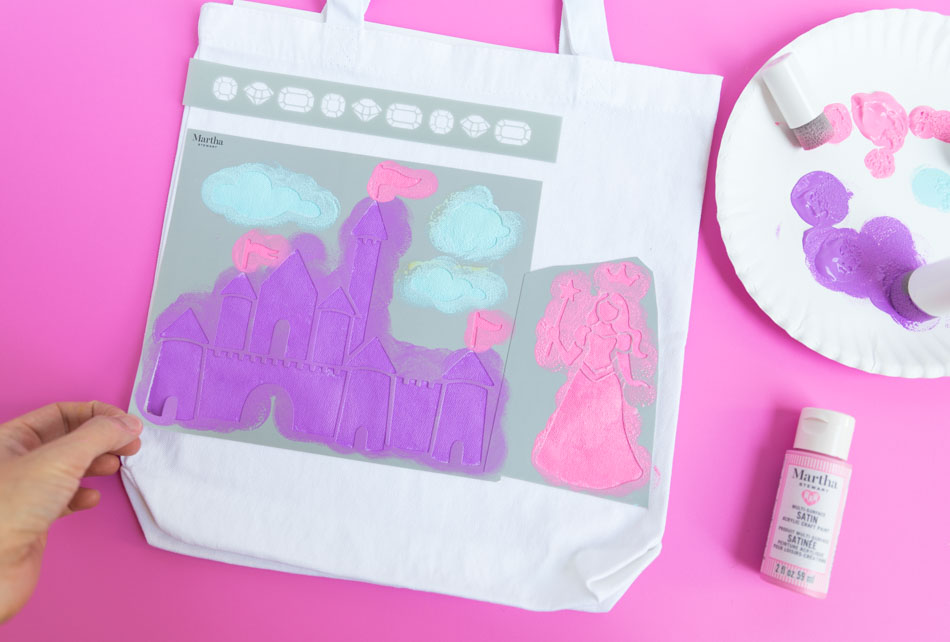
Martha has lots of kid-approved stencils available exclusively at Michaels for you to customize your bag to your child’s costume including these . Have a princess for Halloween? This royal stencil pack is just what you need!
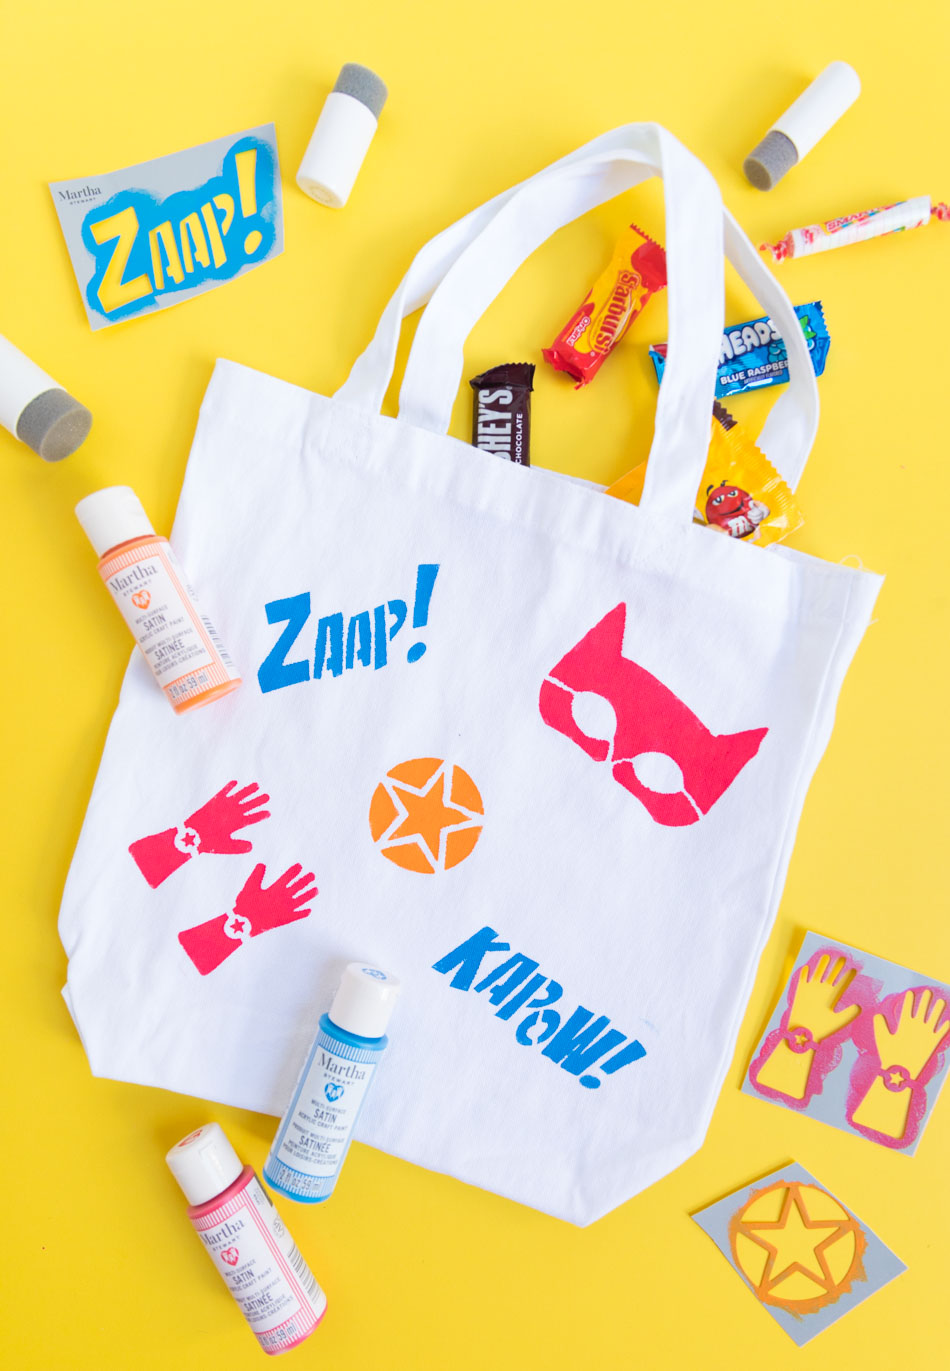
What about a superhero? Then use this Martha Stewart Comics Stencil pack along with bright colors from the Martha Stewart Family Friendly Multi-Surface Paints.
This post contains affiliate links. See our full disclosure.
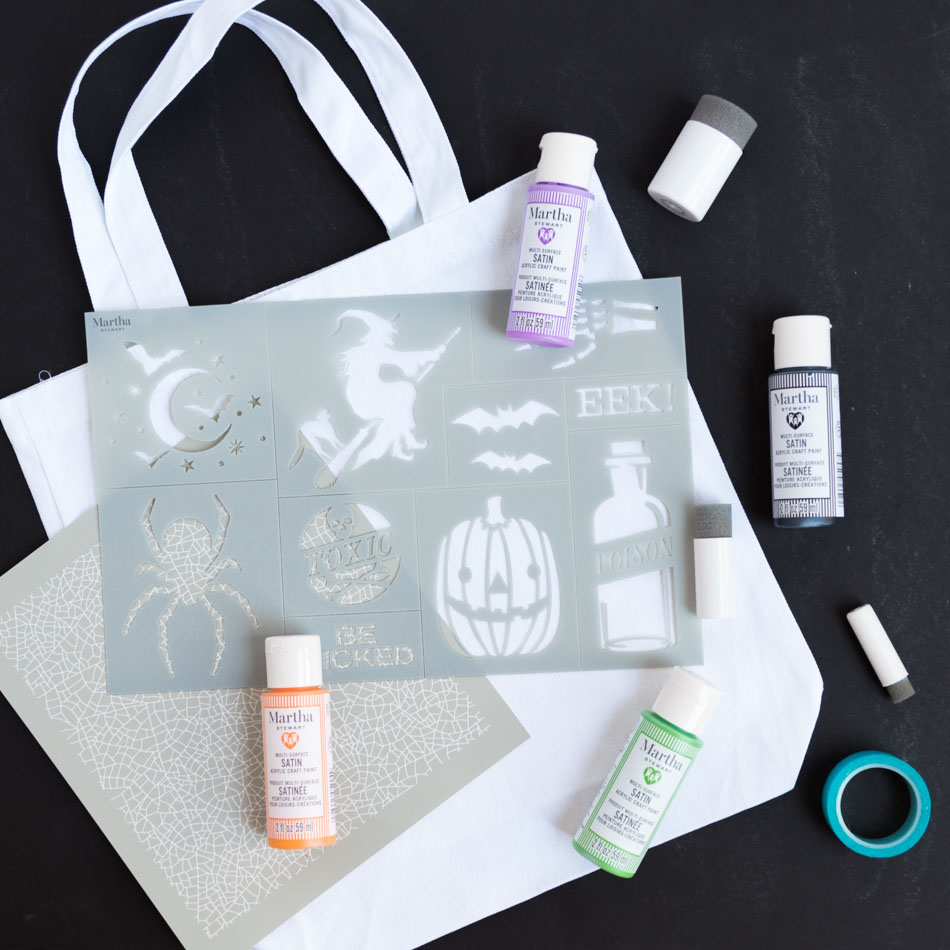
Supplies for DIY Stenciled Trick or Treat Bags
- White canvas tote bags
- Martha Stewart Family Friendly Multi-Surface Satin Paints
- Foam Pouncers
- Halloween Stencils (used for spider and witch bags)
- Martha Stewart Crackle Silkscreen (used for spider bag)
- Knights and Dragons Stencil (used for princess bag)
- Comics Stencil (used for superhero bag)
How to Make DIY Stenciled Trick or Treat Bags
1. Start by ironing the canvas tote bag to remove any wrinkles. Cut a piece of cardboard to fit inside the bag (the packaging from the stencils works great!). This will prevent paint from seeping through to the back of the bag.
2. Choose the stencils you would like to use and cut them out from the pack, leaving plenty of border around them. Peel off the adhesive backing and arrange the stencils on the front of the tote bag.
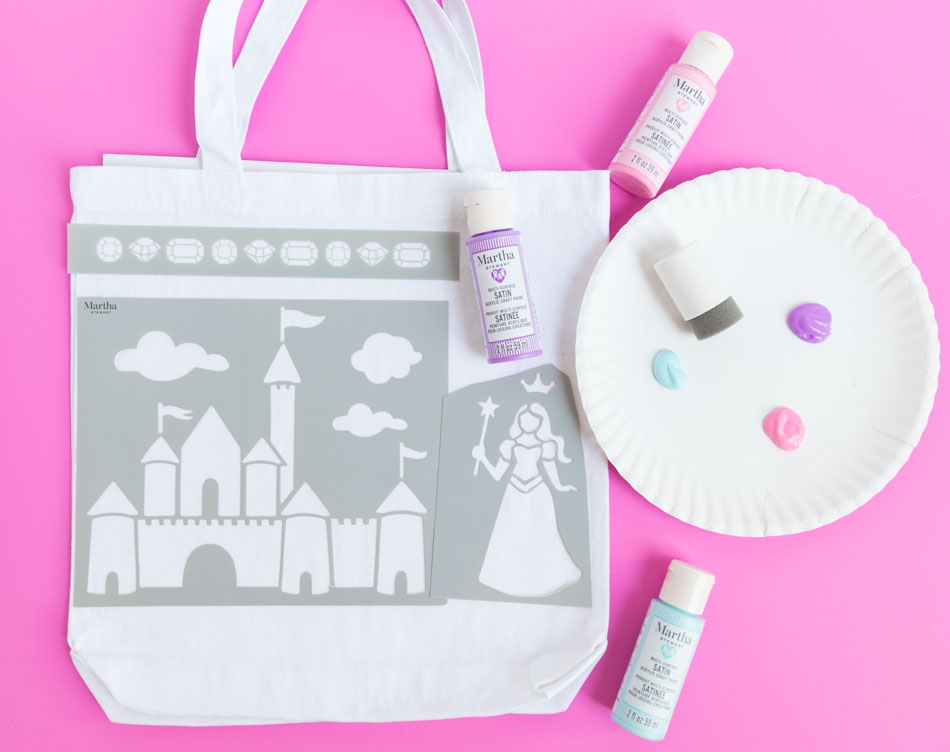
3. Choose your paint colors and squeeze a small amount of each on a paper plate. Press a foam pouncer into the paint and then dab off the excess before applying to the stencil.

4. Continue covering the stencil with paint, working with one color at a time. Carefully peel of the stencil while the paint is still wet to reveal your design. Immediately rinse off the stencil and foam pouncers to keep them working great for future projects.
New to stenciling? Then don’t miss my top 10 stenciling tips!
This post is sponsored by Martha Stewart Crafts®. All expressed opinions and experiences are my own.