Thrifted DIY Serving Tray Makeover!
DIY Serving Tray Makeover
In my mind, you can never have too many serving trays. I have a tower of them in my kitchen cabinet and pull them out daily. They are perfect for taking some snacks outside or treating the girls to lunch in their playroom on a particularly lazy day. They are also great for corralling items on a counter or holding a few candles or a vase of flowers in the center of your table.
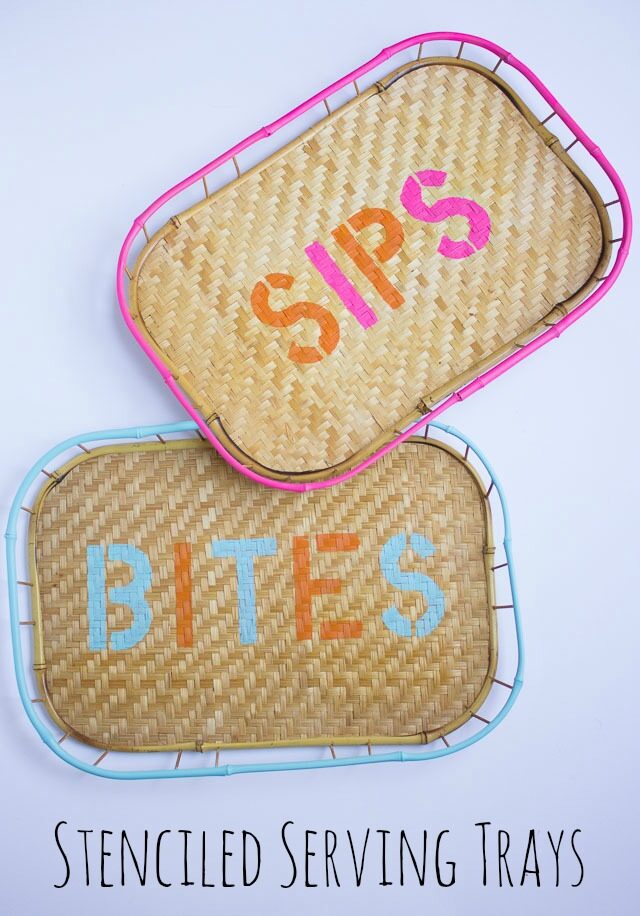
One of my favorite places to find unique serving trays is my local Goodwill. I almost always pick up a new one when I’m in the store for $1-$2 a piece. On my latest visit, I scored a pair of these vintage wicker trays:
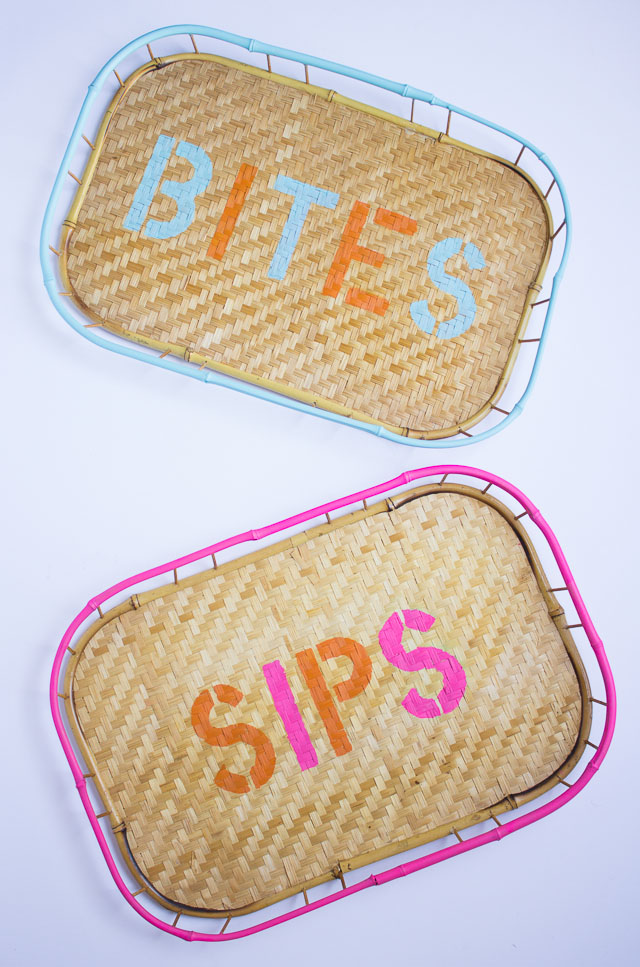
Adding some kitschy sayings in bold letters turned these from plain jane to modern and fresh. They remind me of something you might find at Anthropologie or CB2.

I frequently see these wicker trays at the Goodwill, so you are bound to find them at a thrift store near you. If not, you can apply this technique to any basic tray. Here’s all you’ll need:
Supplies for DIY Serving Tray Makeover
- Wicker serving tray
- Large letter stencils
- Martha Stewart acrylic multi-surface craft paint
- Painter’s tape
- Foam brushes

How to Make Stenciled Serving Trays
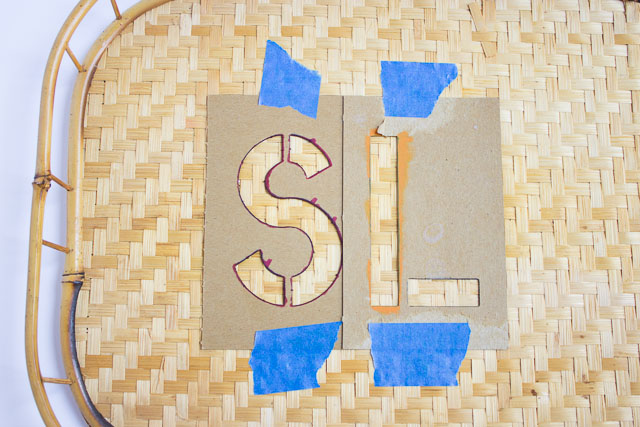
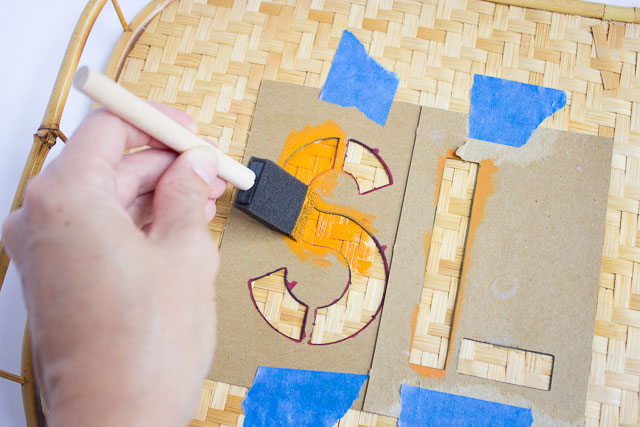
1. Position stencils on tray
Decide what you want to spell and then lay out your stencils in the middle of the tray. You may want to trace the letters with a pencil and then lift up the stencils to make sure the spacing is even before you paint. I used the grid in the woven design as a guide to make sure the stencils were centered in the middle of the tray. Secure your stencils with a piece of tape.
2. Dab on paint
Use a small amount of craft paint on your foam brush to fill in the stencil with an up and down blotting motion. Since the tray is textured, it is important to hold the stencil flush to the tray with one hand to prevent paint from seeping underneath.
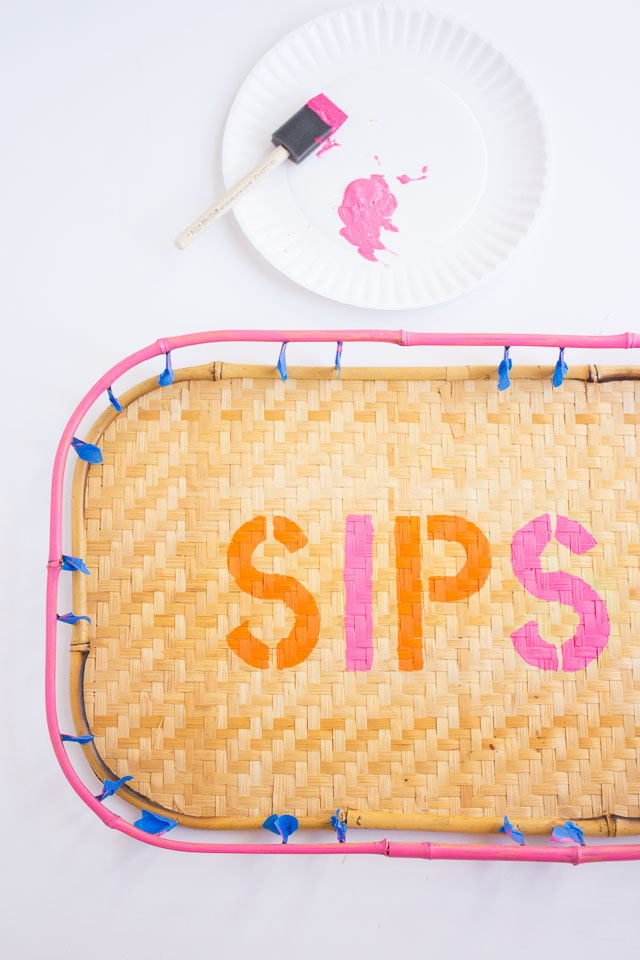
3. Paint rim of tray
For another pop of color you can paint the rim of the tray. I covered the little pieces that connect the rim to the base with painter’s tape and painted the rim with 3 coats.
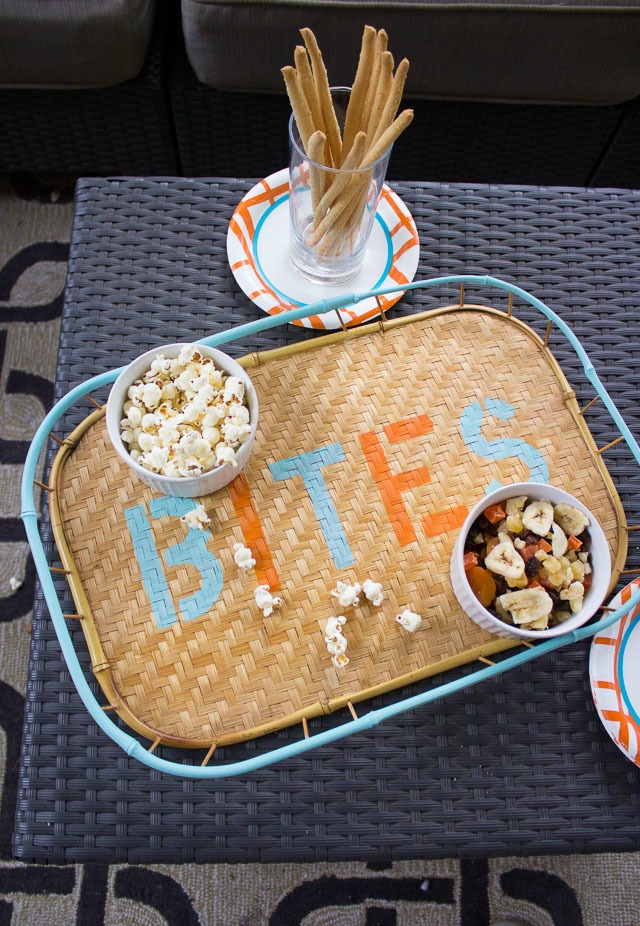
I’m excited to add these to my serving tray collection! I’m also excited to be joining the Goodwill San Antonio blogger team. As a lifelong shopper at the Goodwill, I’m thrilled for the opportunity to help get the word out about this great organization and the amazing finds in their thrift stores. Each month I’ll be bringing you a new DIY using products you can frequently find at the Goodwill. Stay tuned – it’s going to be fun!
Like these painted thrift store trays?
Then don’t miss my Top 10 Thrift Store Makeovers!
This post was written in support of the Goodwill San Antonio. All content and opinions are my own.