Easy Patterned Easter Eggs
Easy Patterned Easter Eggs
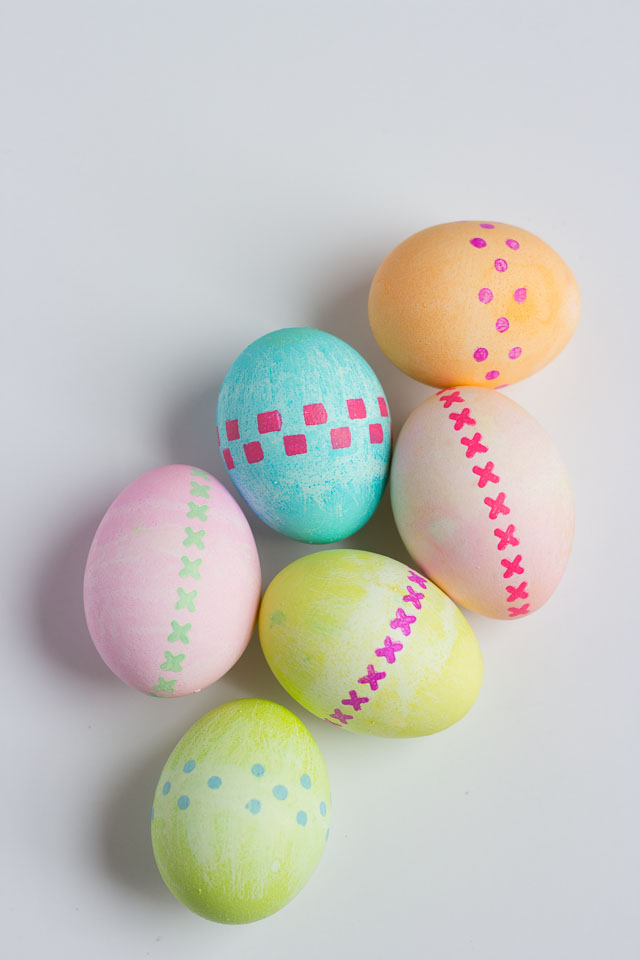
These patterned Easter eggs couldn’t be easier to make! I’ve always loved dying Easter eggs. While there are so many amazing egg decorating ideas out there, usually the good old PAAS dye packs are all I need to be happy. This year, I stuck with this tried and true method but decided to take them up notch with the addition of a little simple stenciling.
This post contains affiliate links. See my full disclosure.
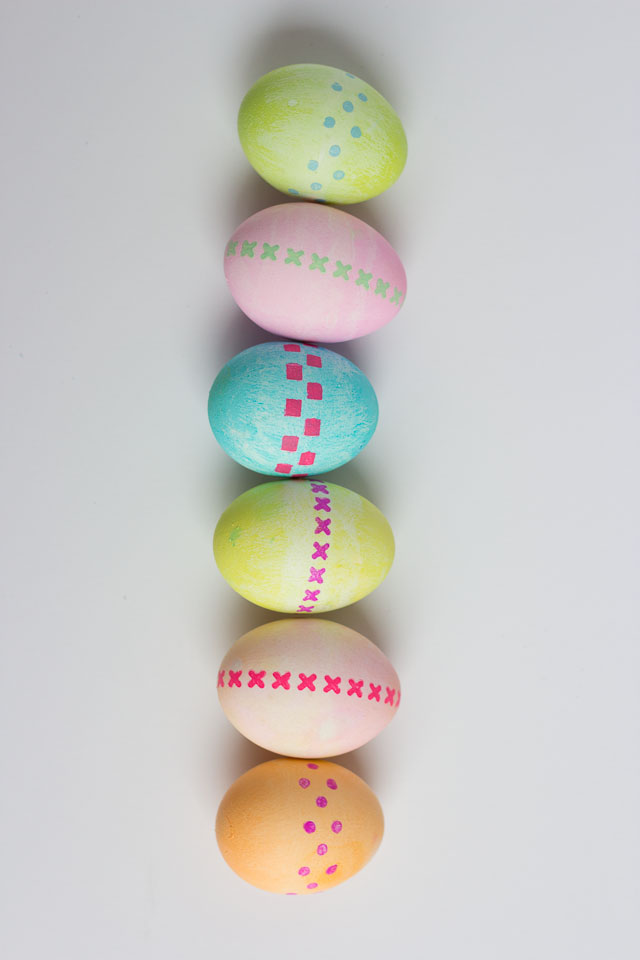
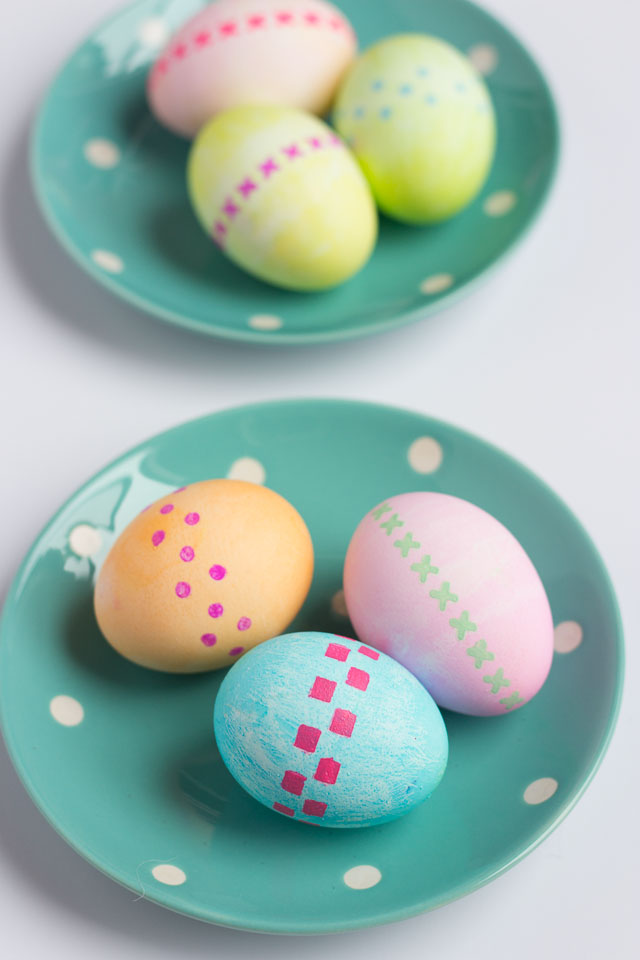
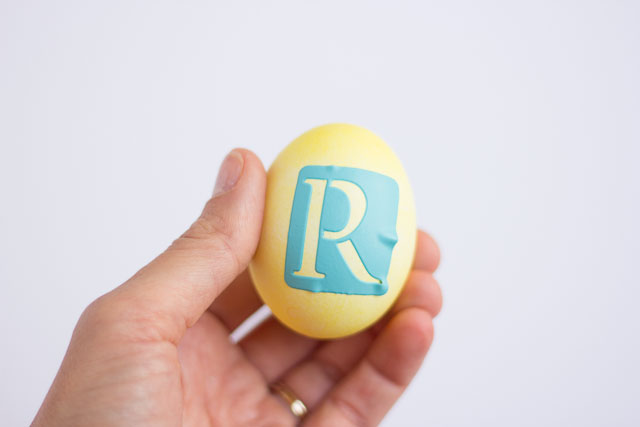
The new flexible adhesive stencils from Martha Stewart made this craft possible. You can wrap them right around the egg and peel them off and reuse them again and again – so cool! While I stenciled real eggs, but for longer lasting results you could use this same technique on paper mache eggs.![]() Just paint the eggs instead of dyeing them. Here’s how to stencil your eggs:
Just paint the eggs instead of dyeing them. Here’s how to stencil your eggs:
Supplies for Patterned Easter Eggs
- PAAS Egg Dye

- Martha Stewart adhesive border stencils
- Martha Stewart adhesive letter stencils
- Acrylic craft paint
- Foam brushes
How to Make Patterned Easter Eggs
Step 1. Dye Eggs
Hard boil eggs and dye according to package directions on PAAS dye kit.
Step 2. Wrap with an Adhesive Stencil
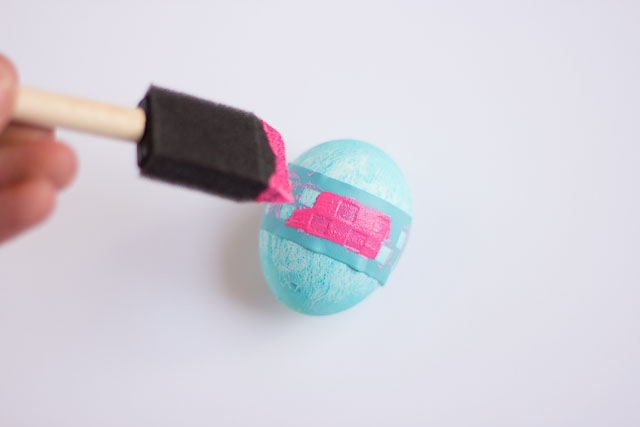
Wrap an adhesive stencil around your egg, smoothing it down with your thumbnail to make sure it is tight against the egg and no paint will seep underneath.
Step 3. Apply Paint
Using your foam brush, apply a small amount of paint all around the stencil.
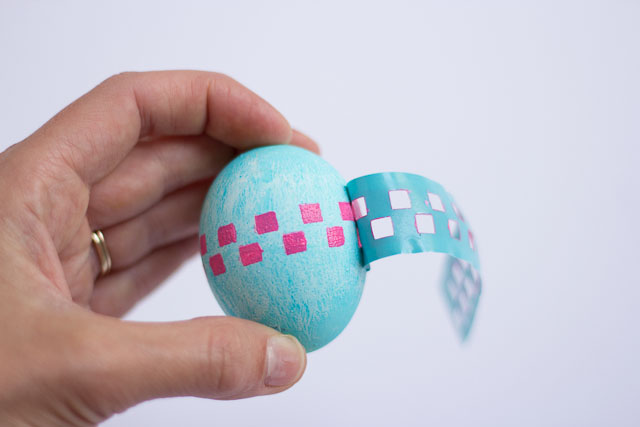
4. Unwrap the stencil while the paint is still wet to reveal your pretty results! Let dry completely – ideally on a drying tray.![]()
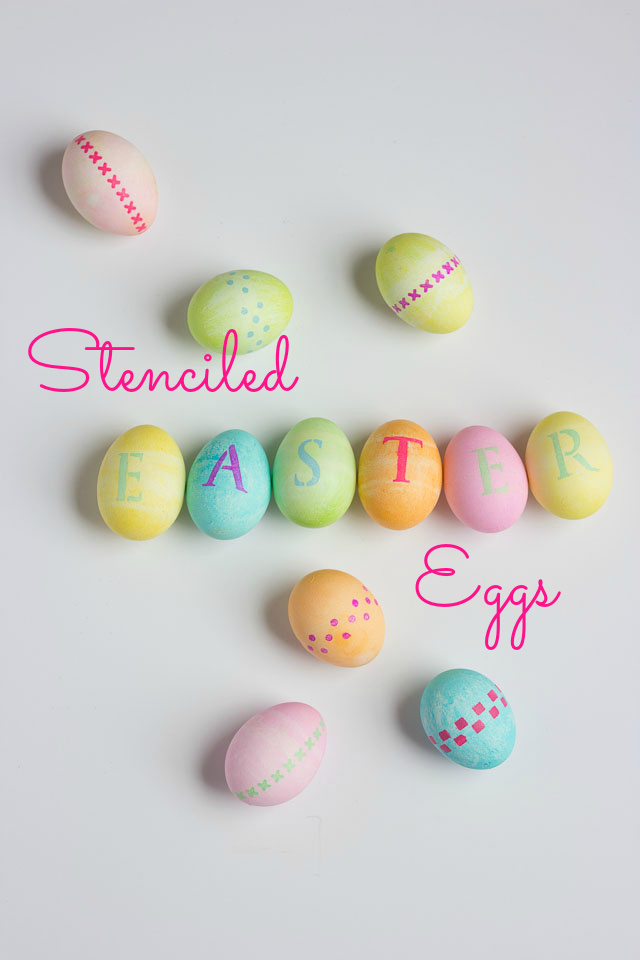
While I used these fun border stencils, the adhesive stencils come in a wide range of designs. Have fun making your own designs!