Plaid Christmas Front Porch Ideas
Plaid Christmas Front Porch Ideas
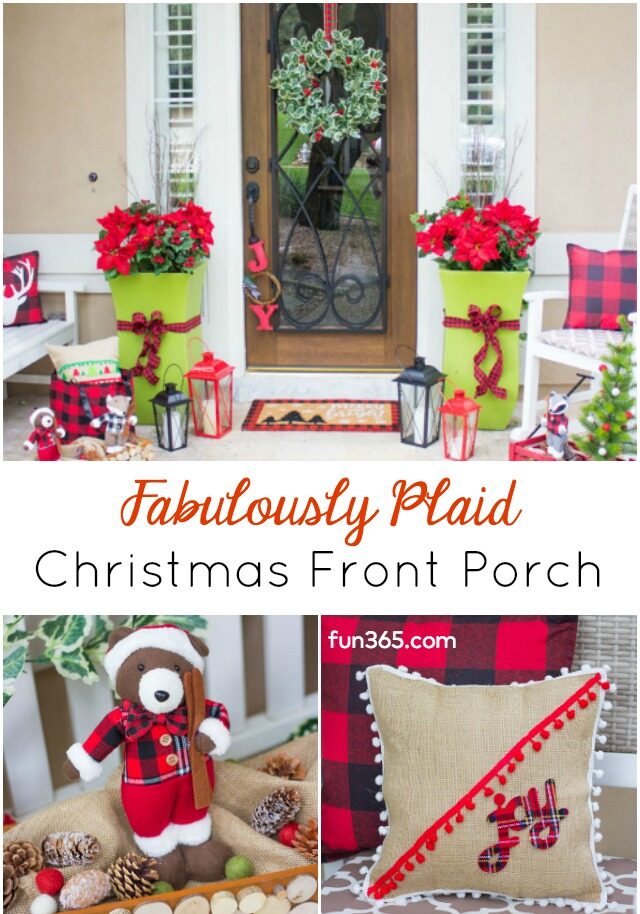
You can’t go wrong with plaid this Christmas, and lots of it! I have been a big a long-time fan of plaid – it is such a classic and perfect for the holidays. You might remember this plaid-filled Christmas table I decorated last year. Well, this year plaid is as hot as ever, especially buffalo check plaid.

My friends at Oriental Trading have a ton of fun products with this print. I partnered with them to create this fabulously plaid Christmas front porch, including some simple projects that you can make yourself like no-sew burlap pillows and a faux holly wreath. A festive doormat is a simple way to change up the look of your front porch for the holidays:

No Sew Plaid Pillows
I love cozying up the small bench on our front porch with different throw pillows that I rotate throughout the year. These buffalo plaid pillows are really nice quality. I also made a few little burlap pillows embellished with pom-pom trim. I added plaid words like “noel” and “joy” to the front. Get all the supplies and tutorial for these no-sew burlap Christmas pillows.

Plaid Woodland Animals
These little woodland animals with plaid outfits were too sweet not to incorporate into my covered front porch. They are actually meant to be tabletop decor. They have flat bottoms so the three animals each stand up easily. The wood planter box that I styled them in is another simple DIY project. I reuse the box often in my fall and winter decorating because it is so versatile.

Holly Wreath with Plaid Ribbon
You know how much I love a good DIY wreath, and this wreath couldn’t be simpler to make with a couple strands of faux holly garland and a plaid ribbon. Get the tutorial here.

Head to Oriental Trading’s Fun365.com for all the details of my plaid Christmas front porch and a full list of supplies!
Like this plaid outdoor decor?
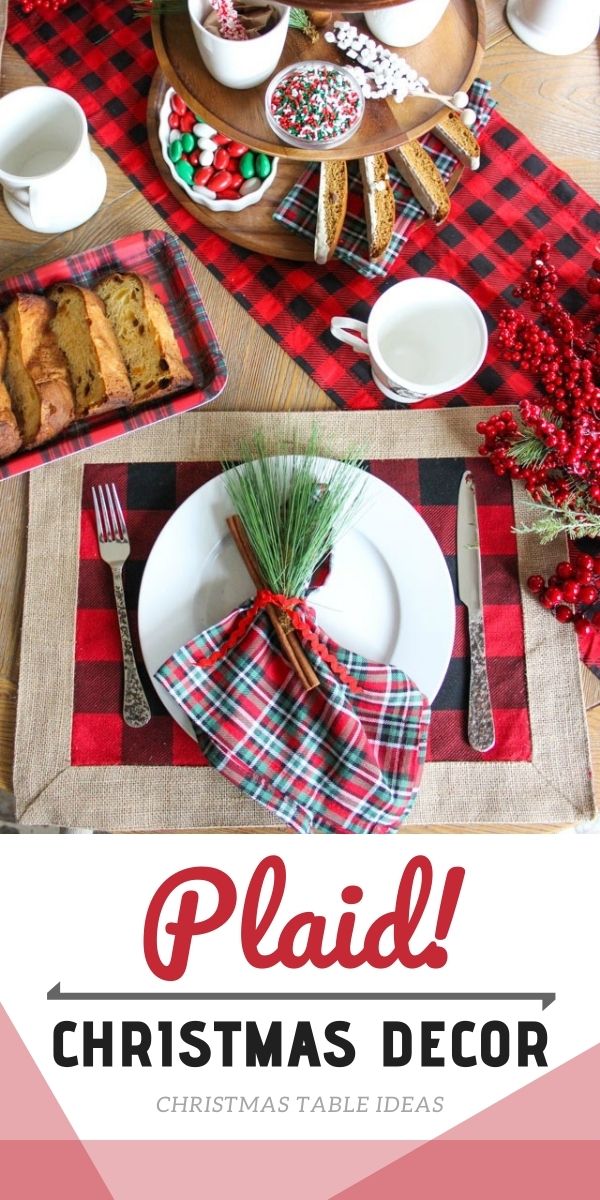
Then don’t miss my plaid Christmas table decor ideas!

Hi,
We publish a monthly publication for Catholic seniors in Northern Illinois. We found your creative ideas and were wondering if you would let us run one of craft ideas each month, with pictures, and give credit to your site?
Please let me know if you are interested.
Hi Julie, you are welcome to share a single photo of the finished craft along with a link back to Design Improvised for the step-by-step tutorial.Thanks! Haeley