7 Simple Steps to Organizing Your Paper Clutter!

How to Organize Paper Clutter
Who else feels like they are constantly dealing with paper clutter? The start of school means the start of a daily flow of paperwork that gets piled up on the kitchen counter – school projects, forms to fill out, homework to do, lunch menus, the list goes on! Not to mention, so many dates of upcoming events that need to be added to the calendar before they are forgotten. Even if you don’t have kids, the everyday mail and bills can quickly pile up in a big mountain on the kitchen counter.
This built-in desk area in our kitchen is used a lot and because it is the landing spot for all incoming paperwork, it can get quickly cluttered. Not exactly what you want when it is right in the middle of the kitchen! Here’s how I’ve been able to keep it looking good with the help of some Office by Martha Stewart products and a few organizing tricks:

My Favorite Storage Solutions for Paper Clutter
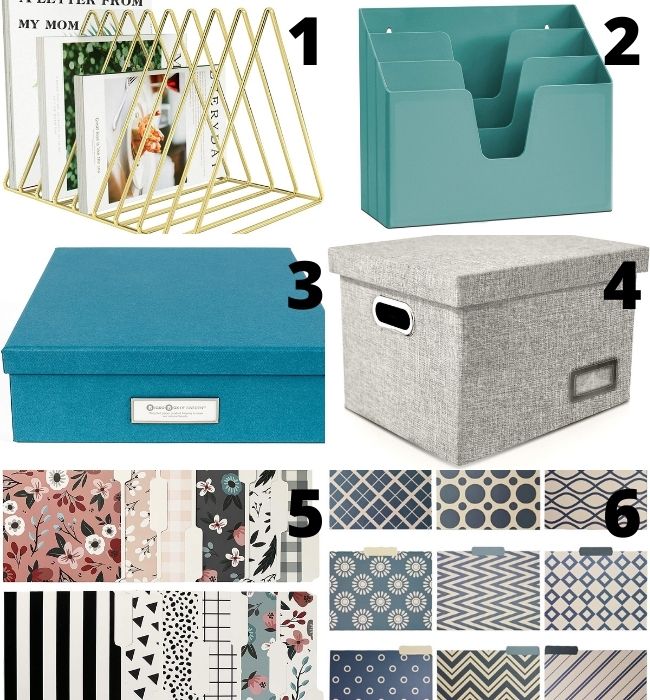
- Gold triangle desktop file organizer
- Mint green file organizer
- Document letter box
- Fabric file storage box
- Decorative file folders
- Blue decorative file folders
7 Steps to Organizing Your Paper Clutter
1. Create categories
Figure out the types of paperwork you’re typically dealing with and organize them around these categories. My most common categories are:
- Kids artwork and school projects
- Mail / bills to address
- Receipts
- Coupons and gift cards
- Tax documents
- Mementos
- Other documents to file (medical, home repairs, insurance, etc.)
- Misc. info (flyers, business cards, etc.)
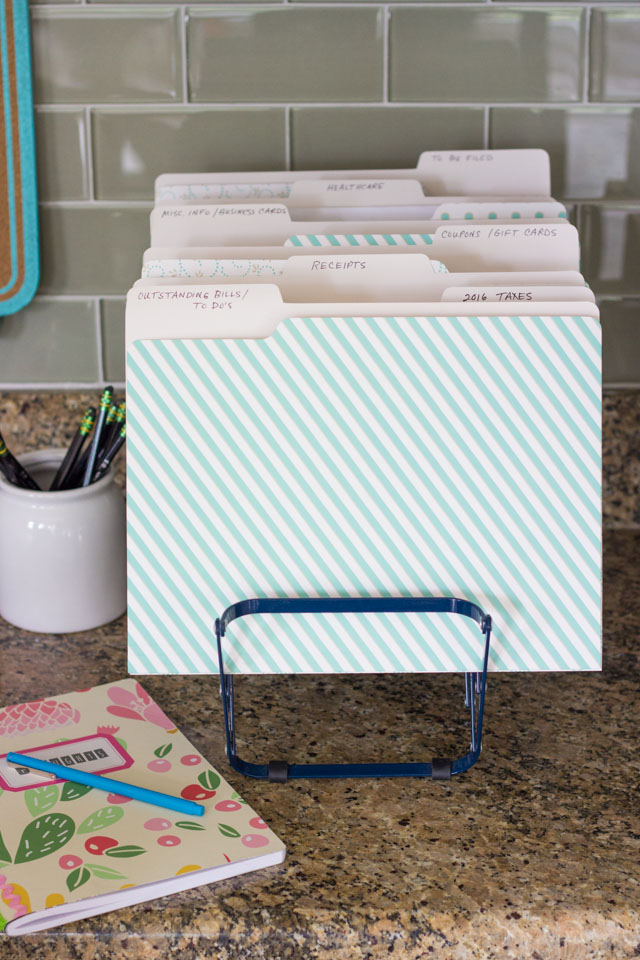
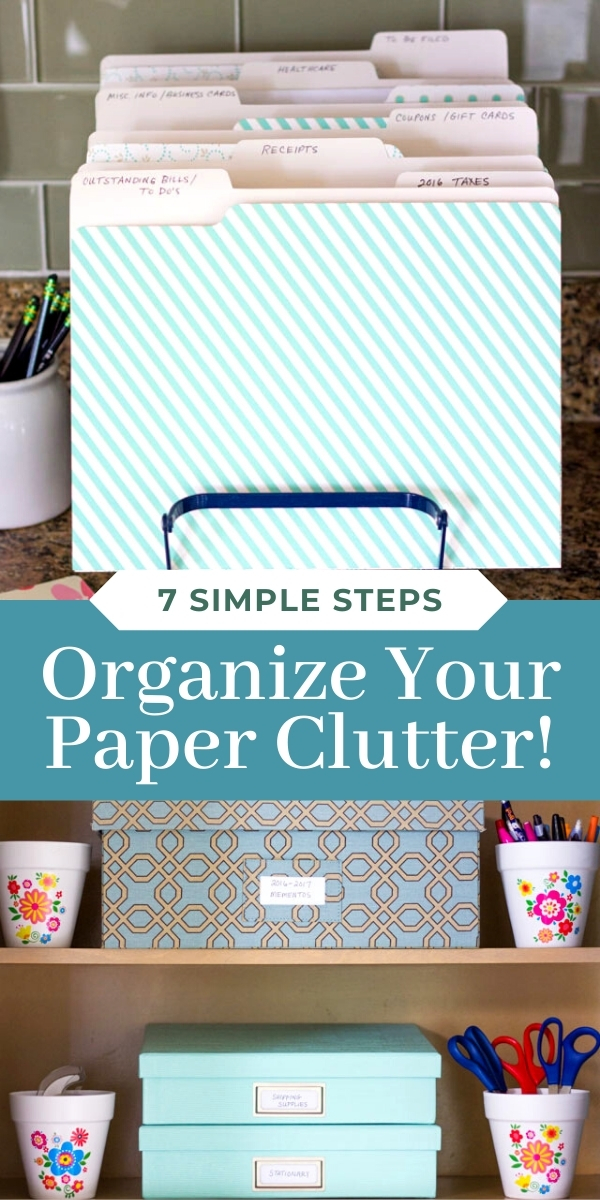
2. Use file folders for your most common categories
This set of file folders organized in an expandable file rack has been my most effective organizing tool, and one I’ve been able to keep up for several years. I recently refreshed my folders and created a folder for each of my top categories. Any time I’m sorting through mail or paperwork, I can easily slot them in their respective folder. Once the folders are looking overstuffed to the point I can’t fit anything more in (about every few months), I pare them down by throwing out old receipts and papers I don’t need anymore, and filing away documents I want to keep long term.
I think the reason why I’ve been able to keep this system up for so long is because the files are right there on the desk. I don’t have to even bother opening a drawer or getting out a binder, I can just quickly slot things away, almost as easy as piling them on the counter. 😉
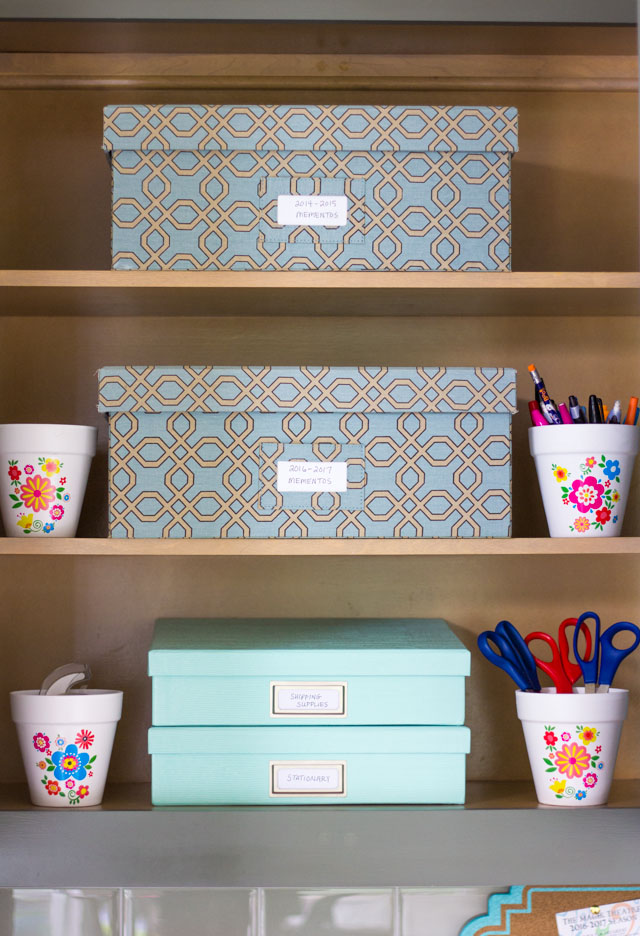
3. Use boxes for larger or less frequently accessed paperwork
I used a combination of paper file boxes including these pretty fabric covered boxes I’ve had for years to store the following odds and ends:
- Stationery (greeting cards, thank you notes, etc.)
- Shipping supplies (stamps, envelopes, packing tape)
- Checkbooks
- Mementos (see below)
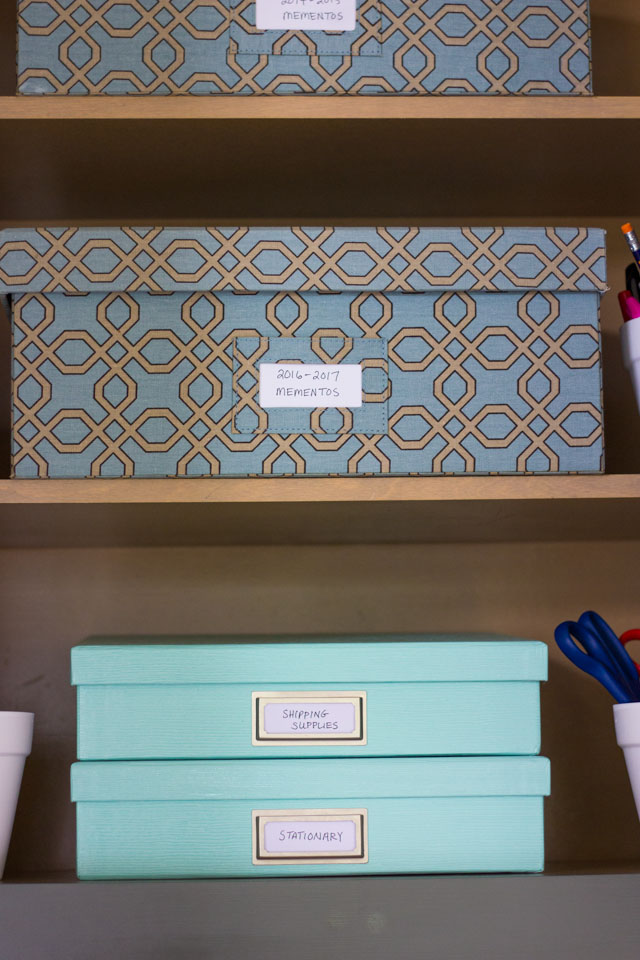
Boxes have been my go-to solution for saving mementos (kids art, birthday cards, awards, school programs, etc.). While I have big goals of eventually putting these into a nice scrapbook someday, I’ve come to the realization that it will likely never happen! So instead, I try to limit what I keep and for those things I do, I store them in a pretty box in hopes that one day I’ll want to go through them and reminisce! I can get a few years worth of stuff in one box. If I get to the point of having too many boxes, I’ll eventually have to dedicate some time to culling through it all!
I also keep two large file boxes in a closet that contain all of our important long term documents such as:
- Tax returns
- Insurance forms
- Auto registration and repairs
- Home repairs receipts
- Bank / investment account info
Every few months I move the paperwork from my “to be filed” folder on the counter to one of these boxes. For whatever reason, this system seems to work well for me!
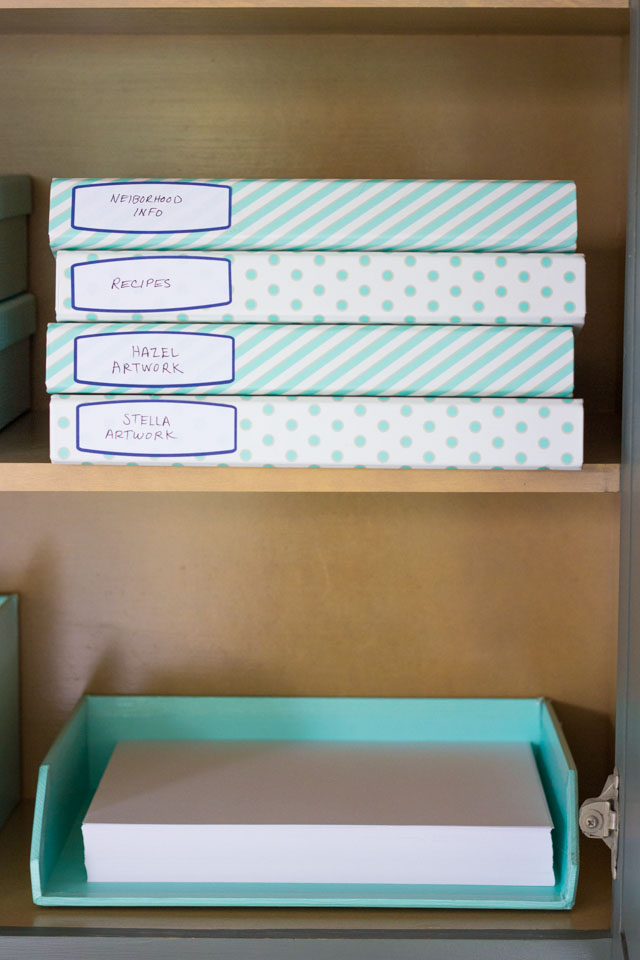
4. Use 3-ring binders for papers you like to page through
I also love using 3 ring binders with clear sheet protectors for a couple things in particular:
- Kids artwork – Stella and Hazel are drawing and creating all the time, and I can’t bear to throw much of it away. Instead, each of them has their own 3 ring binder with sheet protectors in it, and every few months, they go through their stack of drawings and choose the ones they want to keep by slotting them in their binders. I’ve found it to be a great way to get them involved, and they love looking through their past artwork and showing it off to grandparents when they visit.
- Recipes – while I get so many of my recipes online anymore, I still can’t resist to tear out a good recipe I want to try from one of my many magazines. The easiest way for me to keep them organized is to slot them in a sheet protector within a 3 ring binder. It’s like creating your own personal cookbook. 😉
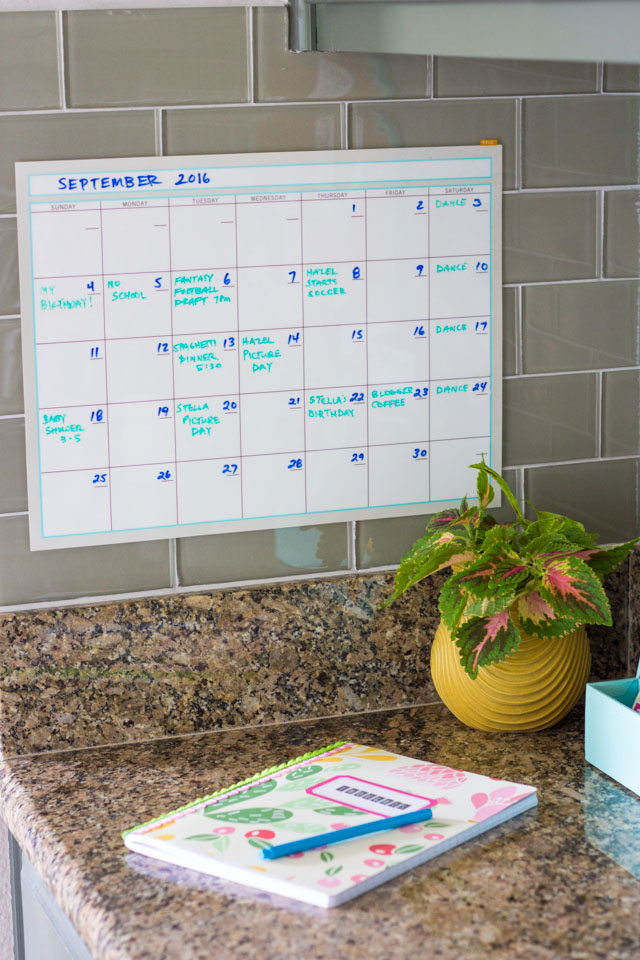
5. Get dates on the calendar quickly
When I’m going through the girls’ school papers, I try to get any upcoming dates on the calendar right then. Otherwise the paper ends up in a stack and I can easily forget about it. I like having a calendar right at my desk, like this dry erase calendar.
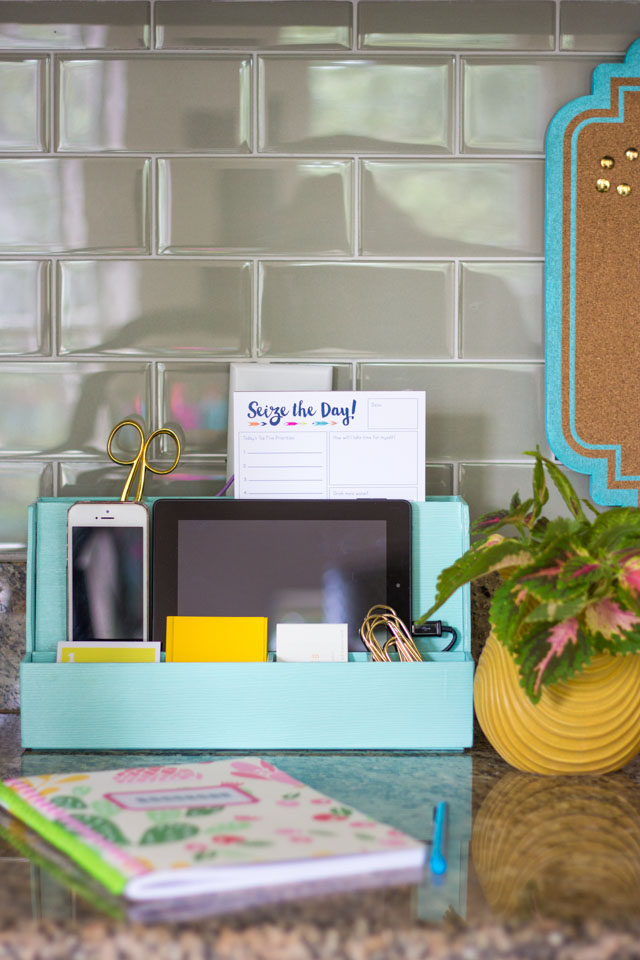
6. Keep post-it notes and small notebooks nearby
I always need small pieces of paper to jot down a reminder or a to-do list. This tech organizer not only keeps all your devices organized, it also has room for a few small notepads and post-it notes.
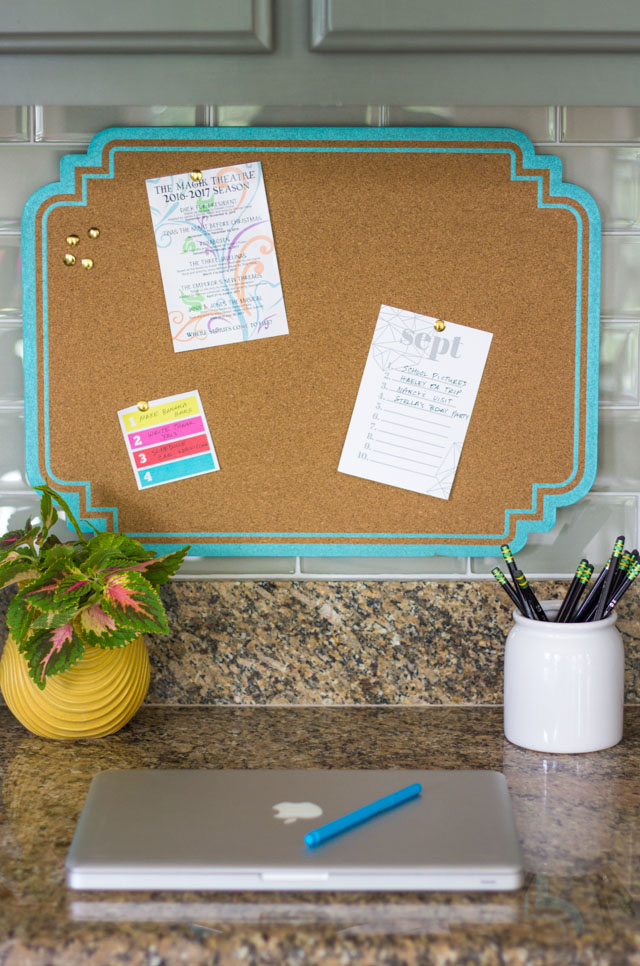
7. Keep important reminders in front of you
To keep all my post-it note reminders and important to do’s from cluttering my desk space, I keep them on this pretty cork board. That way they are right in front of me when I’m working at the desk and can’t be ignored!
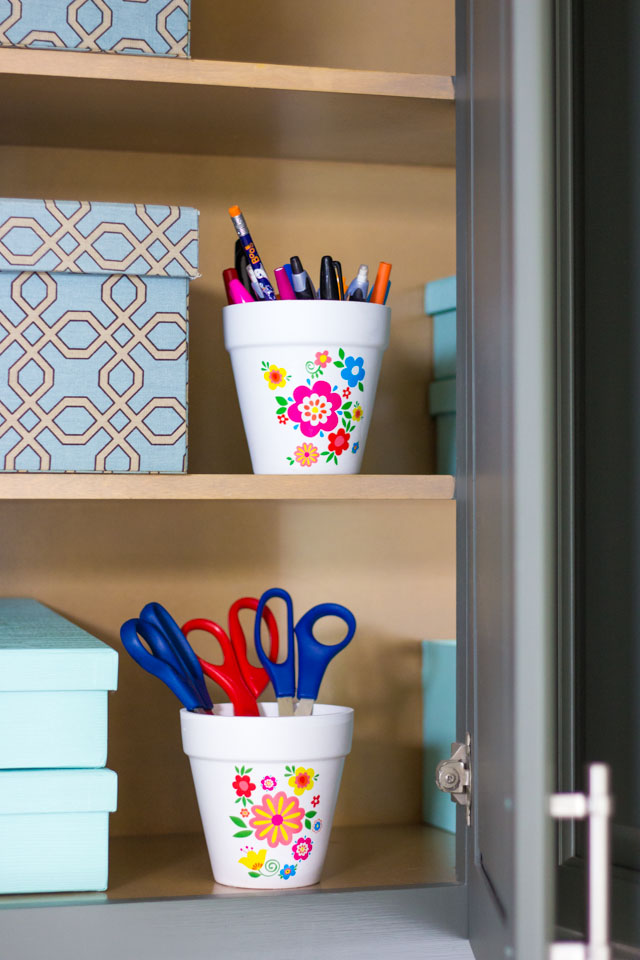
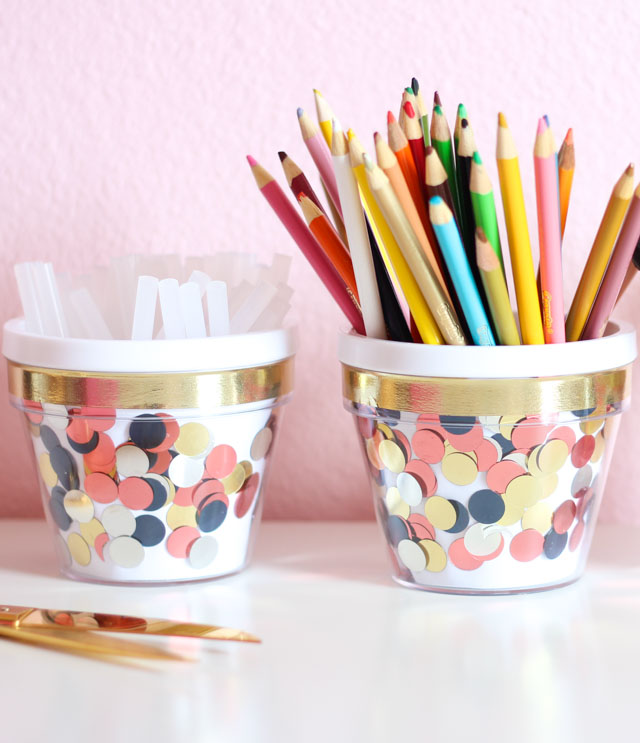
Once you’ve got the paper under control, you can tackle the rest of your office supplies. 😉 I rounded up my scissors, pens, pencils, and tape in these cute little flower pots.
There you go, those are the organizing tricks that work for me when it comes to reigning in paper clutter. I hope you’ve found a couple that work within your own system at home!
Like this organizing project?
Then don’t miss my 10 Simple Steps to Organizing Your Pantry!
This post is sponsored by Martha Stewart Omnimedia as part of the 12 Months of Martha program.
Oh wow! Some lovely ideas that I will definately incorporate in the new year. Thanks a lot!
I’m so glad you found them helpful Amanda!
This is amazing. So detailed and so easy to set up and use. You’ve done a good job of explaining it all, from beginning to end. It’s so much better than the ways I’ve tried to manage. I have a spot just like this and you’ve shown me exactly how to reorganize it. Thank you.
I”m so glad you found it helpful! Good luck with your paper organizing!