DIY Vintage School Desk Makeover
DIY Desk Makeover
Introducing my DIY desk makeover! It’s so tempting to take home furniture in need of a little TLC from my frequent trips to the Goodwill, but I often resist the temptation because I know I don’t have the patience for full-on furniture makeovers and the pieces end up sitting in a closet. Well, with this vintage school desk I couldn’t resist! Luckily I came up with a makeover that you can do in less than an hour and under $15 if you have a similar desk at home.

I love the look of these old school desks with a little compartment to store your books and pencils. It brings back grade school memories, doesn’t it? This one looks shiny and new after a coat of metallic copper spray paint.

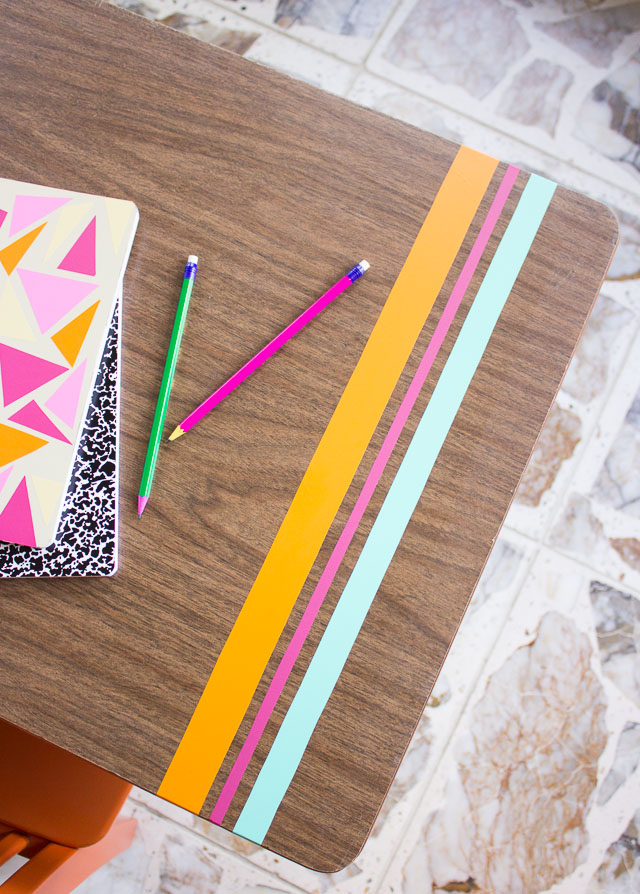
Since the top was in good condition, I chose to keep the wood laminate as is rather than paint it, and instead give it a modern touch with a few strips of colorful vinyl leftover from these colorful vinyl covered notebooks I had made.

I had initially thought about painting on stripes, but the vinyl is such an easier option because it takes minutes to apply and it’s removable so I can always peel it off if I want to change up the look!

This post contains affiliate links. See my full disclosure.
Supplies for DIY School Desk Makeover
- Vintage school desk (check thrift stores or Craigslist – I scored mine at the Goodwill!)
- Spray paint (I used Krylon Metallic Copper)
- Vinyl (I used 12×24″ sheets of removable vinyl)
- Scissors

Here was the treasure trove of desks at the Goodwill. They had just gotten in a bunch from a local school and were looking to get rid of them so had marked them down from $7 to $4 each. What a steal! I looked for one with the fewest dings, and I loved the legs of this particular desk.

Steps for School Desk Makeover
Step 1: Clean desk
Clean off the desk with a damp cloth with soap and water. I also used Goo Gone to remove some sticky tape residue from the top of the desk.

Step 2: Prep for spray paint
Tape off the areas you don’t want to spray paint. The top of the desk was in good condition so I decided to keep it the wood tone. I covered it with a plastic garbage bag and taped around the top with painter’s tape. I then covered the base and legs of the desk with a few even coats of spray paint, allowing to dry a few minutes between coats.

Step 3: Measure and cut vinyl
Cut strips of vinyl in various widths. I used the grid on the vinyl backing as a guide when cutting my strips carefully with scissors. Then peel off the backing and smooth down on the table. I used a ruler to help make sure I laid my initial piece down straight. Smooth out any air bubbles and repeat with the other vinyl strips.


This was such an easy-peasy project that you can do in an hour (plus drying time) and the results are so fun!
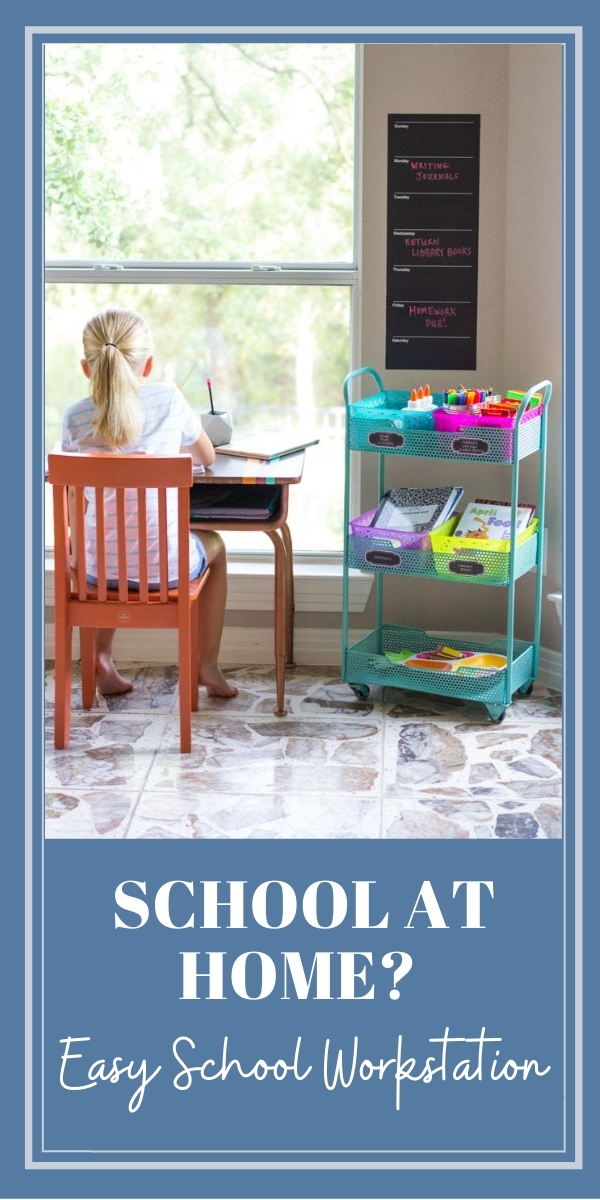
Check out how I used this desk for my DIY Homework Station!
This post is written in support of the Goodwill San Antonio. All content and opinions are my own.


Did the legs get scratched up? Wanting to paint mine but not sure if I need to seel it?
No, the spray paint has adhered really well to the legs – no scratching!