Gym Locker turned DIY Wine Locker!
DIY Wine Locker
I love the trend of bringing vintage lockers into the home as storage pieces. They look so cool, but the question becomes, what do you put in them?
WINE, OF COURSE!!

This post contains affiliate links. See our full disclosure.
Gym Locker Turned Wine Locker
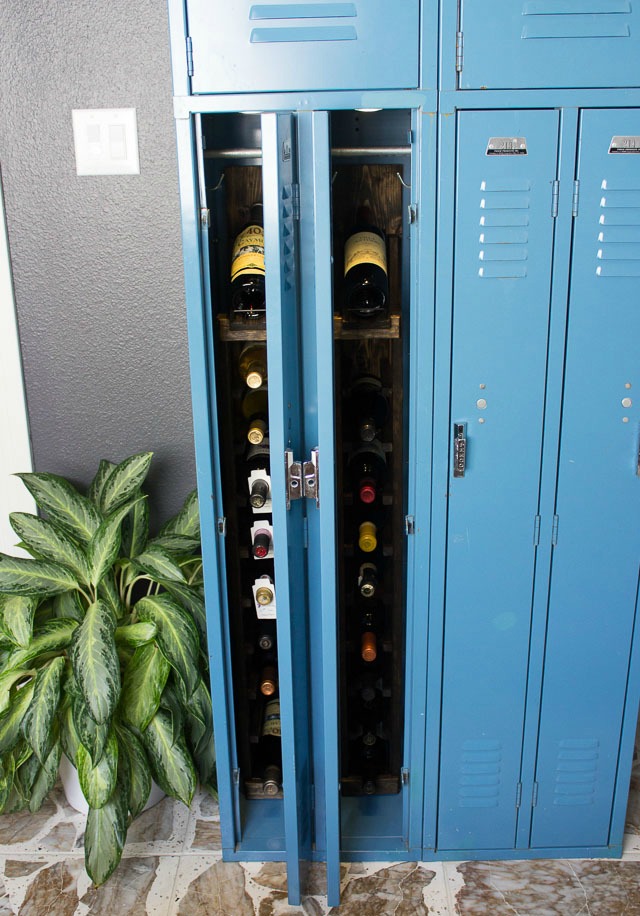
When I found this locker at a local resale store I knew it would be the perfect addition to Ross’s new man cave (have you seen it? Check it out here!). But the narrow compartments made it awkward from a storage perspective. But then it struck me that they were roughly the same width as a wine bottle. 😉
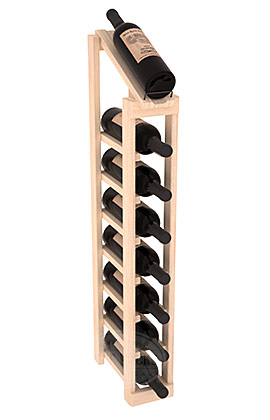
Ross took the measurements and did some research online and found that this single column wine cellar kit fit the space perfectly.
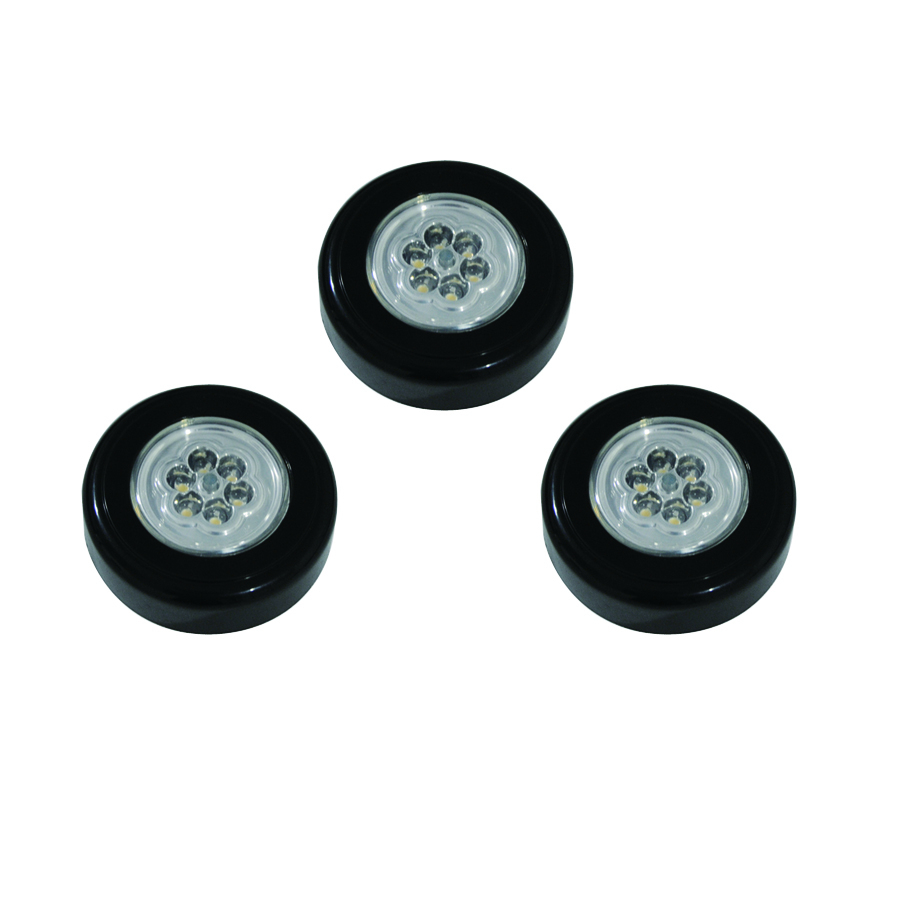
Ross added little battery operated puck lights (affiliate link) to the top of the locker to provide some extra lighting and highlight the display bottle on the top of the rack.

How to Convert a Locker to Wine Storage
Step 1. Measure dimensions
Measure the dimensions of the inside of your locker carefully and then look for basic wine cellar kits that best fit those dimensions. We found our kits at Wine Racks America but there are a number of sources.
Every locker has different dimensions, so you’ll want to make sure you find the cellar kit that works best for you – maybe it is two columns vs. one if you don’t have the narrow compartments like ours. The one Ross found for the locker was a single column, 8 bottle with display top kit.
Step 2. Stain wood racks
We chose to purchase the raw wood racks and then stain them to match the industrial pipe shelves in the man cave, but you can also buy them pre-stained (or leave them as raw wood) if you want to save time. If you do stain them, it is easiest to stain the pieces separately before you assemble them.
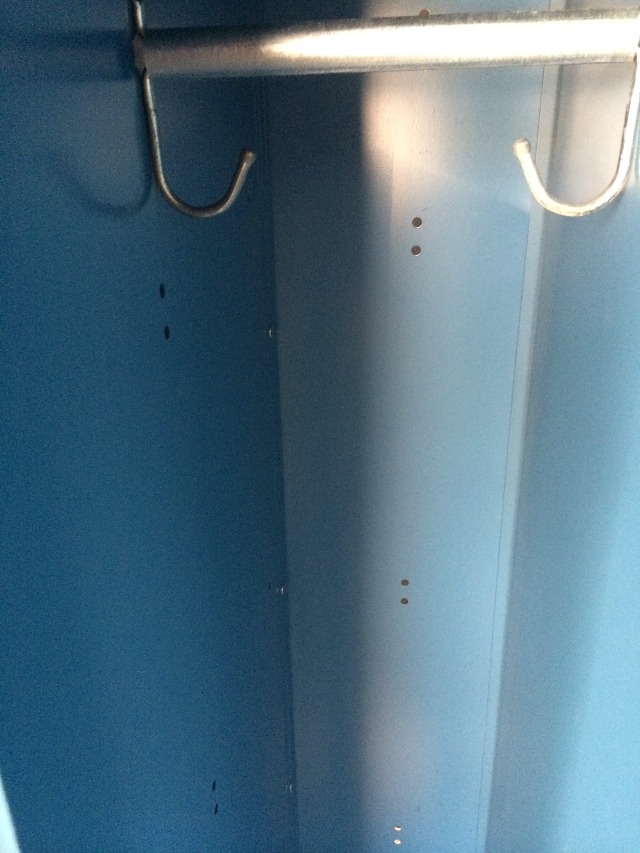
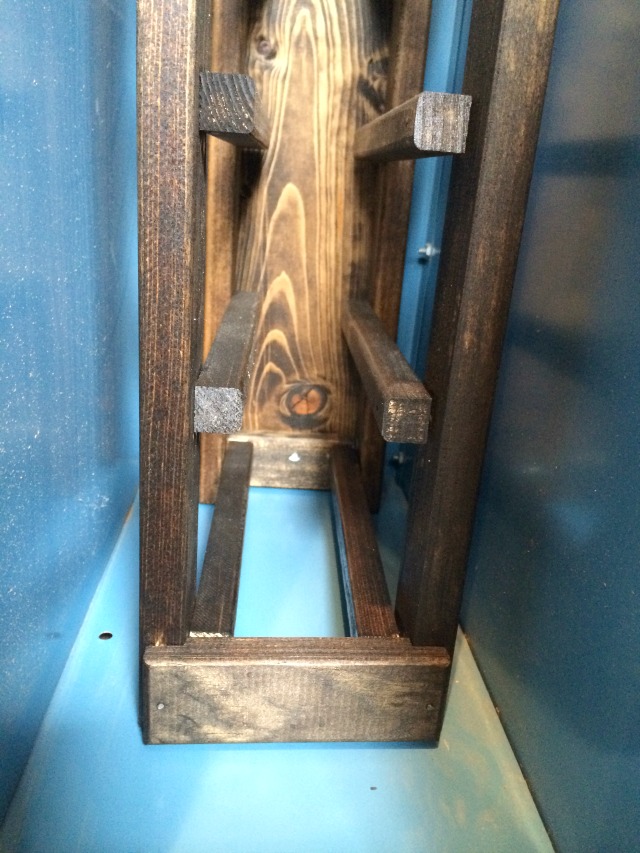
Step 3. Position racks in locker
Once the racks are assembled you could just set them inside the locker but Ross wanted to create a little more stability to prevent them from moving or falling over. Luckily, these preexisting holes in the back of the locker make it easy to secure the rack to the locker:
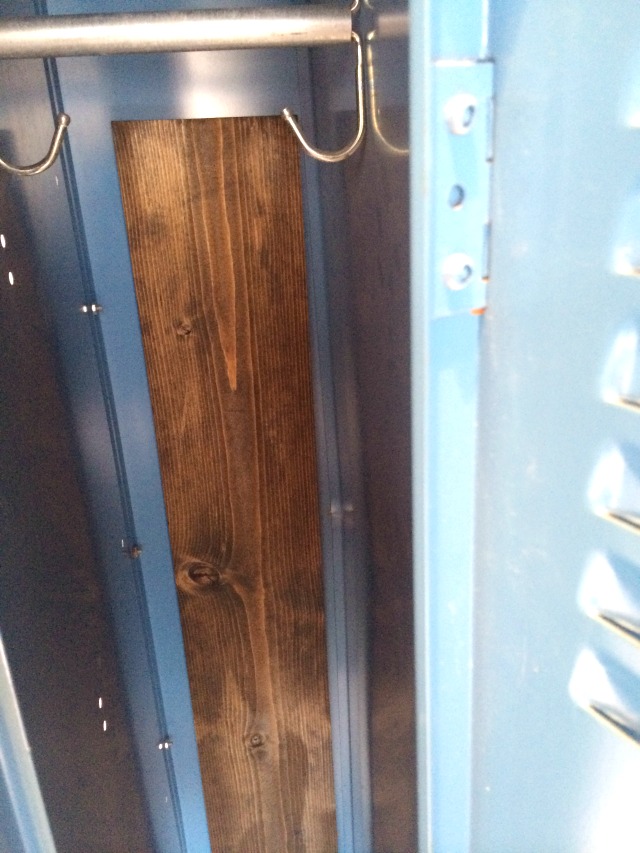
Step 4. Secure rack to locker
To attach the rack, Ross first stained a piece of wood the width of wine rack and screwed it to the back of the locker by putting a screw through a hole in the locker at the top and bottom of the wood.
He then screwed the wine rack to the wood piece by adding two screws to the top of the rack:
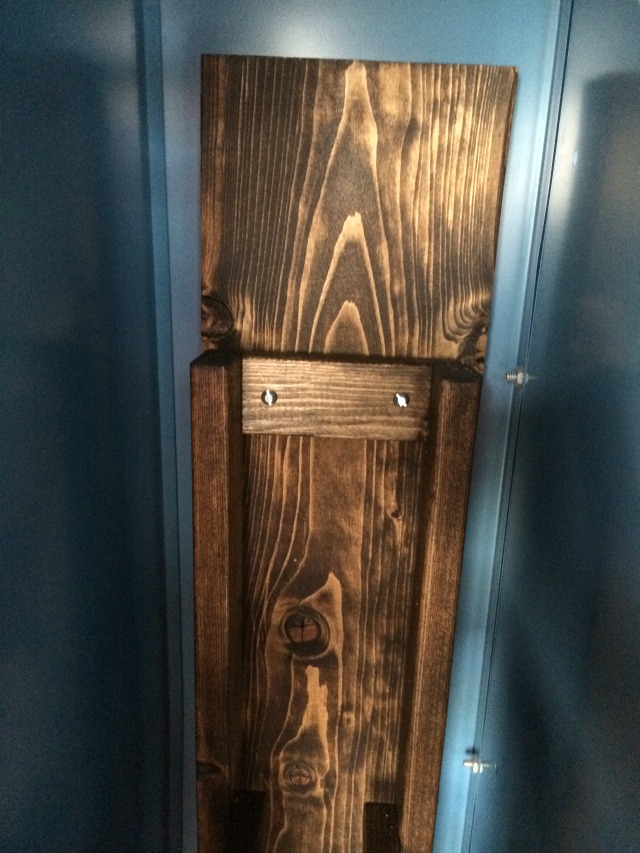
He then added one more screw at the bottom. This wine rack isn’t going anywhere!
Step 5: Add puck lights
Finish by adding a battery operated puck light to the top of each locker compartment (you just stick them on!)
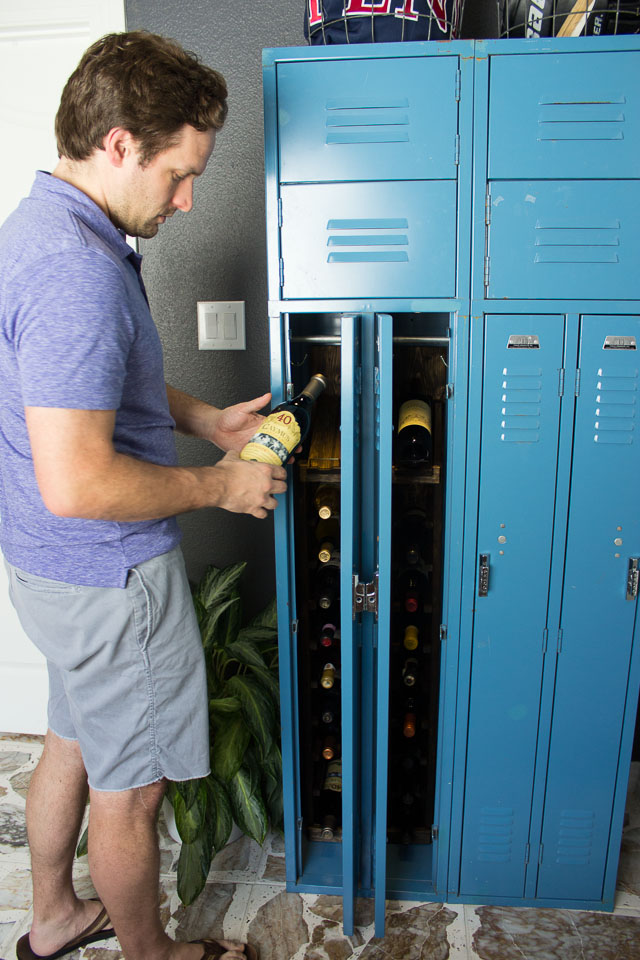
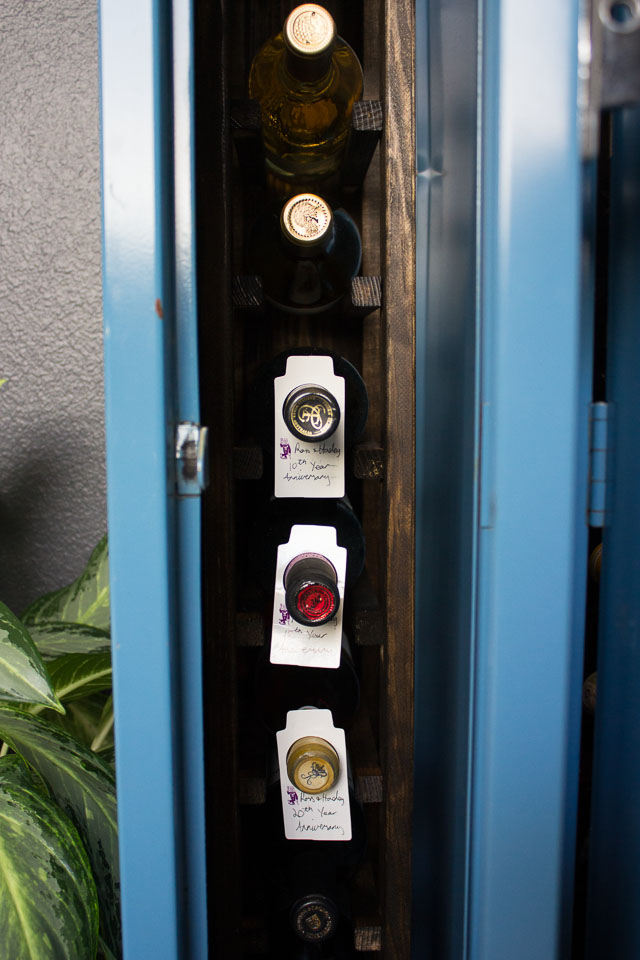
I had to show you a photo of these bottles that we received from my friend Phoebe as a wedding present. Perhaps one of the best presents ever, she got us 6 different bottle of wine, each with a tag stating the anniversary we should drink it on. There was one for our 1st anniversary, 5th anniversary, 7th anniversary, and this year we will be enjoying the bottle for our 10th anniversary!!
It is such a fun thing to look forward to you, and I can promise you, it is the only wine we have managed to save for 10 years! Such a thoughtful gift if you have any weddings to attend coming up.
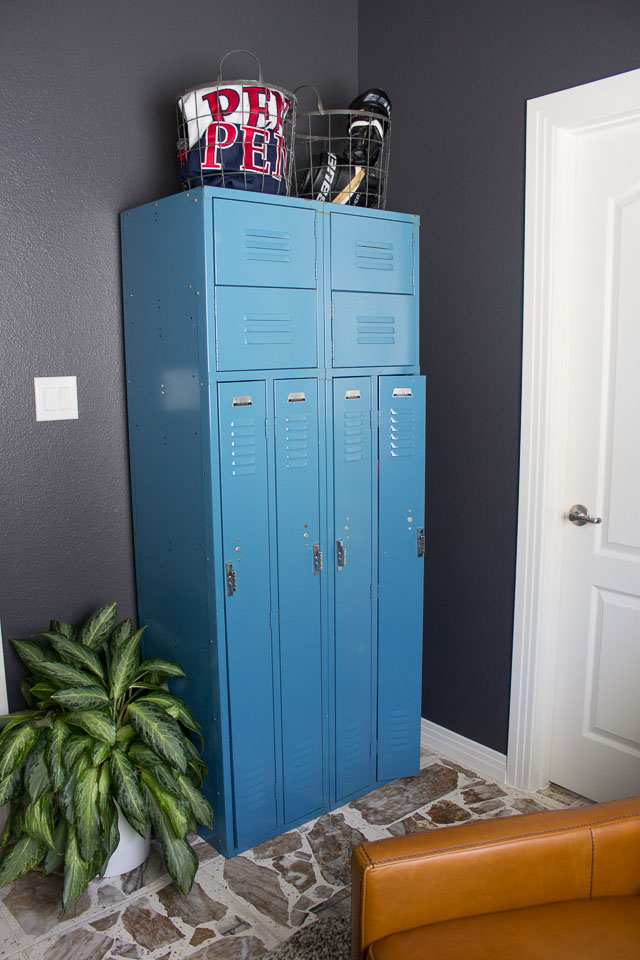
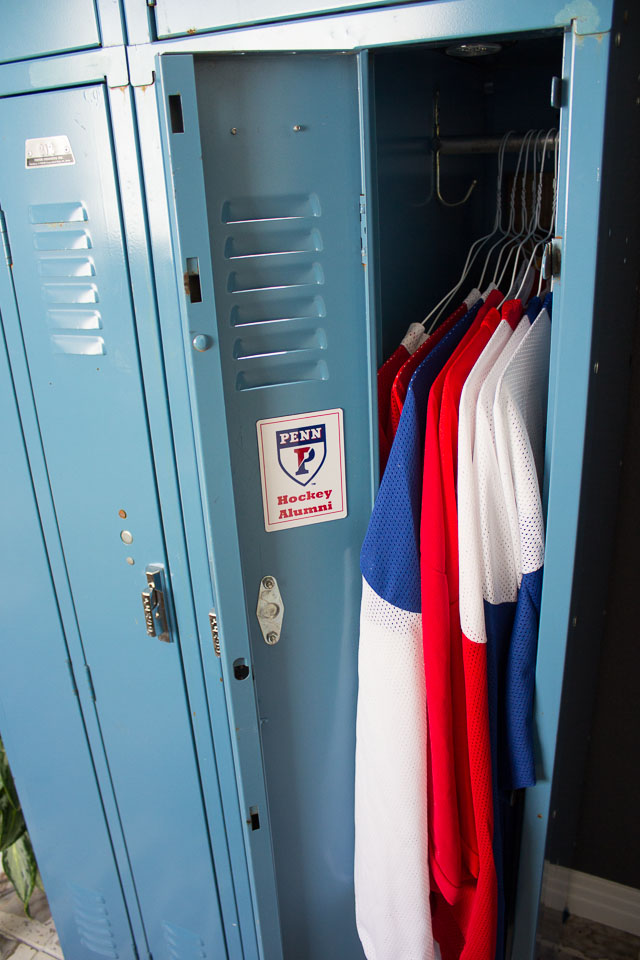
Oh, and Ross left the other half of the locker open so he could hang up all his (clean) hockey jerseys! 😉
Hello. Where can I find the gym locker that u converted ti a wine locker? I like it very much.
We found it at a vintage store!